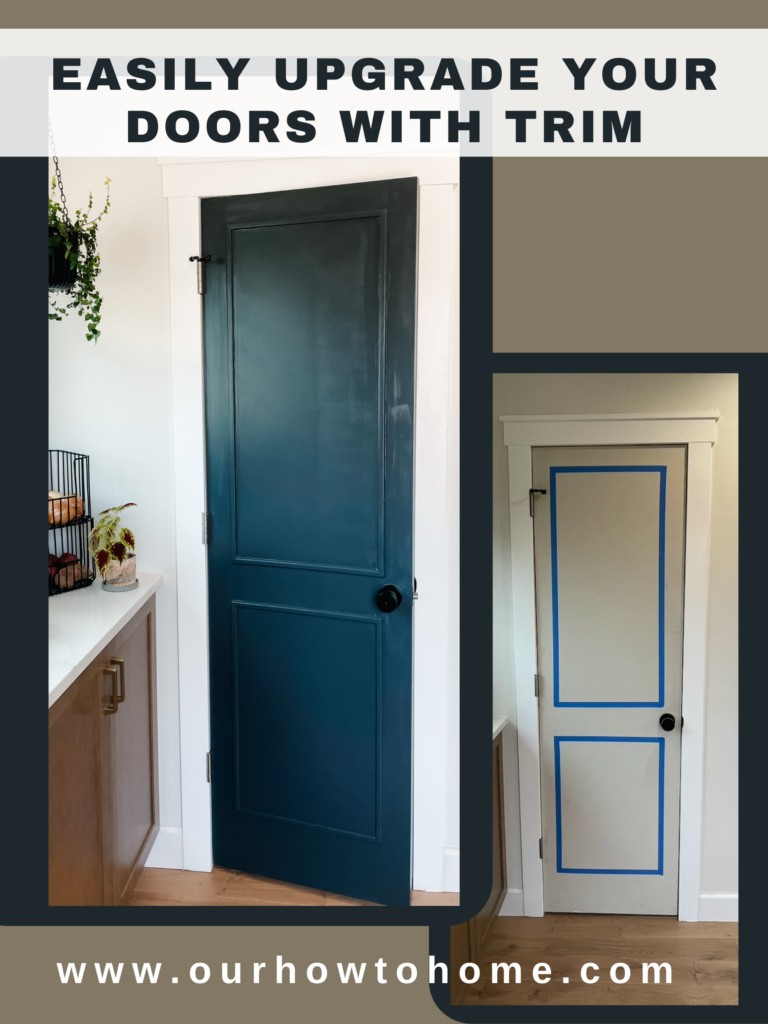
We’ve been working on the master bathroom for a long time. When you start to count all of the contractor delays, the setbacks we’ve had having to remove the floor and then the ceiling, it’s been a lot. Don’t get me wrong, I feel like we’re doing a ton, but I don’t have much to show for it. I haven’t done anything “pretty” in months. Last week, I was once again sitting in limbo in between getting all of my ceiling demo completed and waiting for the contractor to come put huge holes in our room for the new skylights. I needed a win. Something that I could get done in a few days and would leave the house looking more beautiful and complete. What did I decide? I was going to update our boring, flat kitchen doors with new door trim for a modern look.
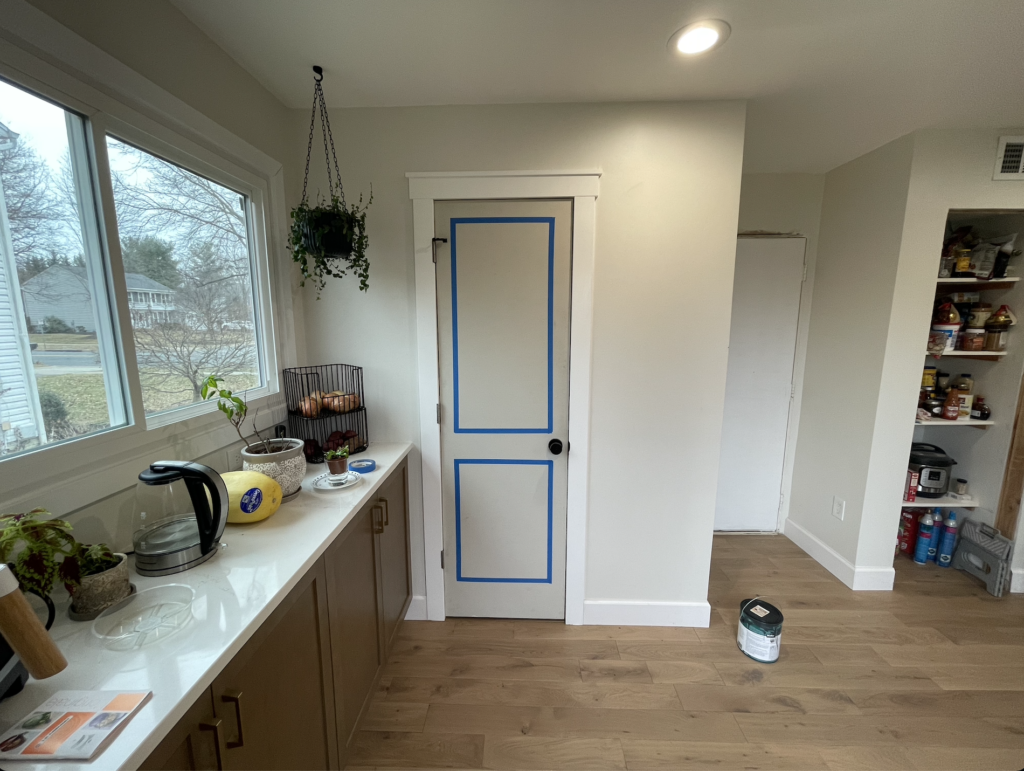
I started by mapping out what I wanted the design of my doors to be. Originally I was considering a board and batten look, but ultimately I decided that it was going to overcomplicate the whole project. (I am the QUEEN of overcomplicating the planning process, which makes everything take twice as long as I determine the easier option). I eventually decided on a two box picture frame look that was easy to execute and could be done on any of the doors in our home. I used my mock up to determine how much trim I was going to need and then headed to Home Depot to pick out my molding.
Trim molding
I opted to go with a screen molding for a couple of reasons.
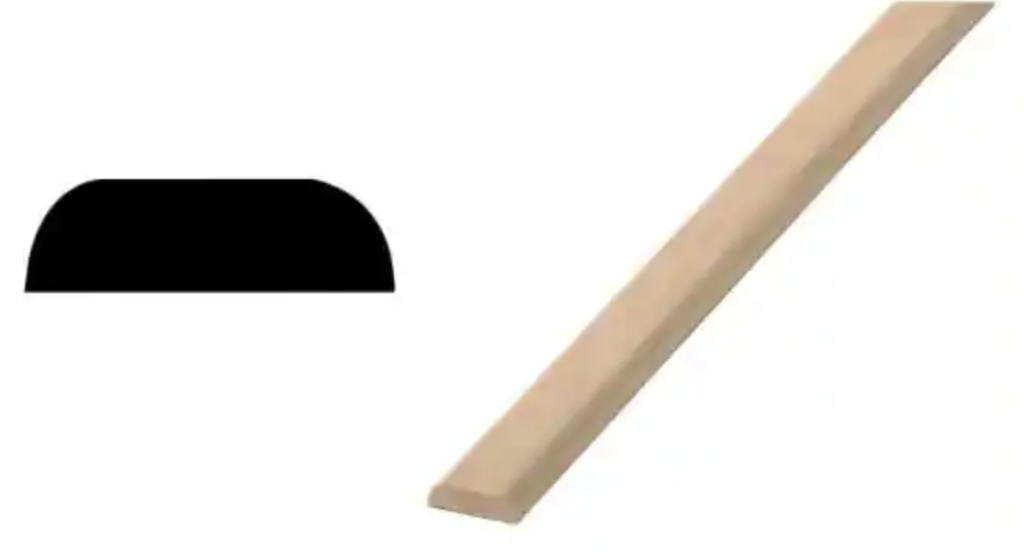
- It was cheaper than a lot of the other options at $.98/ft. I’m not trying to break the bank on a couple of doors.
- I liked that it wasn’t completely rounded like a half round. The flat top edge was a perfect low profile option for a door.
Once the trim was picked, I started by painting the doors my classic door black – Black Satin by Behr. I did this first because I knew it was going to harder to paint and get that smooth finish once the trim was on the door. It was also going to take a few coats to completely cover. (I ended up doing three on each door). As soon as I started painting, I knew I had made a mistake. While the gray bathroom door was raw, our garage door had been painted before and had a semi gloss finish. In reality I should have primed the door first, but the paint was already on so I leaned into the mistake and I guess we’ll see overtime if I’ll need to redo it.
First Steps – Craftsman Molding
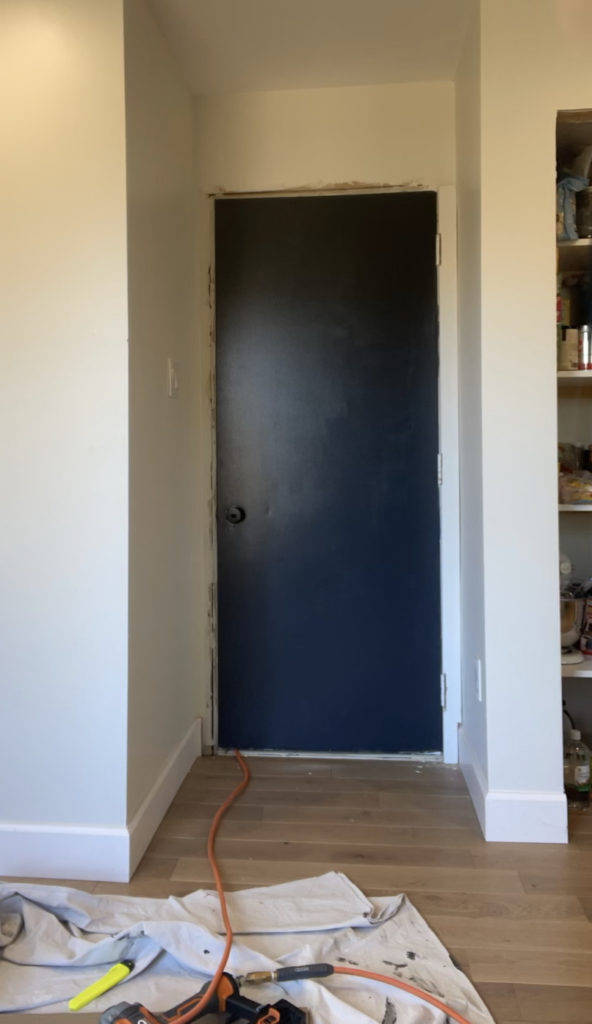
Have you ever noticed how certain things that bother one person, doesn’t even effect another? That was the case with Kevin and I for these doors. I HATED the plain flat factory gray doors that just looked washed out and unfinished. Kevin on the other hand, didn’t really have any issue with them. On the other hand, he could. not. stand. the fact that we hadn’t finished the door trim on the garage door. Embarrassingly, we had only demoed 2 out of the 3 sides of the door so it didn’t just look unfinished, it looked sloppy. I decided the first part of construction I needed to do was finish the exterior door trim. If you remember back a few months ago when I updated the front door and sliding back door, I’m kind of an expert at trim now. No big deal.
The only difference here is that due to the limited space, I ended up doing 2.5 inch MDF molding on the sides and top. That’s the smallest they have in our hardware store, but I think any smaller would have looked silly. Even with the smaller frame, I ended up needing make a lot of custom cuts for the base molding and the hinges. I used a mix of an oscillating tool and a chisel to get this done and it took me much longer than I had hoped.
Finally I was ready!
Let’s Cut the Door Trim!
For the trim, I did one door at a time. My plan was to keep a 3 inch edge from the outside of the door to the start of trim. With that parameter in mind, I was able to cut the top and bottom piece. The sides were more eyeballed and determined by where my original mock design tape had ended. The key was for the box to end above the door handle. Once my measurements were confirmed I moved forward with these easy steps to finish out the door trim:
Cut all four pieces of your box at once to make sure the sides are even. Because of the shape of my molding, each cut needed to be at a 45 degree angle. This can be done with a mitre saw if you have one or a MUCH less expensive mitre box and saw.
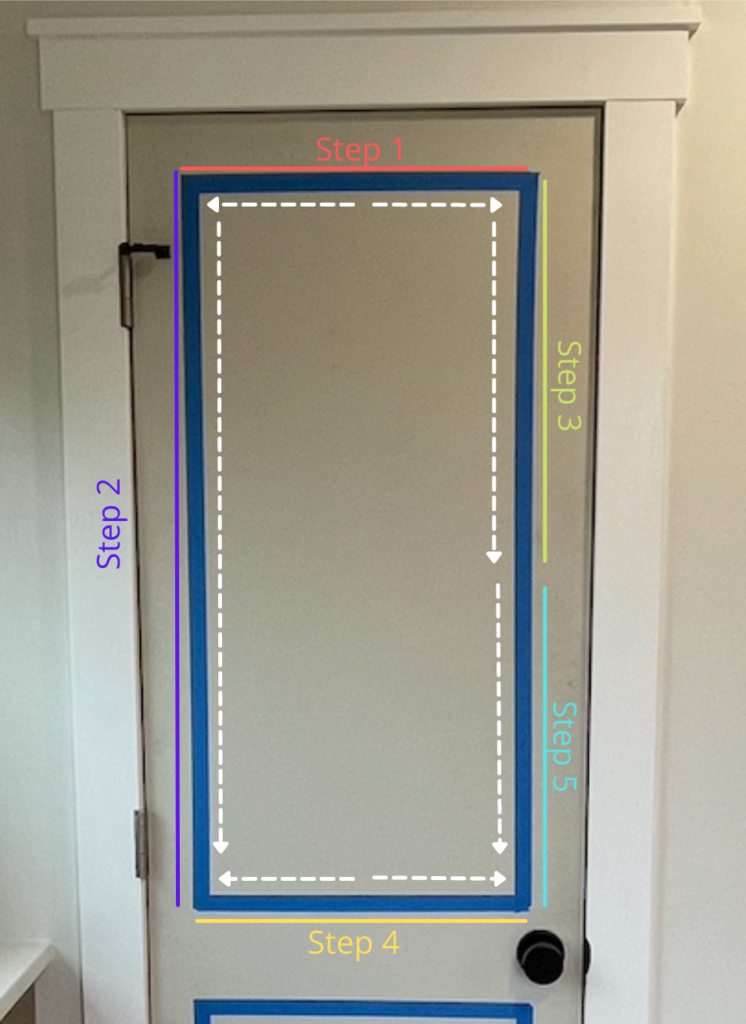
- Starting with the top piece, attach your trim using finishing nails. (For this part of the project I used a nail gun). Insert your first nail into the middle of the trim to secure it. Next using a level to make sure you are even on both sides, nail the rest of the piece to the door.
- Now that your first piece of trim is secure, you can attach both of the side pieces. Starting at the top, nail the trim at the corner. Then, working your way down one side with a level secure the rest of your first side.
- At this point, I do the same for the other side, but stop about half way down the trim. You’re going to want a little flexibility when adding your final base piece. By waiting to secure the side you are able to adjust it to meet your trim to complete your box.
- Next begin to secure your base piece, lining it up to meet both of the corners of your side pieces. As with the top piece, start in the middle of your trim and then work to the outside edges.*
- Finally secure the bottom of the side piece to finish off your square.
* At this point, even will all of the measuring you did, it might not be completely level. Use your best judgement here. If it looks level to the naked eye, go with it. If you need to have a little gap at the corner, you can always use wood putty to fill and hide it.
Use the same method to complete the second box. The top and bottom trim will be the same length as the one above, but you’ll have new measurements for the length. I determined this but leaving a 5.5 inch gap between the top and bottom box and also leaving “kick plate” room at the bottom so my trim didn’t get dinged up overtime.
All Doors are NOT Created Equally
One thing that I did want to mention is something that I hadn’t even considered. I assumed that since my doors were all the same height, the length measurements would all be the same. So it was quite a surprise to me when I installed the first square of the second door and it was completely off from the first. Turns out, the door handle was 2 full inches lower on that door than the first one.
I ended up have to take the door trim down and completely redo it to match the look of the first door. It was annoying to have to redo the work and while I’m glad I fixed it, I really wish I would have measured the doors before installing.
Finishing Touches
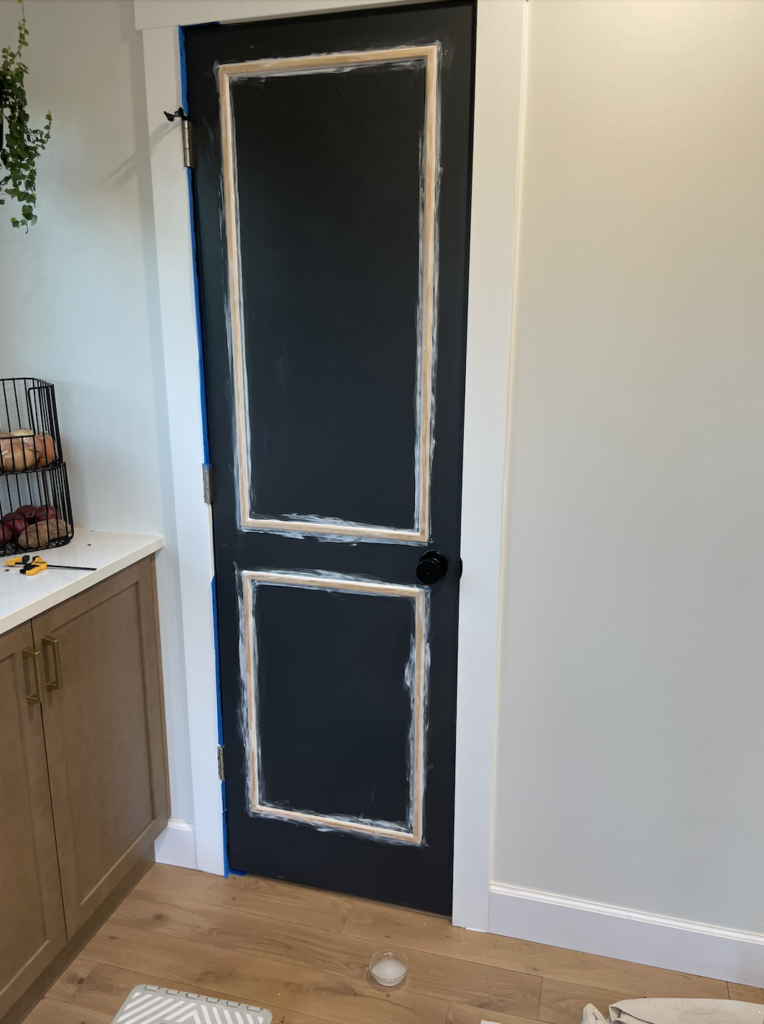
To finish out this project, I used wood putty on all of my nail holes and corners. Then I used a paintable caulk to finish off the edges. This photo was one that I sent to a friend to show her how ugly caulking can be… I cut my tube too wide and it got everywhere! But that great thing about paintable caulk is that you can cover it completely and no one ever has to know that you basically finger painted it on.
For the remaining doors I did end up taping my edges. Even though the prep takes more time upfront, I ended up breaking even on over time spent as there was significantly less “cleaning and touch ups”. Unfortunately the tape ended up taking off paint as well so take that with a grain of salt when you decide what method to use.
I gave the trim a quick sand where the wood putty had dried and then it was time to paint the door trim.
Again using the Black Satin, I covered every bit of raw wood, caulk, putty and pain chip. Much like the doors, it ended up taking me three coats to completely cover the doors.
This project ended up taking me about 2 days to complete and it was 100% a win! They look so good with the new door trim (and just finally being painted). Little projects like this definitely give me the strength to keep going on the master bathroom project.


Leave a Reply