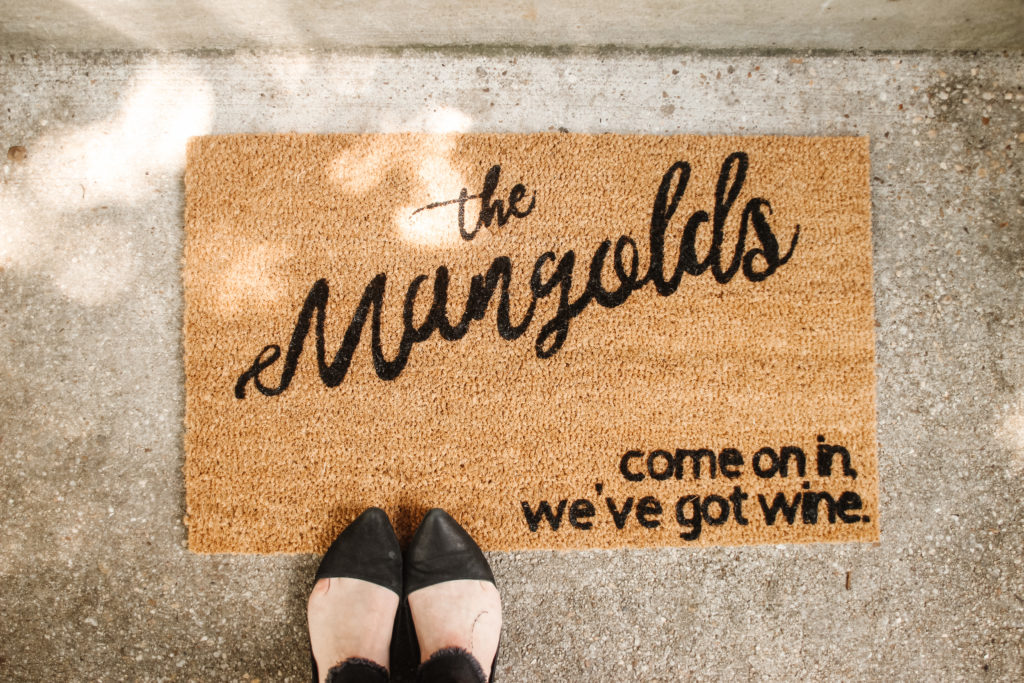
I love a cheeky welcome mat. Something that says who we are and we’re happy you’re here!
So, I’ve decided to try making my own and am going to show you how to make your own welcome mat.
For this project, I used a Cricut machine to help with the stencil. A Cricut is basically a way to precisely cut materials such as paper, cardstock, vinyl, and even some thin woods and fabrics. I didn’t really know much about them when Kevin got me one for Christmas, but I sometimes underestimate how well he knows me because I love this thing! Our house is eventually going to look like a Pinterest board and I’m here for it.
Check out all of my wins and mistakes in the video below!
If you’re not using a Cricut for this project, you can ignore the first few steps. I’ve seen a lot of examples where people have hand cut a stencil, and that’s a great option.
Here’s what you’ll need for this project:
For the stencil:
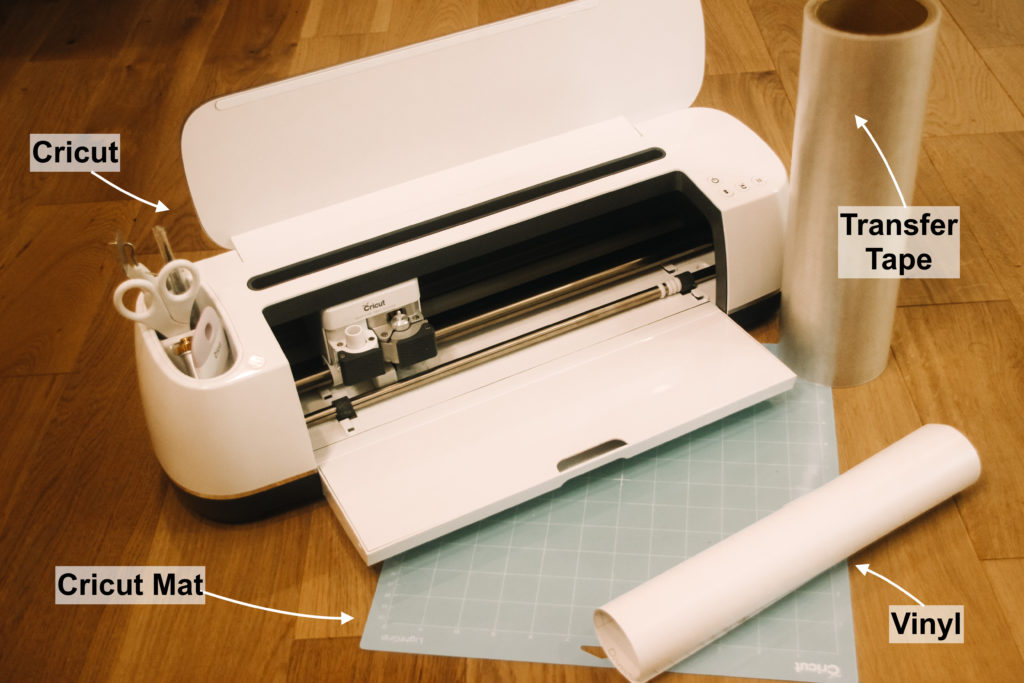
- Permanent or temporary vinyl
- Transfer paper – I’ve read that a less sticky version is best (aka not Cricut brand)
- Cutting mat
- Cricut (or similar) machine
For the mat:
- The doormat itself –
 I’m using a Coir (rhymes with foyer) mat that I got from Target for $10. I’ve also heard you can get cheap ones from Ikea.
 - Outdoor acrylic paint
- A foam paint brush (or regular if you’re not using a stencil)
- A blow dryer – if using vinyl
Alternative
If you’re not using vinyl, I have also seen people use freezer paper (like from the grocery store) and tape/pin it in place.
Why a Coir Mat?
I’m not going to pretend like this isn’t the most common doormat option, but it is for a reason. Coir is actually a coconut fiber made from the husk of a coconut. This makes the doormat not only extremely durable, but water resistant and eco-friendly.
Let’s get started!
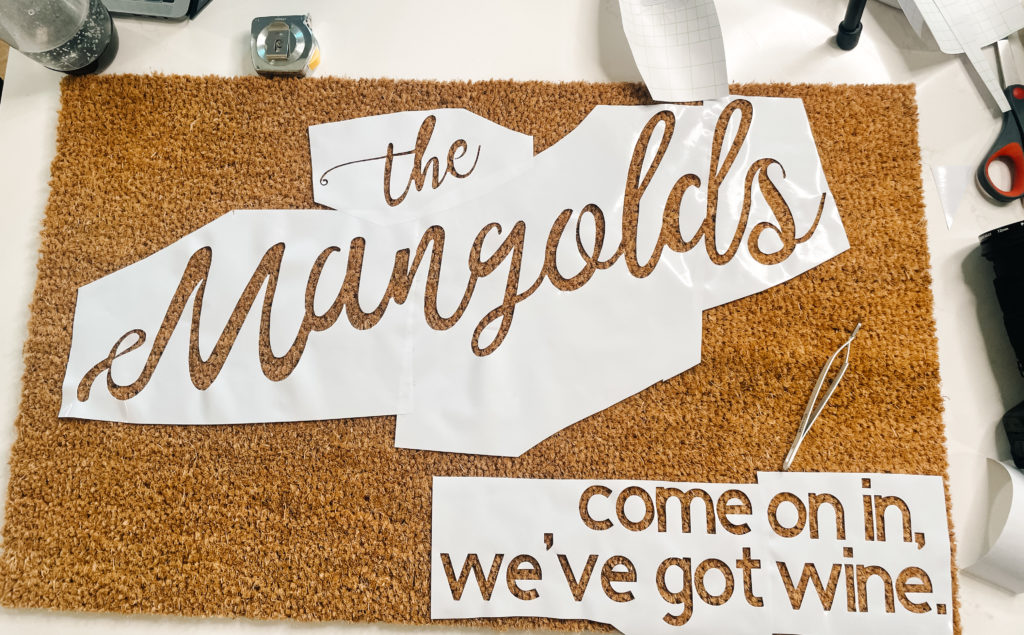
I began by cutting out my design on my Cricut. I had already created the design in their studio; what I didn’t account for was the text being so large to fit the Welcome Mat that it would be too big for my 12 x 12 cutting mat. So, I created a 11.5 x 11.5-inch square using the shape tool and covered as much of the text as I could. Then I used the splice tool to split my text into 3 different cuts. Once this was done, I was able to move ahead with the project and cut it out on the vinyl.
I am used to using the letters from the cut, not the stencil part before so I needed to be careful to not ruin the wrong pieces as I started to weed. The term weeding means to pull out the pieces of the cut that you don’t need. I’m not sure where the term came from, but I find it kind of funny so I can see why it’s taken off.
Once I had the stencil, I picked it up with my transfer tape and place it where I want it on the mat.
Transferring your Stencil to the Mat
Up until this part, it was pretty easy, but the transfer was ROUGH. The first time I tried to transfer I ended up destroying my stencil. Even with the special “less sticky” transfer tape, which didn’t seem any less sticky. Kevin suggested trying contact paper and it does feel less sticky so I may do that next time.
The problem is that the vinyl doesn’t really stick to the coir mat so you really have to take your time and hold down the stencil as your removing the transfer tape. Just go into it knowing that this is going to take a while.
I also originally started with the left side of my text and was really struggling to get the angle right. To avoid the text from coming off the mat at the top, I regrouped and started on the right side and worked my way backwards. This ended up working much better.
Heating Things Up
I’ve read about the hair dryer trick on a few other blogs and it seemed to work really well. So, I grabbed my rarely used hair dryer and used it to lightly heat up the vinyl so it sticks to the doormat.
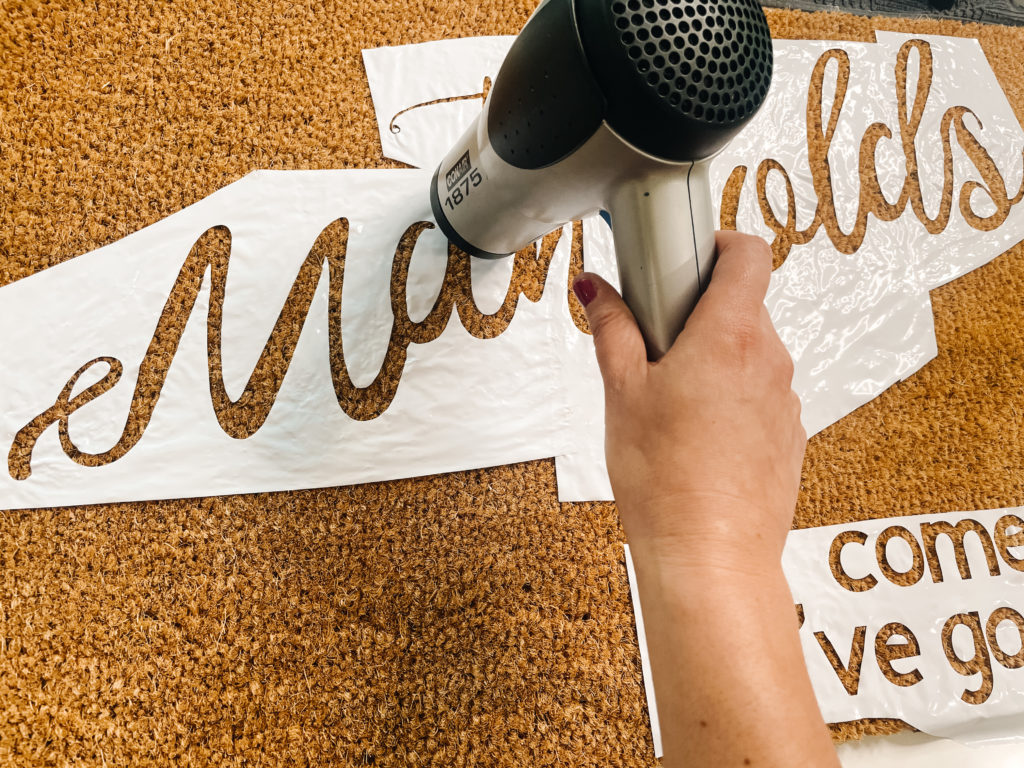
I put the hair dryer on high at first a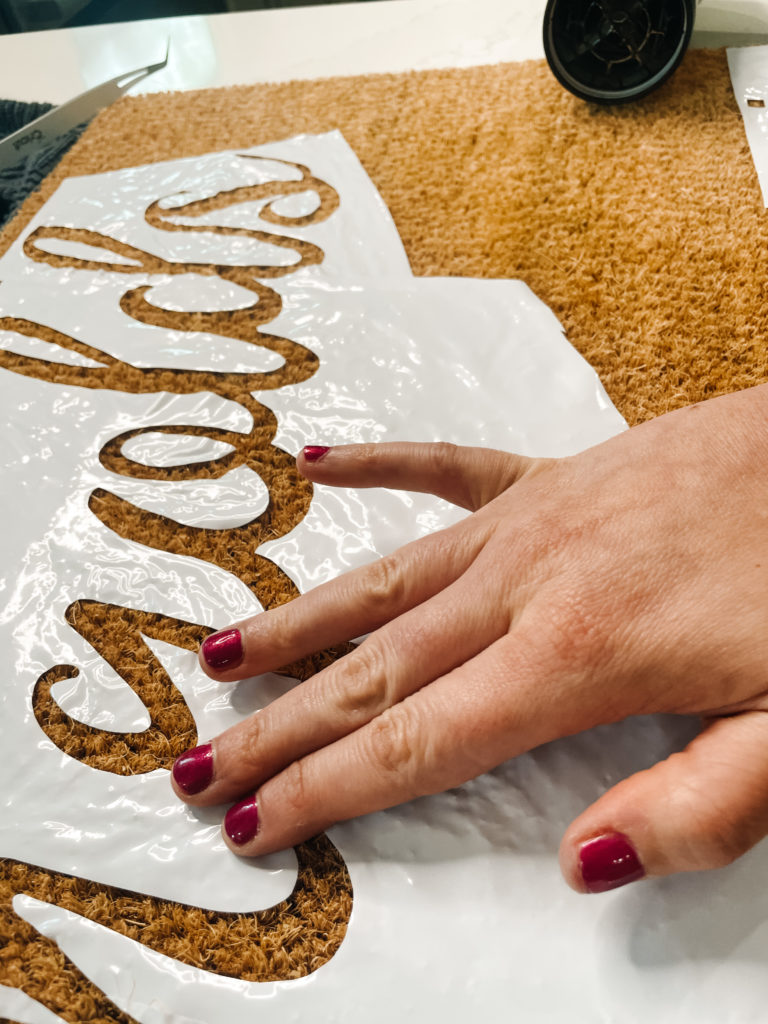 nd that was a very poor decision because it blew the stencil right off the mat. Keeping it on low still gave enough heat but didn’t blow the vinyl. Then, I pressed it lightly with my hand to get it to stick.
DO NOT SKIP THIS STEP. I can’t even imagine how I would have remotely started to paint this without it sticking to the mat.
Now we paint!
When you start painting make sure you blot the paint on in an up and down motion. Do not paint it on or use sweeping motions. I really globbed it on thick because this mat is ABSORBENT. I was pretty hesitant, but you really don’t have to worry about the paint bleeding at all as long as you blot it.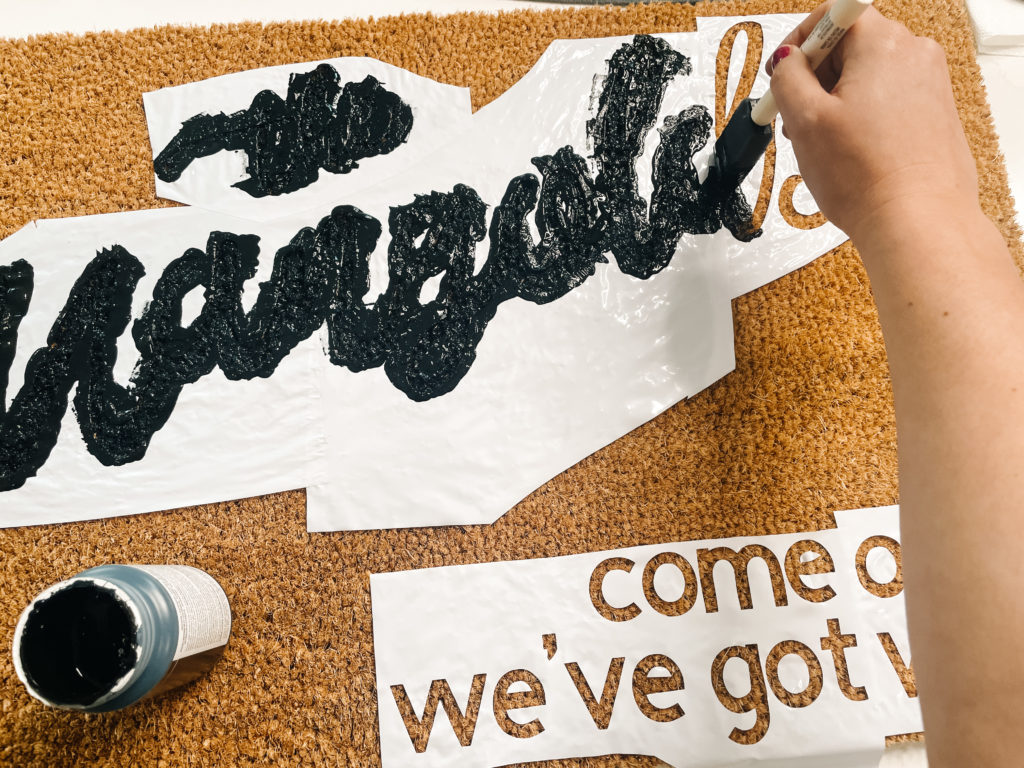
Keep applying until you can’t see any more of the original mat color. To be honest, I could still see some on the sides, but I was too nervous to overdo it and screw it up.
Once the painting is complete, take the stencil off immediately. You don’t have to worry about messing it up. The vinyl comes right up and doesn’t leave any residue.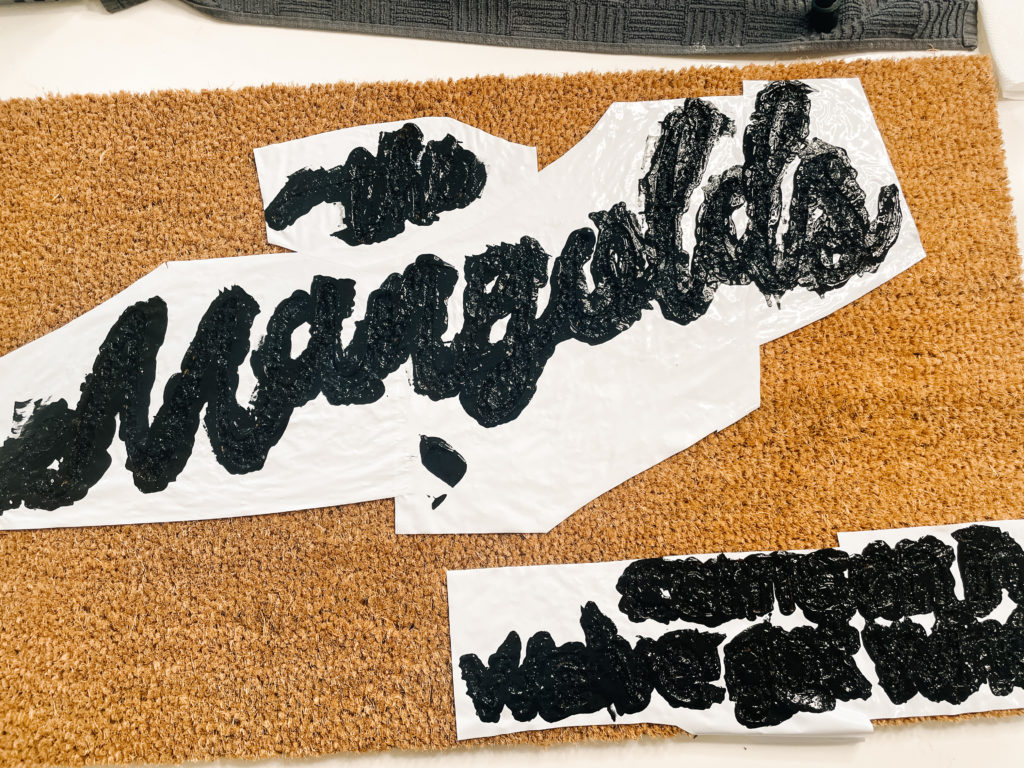
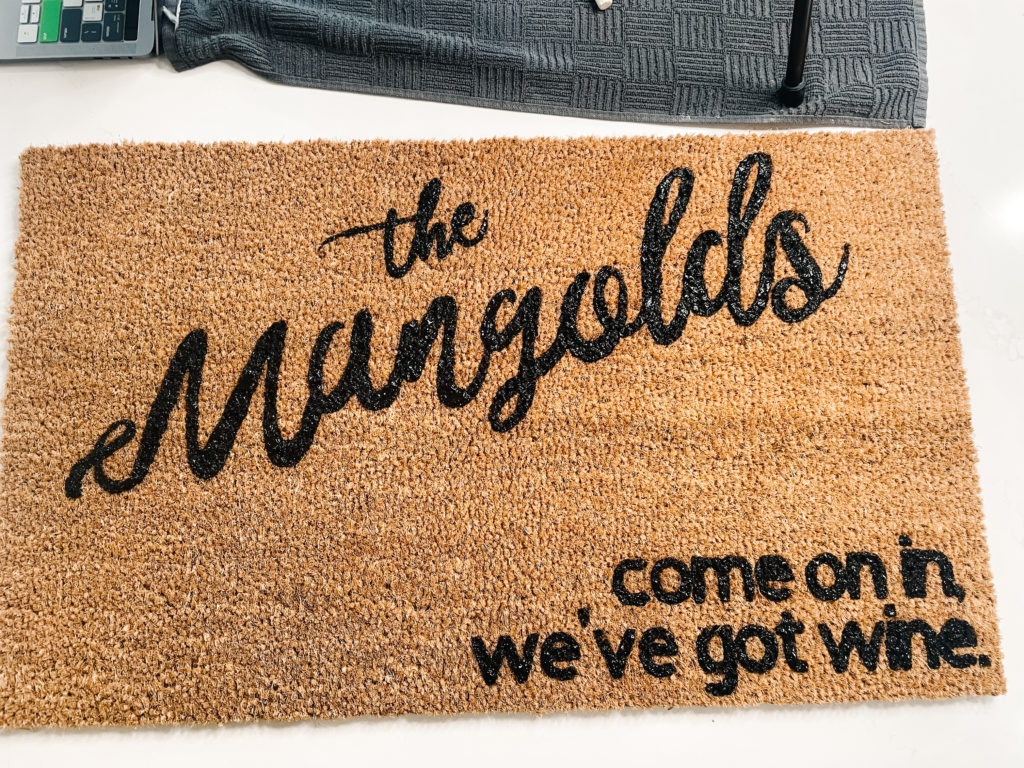
Next you leave it to dry for 24-48 hours. After 24 hours my mat still looked wet so I went for the full 48 hours.
I’ve also heard of sealing the welcome mat with a UV Resistant Clear Sealer, which I have not done. We’ll see how long this one lasts and maybe we’ll do it on the next one! There you have it! How to make your own welcome mat. What designs will you make???
Take-aways
My biggest take away was being mindful of the stencil I chose. You can see in the bottom right, the “i” and “n” got stuck together because there wasn’t enough space between the letters them on the stencil. So, I’ll be sure to add a little bit more space next time.

This project takes a decent amount of paint and it’s harder than expected to apply. I think a stencil of some sort is necessary, but you could totally hand cut it if you wanted.
The first one is the hardest! I can’t wait to try this again with another fun saying. Customizing our front entry is such a cute way to welcome people into our home. And let them know that above all else, we will ALWAYS have wine.


Leave a Reply