Our How-To Home

  • How-To
  • DIY
  • Lifestyle
    • Recipes
    • Kristen’s Book Club
  • Blog
    • Home Updates

Explore

  • How-To
  • DIY
  • Lifestyle
  • Blog
  • About Us
  • Ask Us Anything
  • Kristen’s Book Club

Connect

You are here: Home / DIY / Christmas Coffee Table Decor so Easy to Make and Looks Gorgeous

DIY · December 24, 2021

Christmas Coffee Table Decor so Easy to Make and Looks Gorgeous

Confession: This project started because I really wanted a dough bowl. What’s a dough bowl? They’re wooden bowls that throughout history were used to knead bread dough. Now, in 2021 where we have grocery stores and bread makers, they’re just a pretty place to keep things on your coffee table. Not only are they cute and functional, but it would be the perfect place to keep my newly crafted Christmas coffee table decor. 

I searched for a dough bowl for months! Most of them were over $50 and for a piece of wood, I just couldn’t validate spending that much money. I finally found some good options at Hobby Lobby. The good news, it was only going to cost me $30. The bad news, the wood was raw and desperately needed to be stained. 

Step 1:Stain dough bowl and make it pretty. Step 2: Make Christmas Coffee Table Decor that looks like a million bucks. 

items needed for the christmas coffee table decor: a dough bowl, candles and pinecones

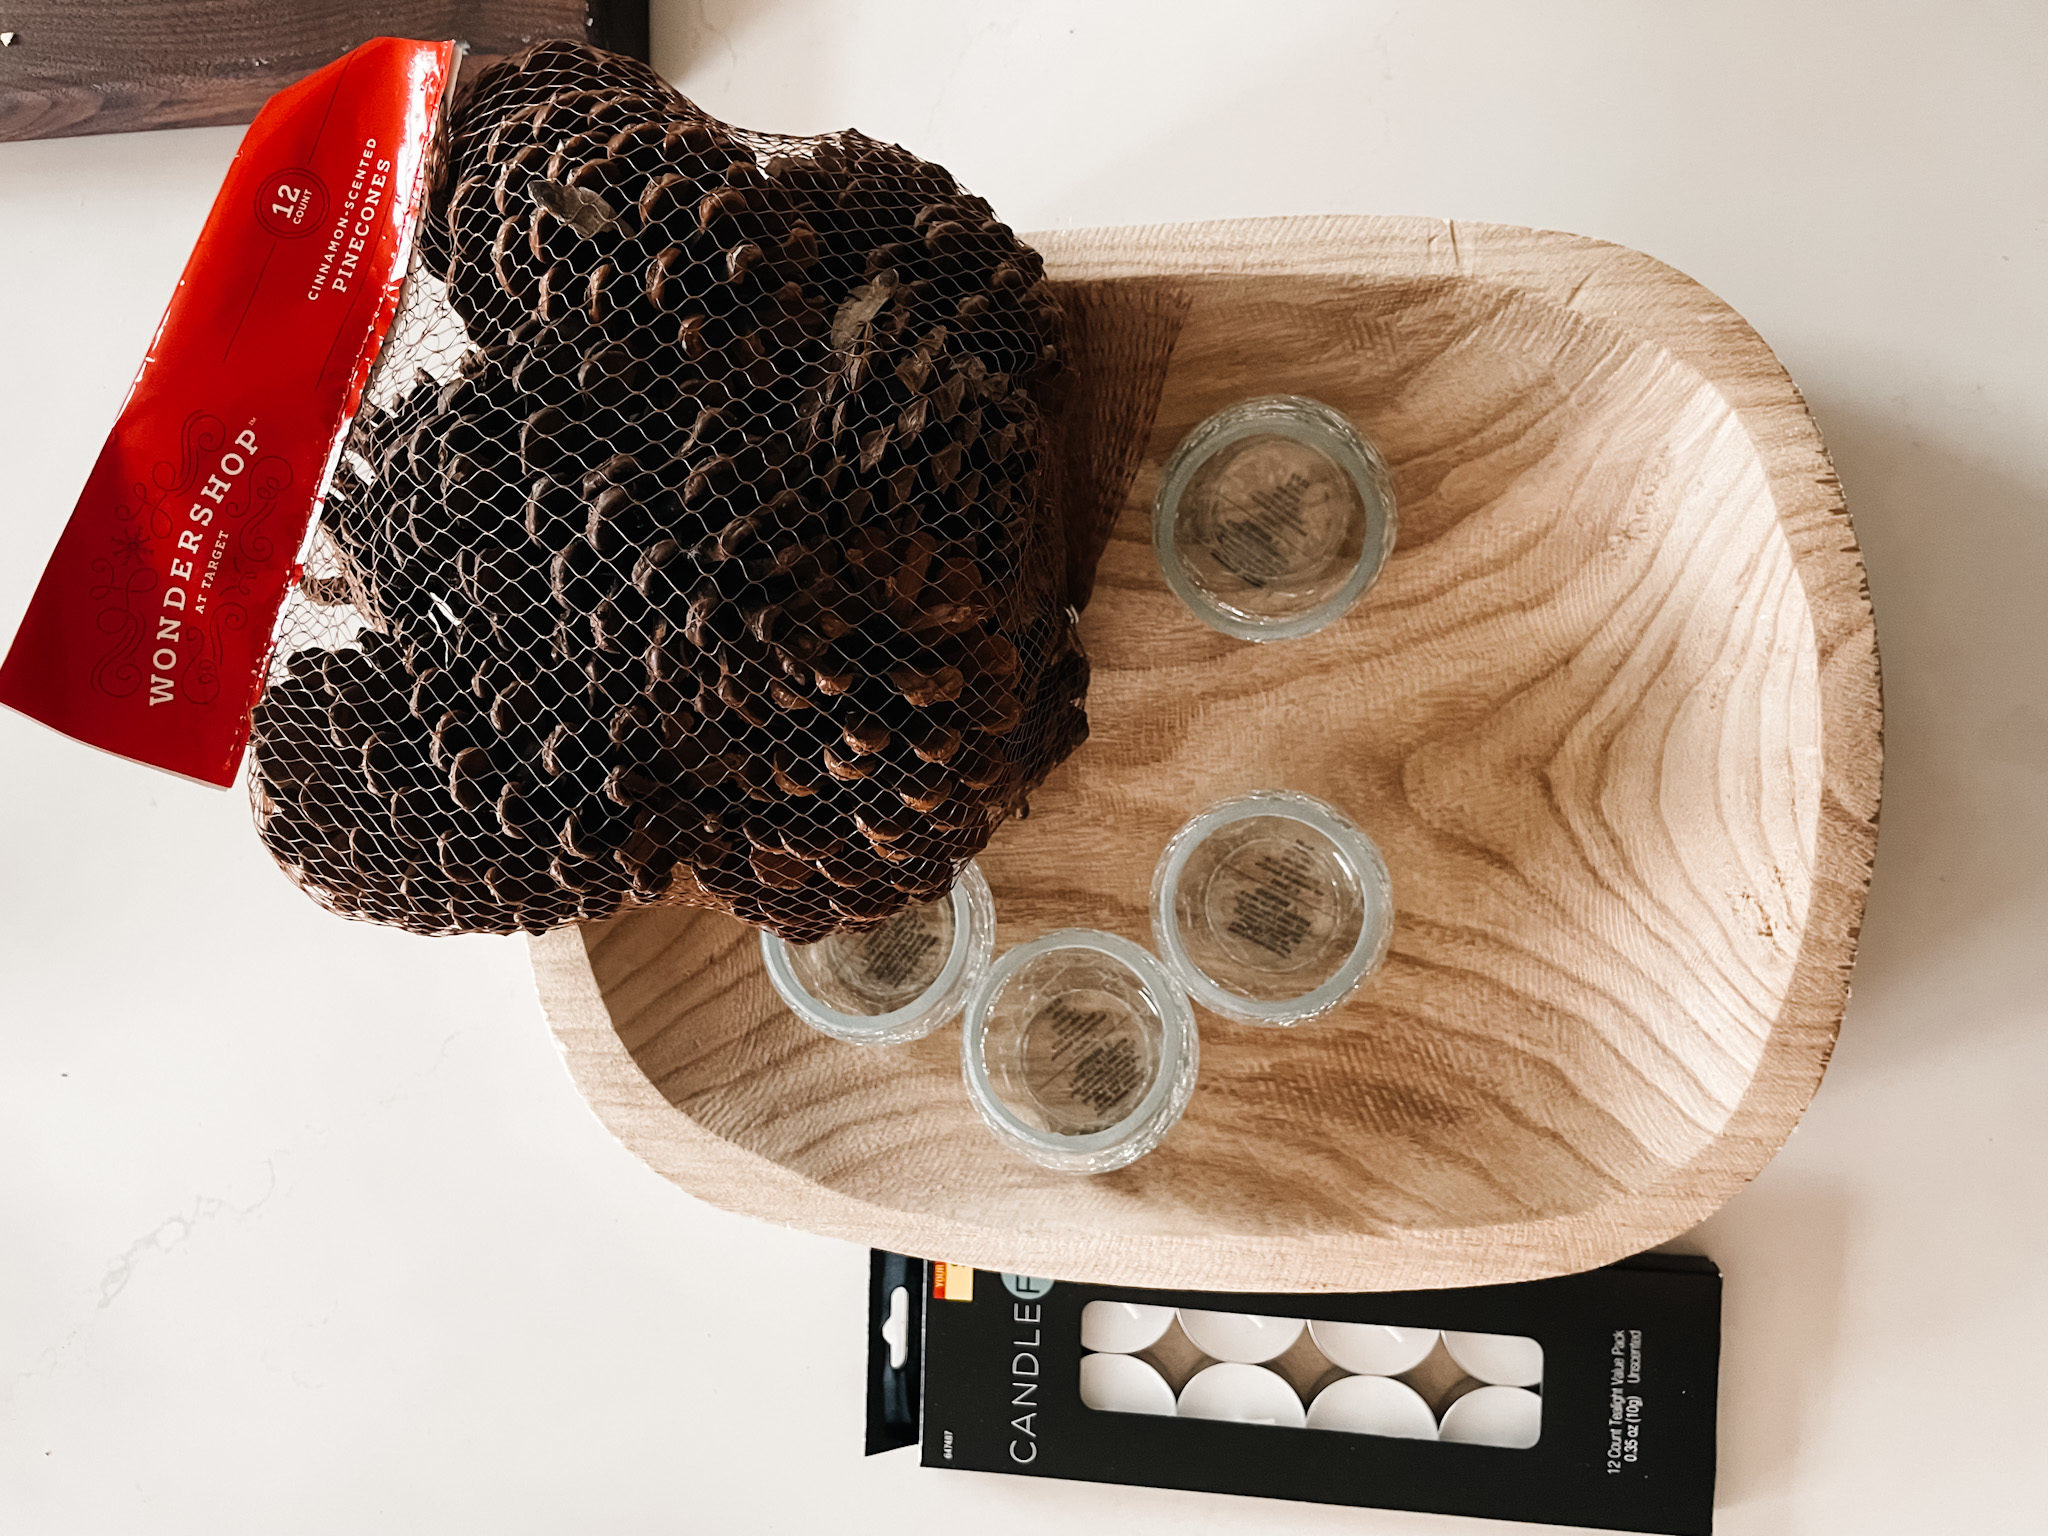
While I was at Hobby Lobby I also picked up some votives and candles. As you can see the raw wood of the dough bowl was is fine, but to me it just didn’t seem finished. Here are the steps I took to stain the bowl: 

  1. Sand it down: I have no idea what kind of wood his dough bowl was made out of, but it is incredibly porous. It also felt kind of rough like it was never properly finished. I ended up sanding down the bowl with an 80 grit and then 120 grit to give it a much smoother finish.
  2. Condition the wood: Like any staining project, the first thing you want to do is cover your wood in pre-stain conditioner to help make sure your stain will go on evenly. After letting the pre-stain sit for 30 minutes, you can move ahead and stain.  
  3. Test your Stain: One really important thing I learned during the project is the importance of testing the stain on the wood. As I mentioned this wood is insanely porous. This meant that any color I put on the wood was pretty much there to stay. I did a test swatch on the bottom of the bowl and HATED IT. I ended up completely changing my stain colors and am so grateful I only had to sand down and re-condition that small swatch rather than the whole bowl. 
  4. Apply your Stain: For this project, I premixed a combination of early american and weathered oak stain. The sides absorbed the stain more than the flat parts of the bowl so I continued to apply and wipe away the stain with strips of old t-shirts until I got the perfect color. 
  5. Let Dry: Stain needs time in a warm(ish) room. Typically you want the room to be at least 50 degrees and the project to dry for about a day to be completely dry. 
  6. Add a Protective Coat (Optional): If this is going to be in a high traffic area or outside, you can choose to add a protective top coat such as a matte enamel or polyurethane to your project. In my case, I wasn’t very concerned about this and skipped this step. 

Once the bowl was done, it was onto the fun part, adding some “snow” to our pinecones and putting it all together. 

How to make this easy Christmas coffee table decor 

Now onto the fun part! I grabbed my pine cones, an old toothbrush and some paint to begin this project. 

how to use a toothbrush to paint snow on a pinecone

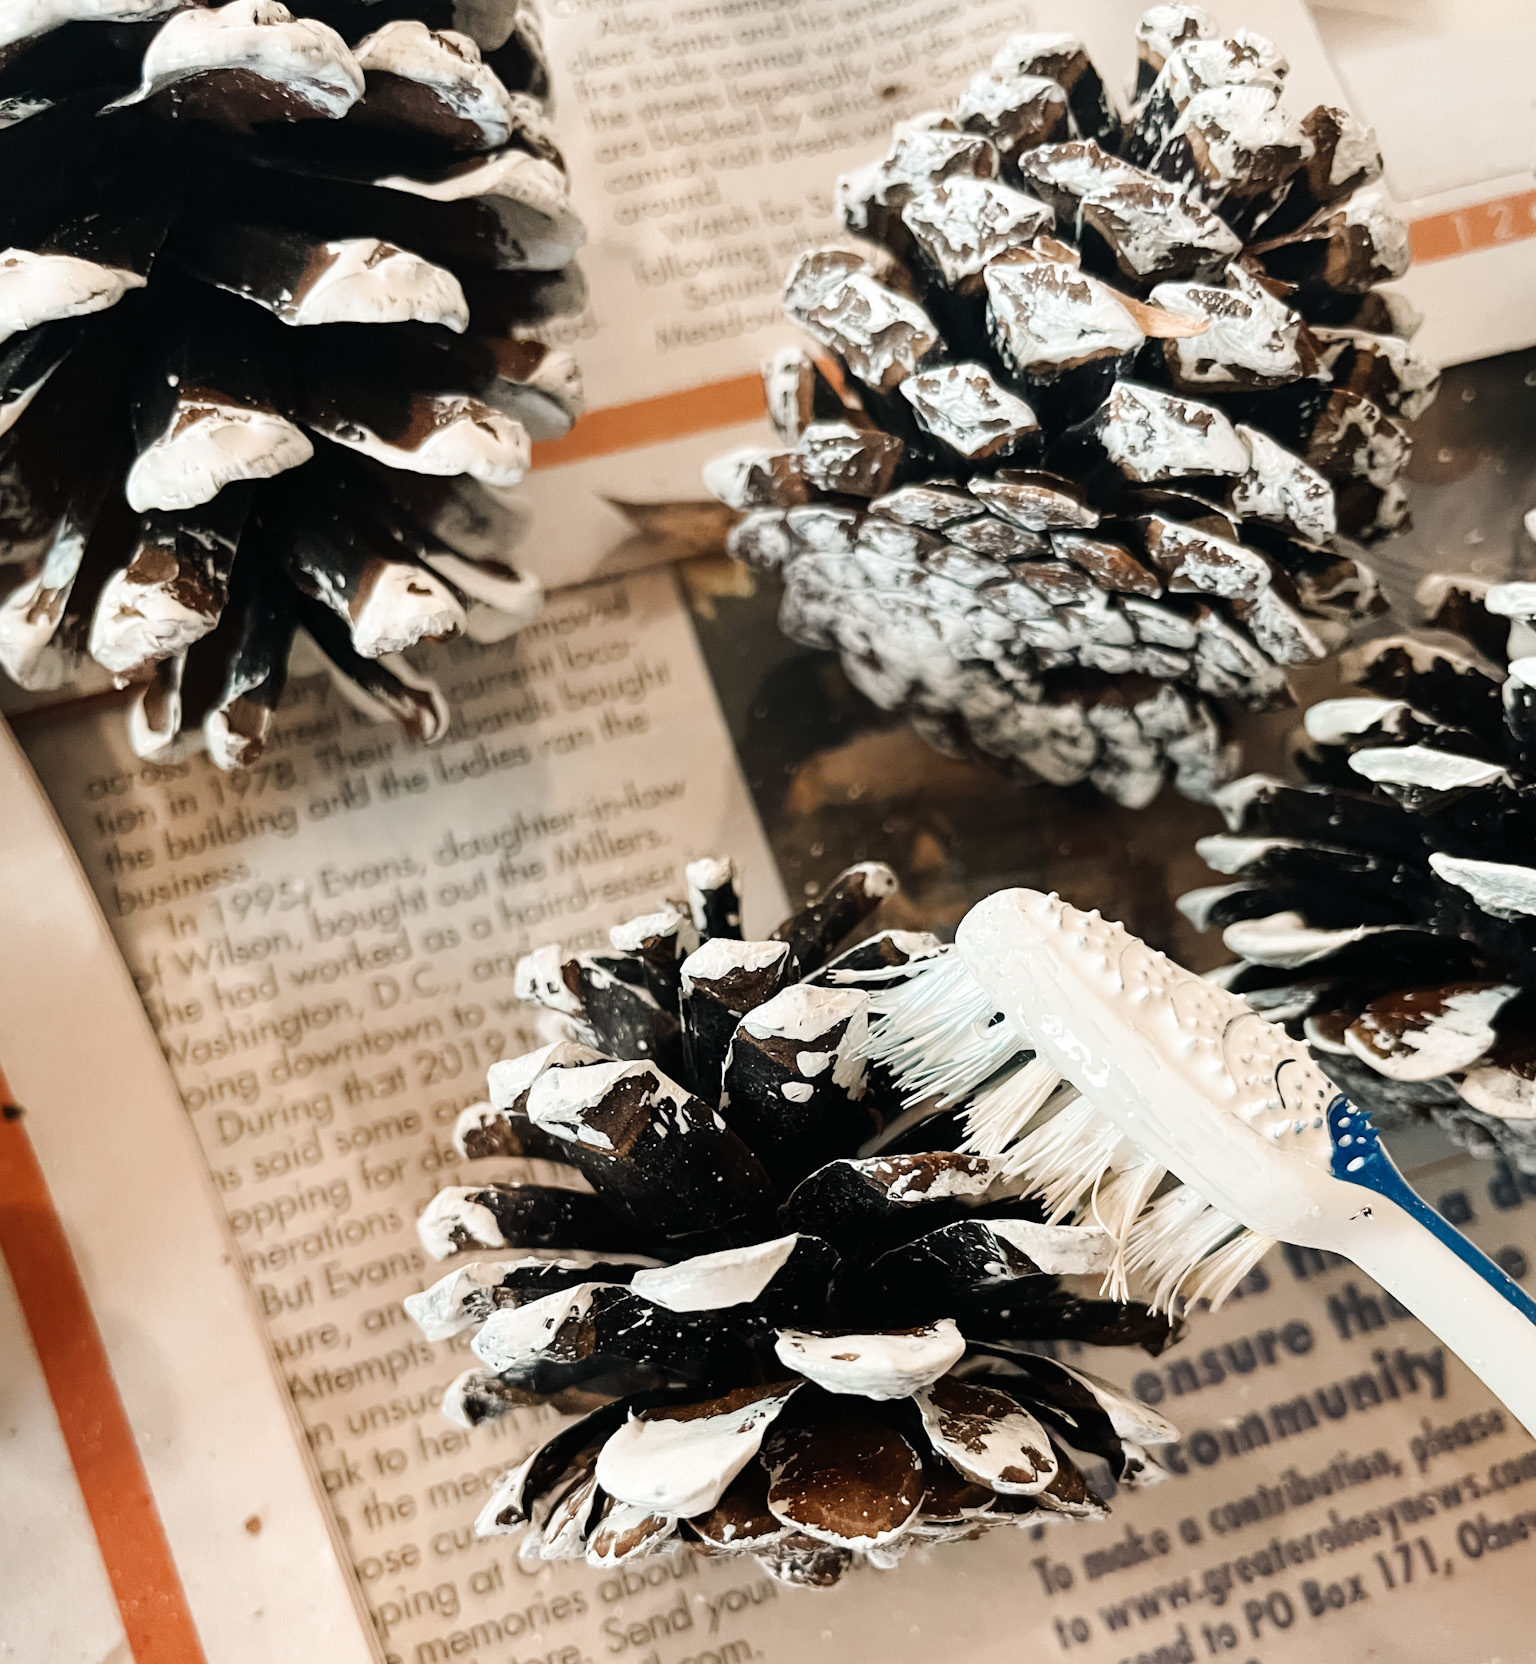
  1. To give the pinecones their freshly snowed look, I took a toothbrush and dipped it into white paint. (the paint type doesn’t really matter.. I used extra wall paint we had laying around)
  2. After dipping your brush, I recommend wiping off some of the excess paint onto your newspaper otherwise you’ll end up with completely white, painted pinecones. Wait until the paint gives a scratchy look before applying on the pinecones. 
  3. Lightly brush your pinecones, making sure to push the bristles into the middle, top and bottom of the pinecone. You can make the pinecones as snowy as you like by applying more or less paint. 
  4. While the pinecones dry, I took leftover garland and cut it into large pieces to fill in around my bowl. 
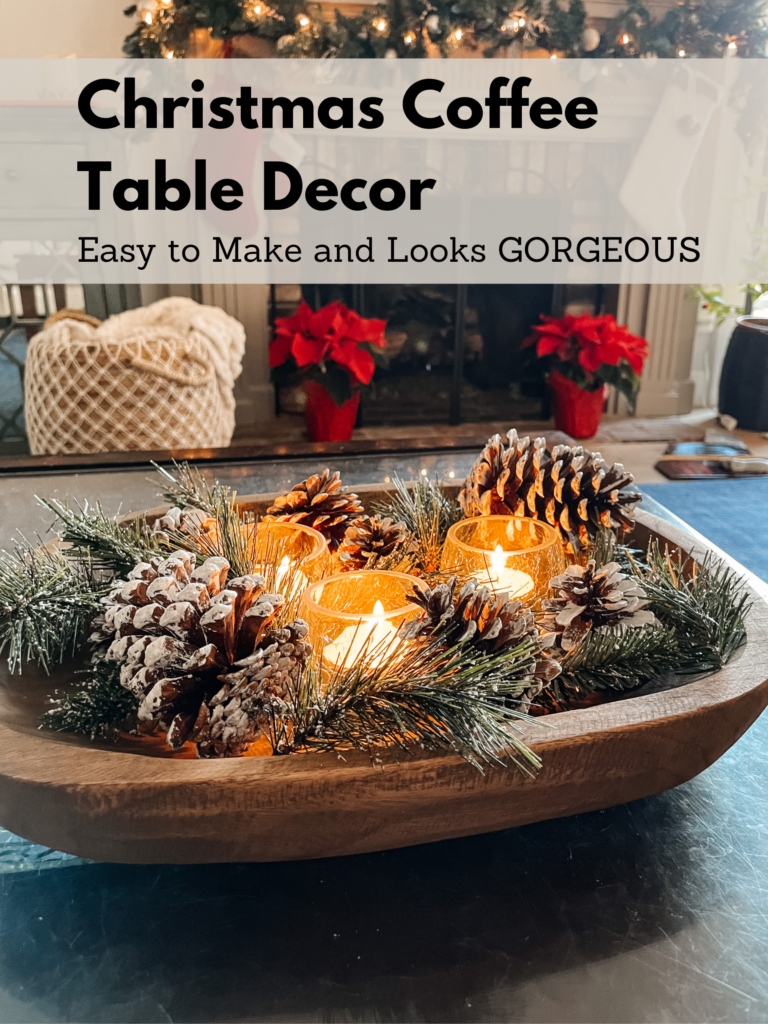
  5. Once the pinecones had time to dry, I assembled the christmas coffee table decor by adding the leftover faux evergreen, the new votive candles and pinecones to my dough bowl. I placed the candles first followed by the pinecones and then filled in the blank spaces with the evergreen to give a really sweet wintery vibe.

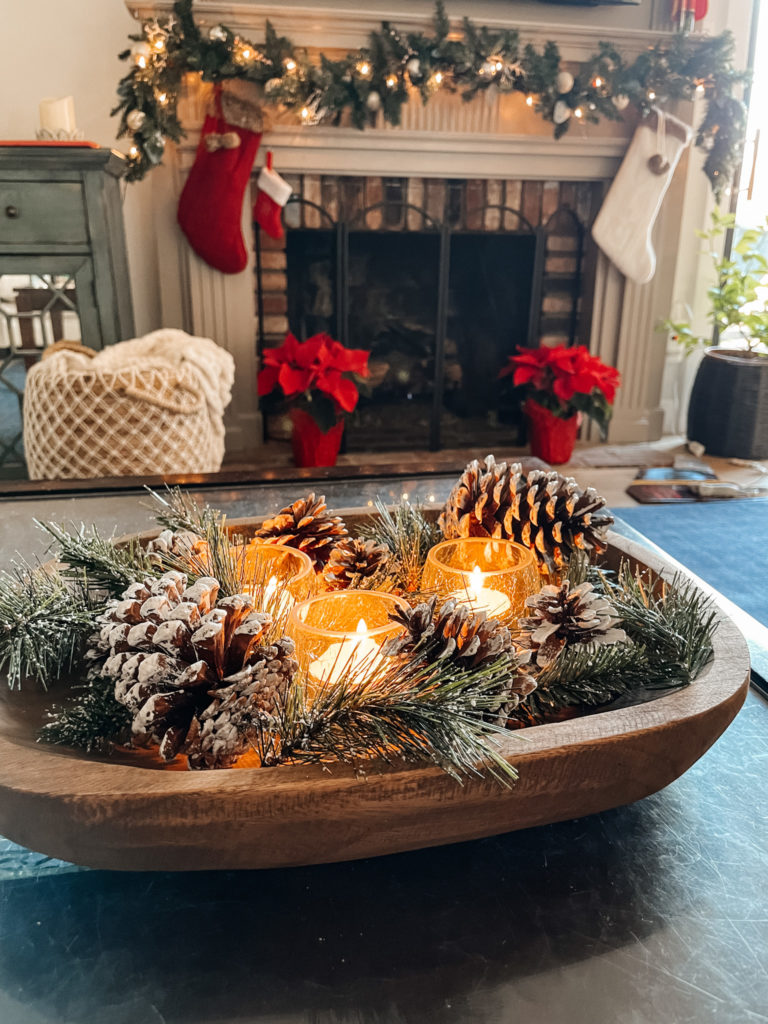
Here is the final look!

dough bowl filled with snowy pine cones, evergreen and candles

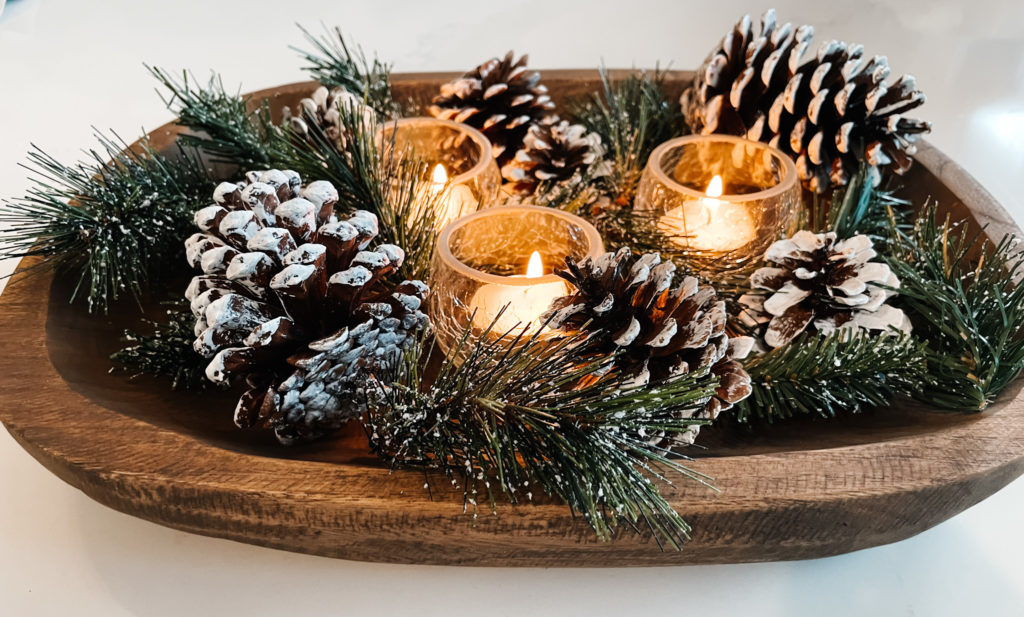
It’s moody, cozy and so easy to put together! Plus now I finally have my dough bowl for all seasons. I feel like this look could also be great along a longer centerpiece on a dining room table with pillar candles added into the mix too! What decor are you adding to your coffee table?

dough bowl filled with snowy pine cones, evergreen and candles

Posted By: Kristen · In: DIY

The Best Homemade Marinara Sauce
The Best Peppermint White Russians

You’ll Also Love

green velvet ribbon wrapped around cones to create a modern christmas treeMake These Simple DIY Velvet Christmas Trees
Make Your Own Terracotta Pumpkins With This Dupe
black door with decorative trim and white craftsman moldingChange your Home’s Whole Look with Simple Custom Door Trim

Leave a Reply Cancel reply

Your email address will not be published. Required fields are marked *

Recipe Rating


Trending

  • Want a Black Interior Front Door? How New Trim And Paint Change Everything
  • Our Beautiful Traditional Brick House With Black Windows Remodel
  • Mini Chicken and Waffles – The Ultimate Brunch Appetizer!
  • Glass Barn Doors Gave Our Office A Stunning Modern Look
  • Gray, black and gold powder bathroom
    Get the Room: Details & Links – The Powder Room

Categories

  • Blog
  • DIY
  • How-To
  • Lifestyle
    • Kristen’s Book Club

More You’ll Love

Mood Board For Our Kitchen Update- How To Make It Cozy

Mood Board For Our Kitchen Update- How To Make It Cozy

Meet Our New Family Member: Teddy!

Meet Our New Family Member: Teddy!

An Upcycled Fireplace Mantel Antique Creates a Chic Modern Look – Part 1

An Upcycled Fireplace Mantel Antique Creates a Chic Modern Look – Part 1

ourhowtohome

Scarlett Annette Mangold ♥️ You are so so lov Scarlett Annette Mangold ♥️ 
You are so so loved baby girl.
One view of this nursery just isn’t enough😍 One view of this nursery just isn’t enough😍

We’re days away from meeting our little girl and if she’s anything like her parents we’re in big trouble! 

At least the room is cute. 

#nursery #babygirl #nurserydecor #nurseryinspo #nurserydesign #safaribaby #safaritheme #littlegirlsroom #38weekspregnant #whitefurniture #refurbishedfurniture #refinishedfurniture #diyhomedecor #diyprojects #housetohome
We’re so ready for you baby girl! When we starte We’re so ready for you baby girl! When we started working in the nursery there was not a chance I thought it would be totally ready in time. Close? Sure. But finished? No way. 

We are so lucky to have so many people help us along the way (and for getting so many great deals on marketplace to bring this room together!) 

Now all we need is a little girl to use it!

#nursery #nurserydecor #nurseryinspo #babygirl #babygirlnursery #safari #animalnursery #facebookmarketplace #refurbished #38weekspregnant #nurseryideas #babygirlroom #homedesign #bedroomdesign #changingstation #safaribaby
Bookshelves for the nursery are FINISHED!! Can yo Bookshelves for the nursery are FINISHED!!

Can you believe this was all done with scrap wood that we had in the garage? 

For our baby shower we asked guests to bring a book in lieu of a card and im obsessed. We have the perfect amount of new stories to fill our shelves and a million memories to make in this cozy nook. 

#booknook #bookshelves #bookshelvesofinstagram #childrensbooks #nursery #nurserydecor #nurseryinspo #scrapwood #scrapwoodproject #reelsinstagram #memoriesforlife #snuggletime #cozynook #reelsvideo #nurseryroom #nurseryinspiration #childrensroom #reelsviral #childrensroominspo
What a year it’s been! I feel like we’ve don What a year it’s been! 

I feel like we’ve done so much work to the house this year but when it’s almost all in one room, I’m realizing it doesn’t always look like it. 

With the nursery almost ready to go and baby girl coming any day, we can only begin to imagine the great things 2023 is going to have in store for us! 

Happy New Year everyone!

Thanks for sticking around and being a part of our story 💜

#newyearseve #2022recap #2022wrapped #homeprojects #2023 #happynewyear #housetoahome #primarybathroom #livingroom #homedecor #renovation #newyear #recap2022 #reelsofinstagram😍 #reelsvideo #homesweethome #homedesign #nursery #boardandbatten
GAME CHANGER After years of making gingerbread h GAME CHANGER 

After years of making gingerbread houses and waiting the torturous overnight for the icing to dry we finally asked the question - why are we doing it this way?
 
Hot glue for the win! We saved the icing for decorating and the brownstones we’re ready for decorating immediately. 

Even Kevin who was a skeptical gingerbread traditionalist agrees… we’re never going back!

#nevergoingback #gamechanger #rowhomes #gingerbreadhouse #gingerbread #reelsinstagram #instagood #christmascrafts #christmasdecor #reelinstagram #christmasreels #holidayseason #christmasvibes
When I found this sleigh in the Target dollar sect When I found this sleigh in the Target dollar section, I knew it needed to be part of our holiday decor this year. Only problem? It needed a little something extra- queue for the stain! 

This updated sleigh is so cute and the perfect addition to our mantle. I found this pine cone filler and mini ornaments to complete the look! 

#christmasdecor #sleigh #pinecone #miniornaments #mantledecor #merrychristmas #holidaydecor #holidaycrafts #reelsvideo #merryandbright #stain #sleighride #christmastime #holidayseason #reelforyou #christmasmantel
Load More... Follow on Instagram
  • Privacy Policy

Copyright © 2023 Our How-To Home · Theme by 17th Avenue