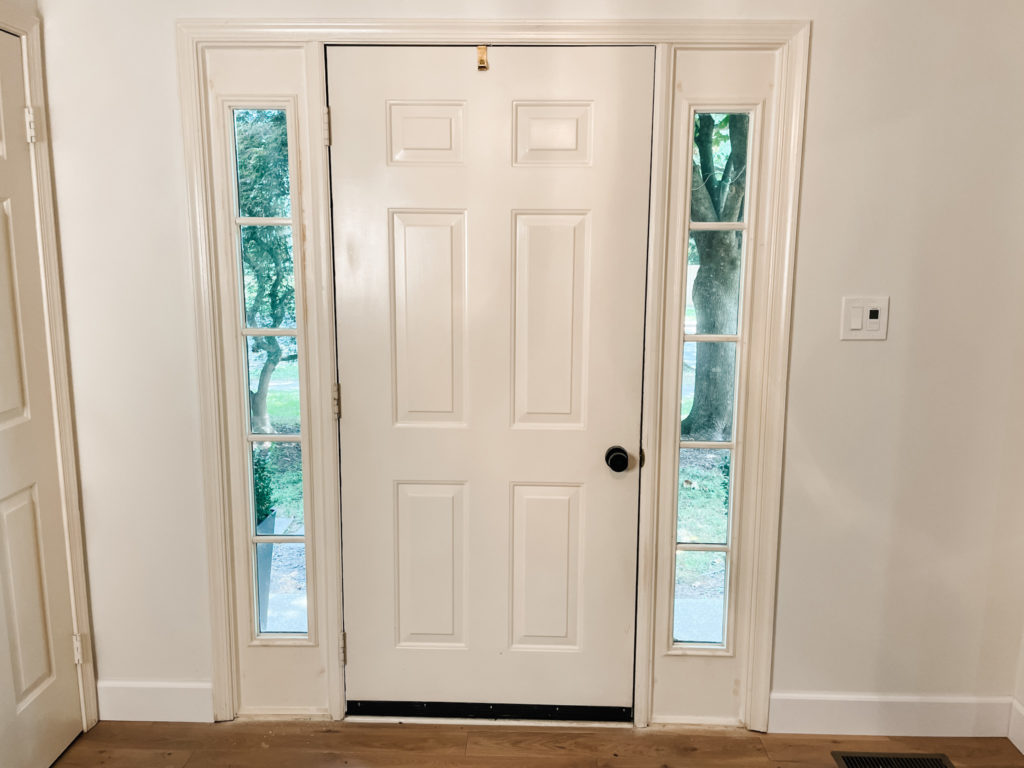
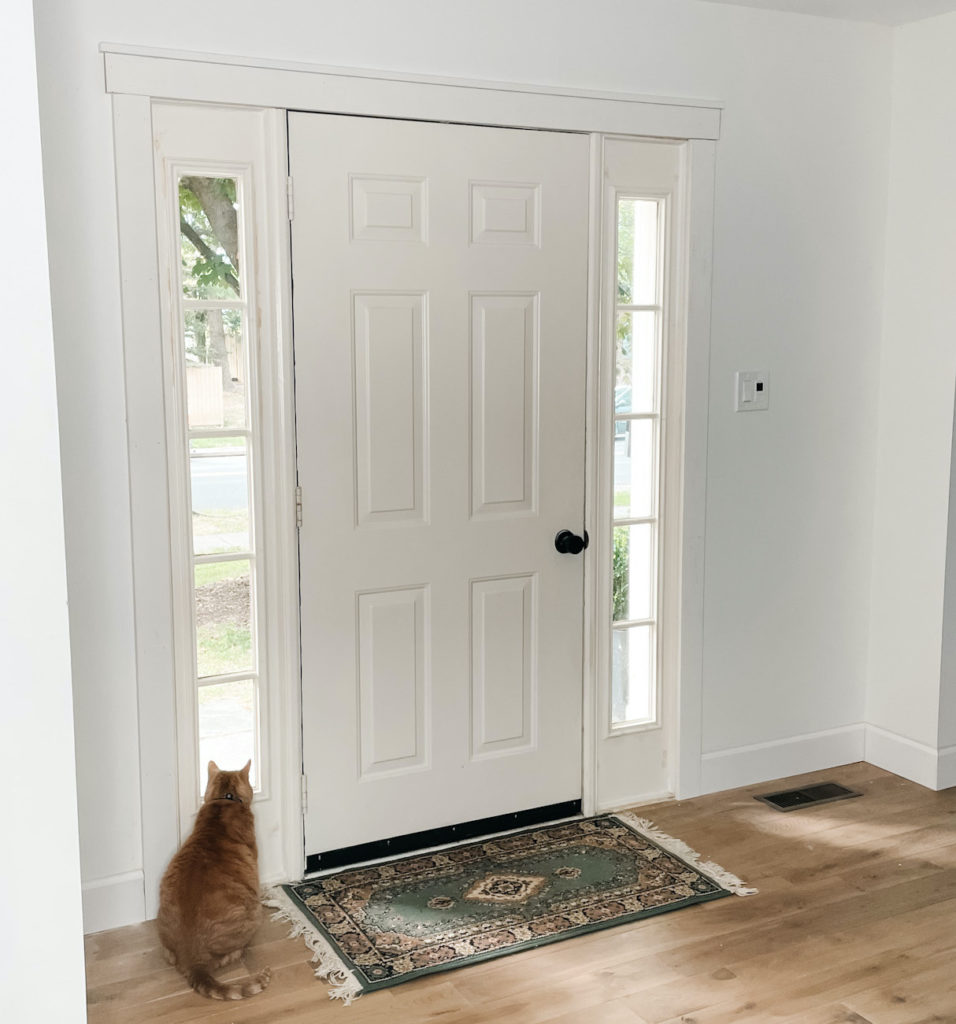
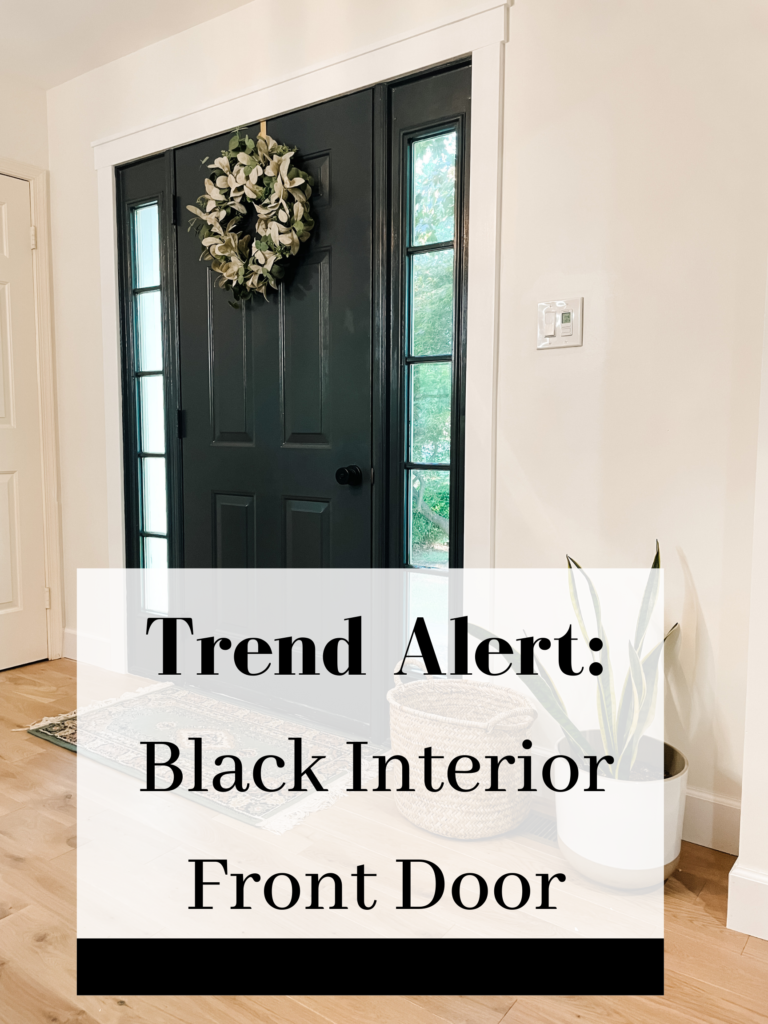
There’s something about new trim and paint that completely transforms a space. So I knew that’s just what we needed to do to update our front entrance. Much like the windows, the plan is to change out all of the traditional door trim for a more modern, craftsman-style look. And then of course paint everything black. A black interior front door?! Isn’t that going to be too much? Nahh. Just go with me on this….
Trim it out
I started with the trim and I think I’m getting the hang of this because it took me a much shorter amount of time than I was expecting. Unlike the windows which required 45° angled cuts, for the doors we’re going with a classic craftsman-style trim where flat cuts will allow the boards to essentially sit on top of each other.
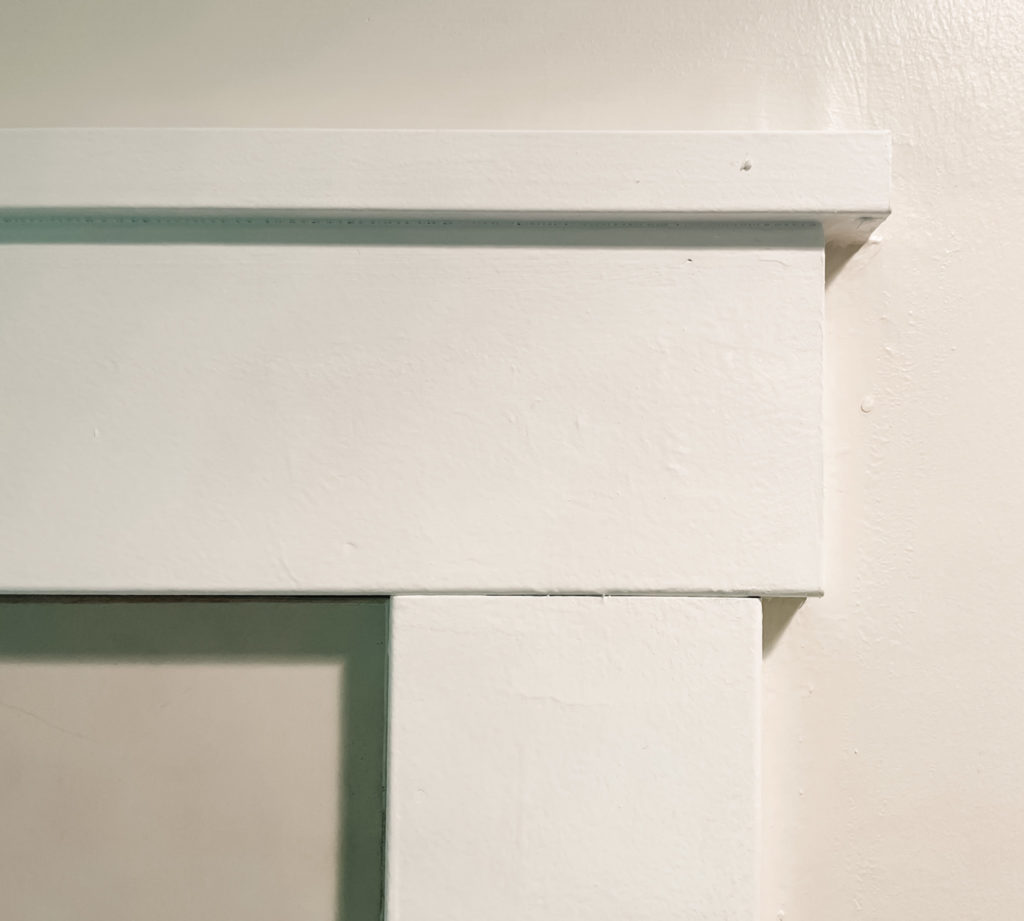
For this door trim, we used 3 ½ inch mdf (craftsman molding) for the sides and large top piece. I actually had to double check the measurements because the top piece always ends up looking larger than the sides, but I confirmed it! It’s all the same.
The very top piece is a little bit trickier because we couldn’t find any trim the size that we wanted. We ended up going with a ¾ inch pvc trim which is typically used in exterior design. It fit perfectly with the slight overhang we were shooting for. The pvc trim does cut a little bit differently than the mdf or wood, but it paints just the same so when the project is complete you can’t tell a difference.
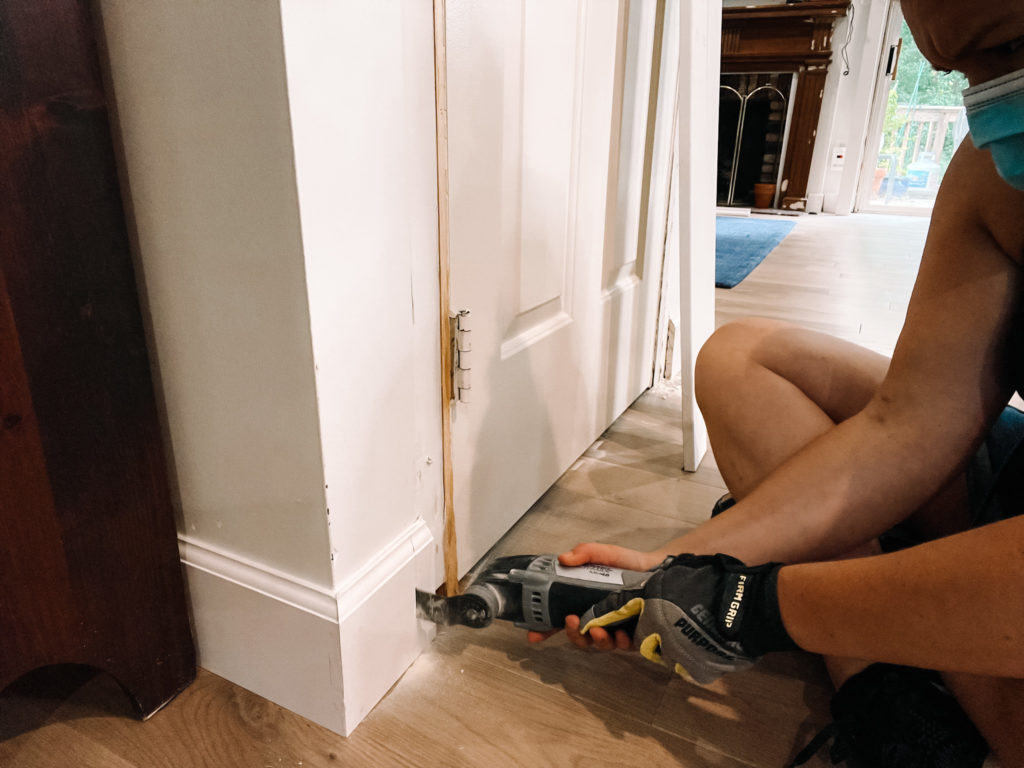
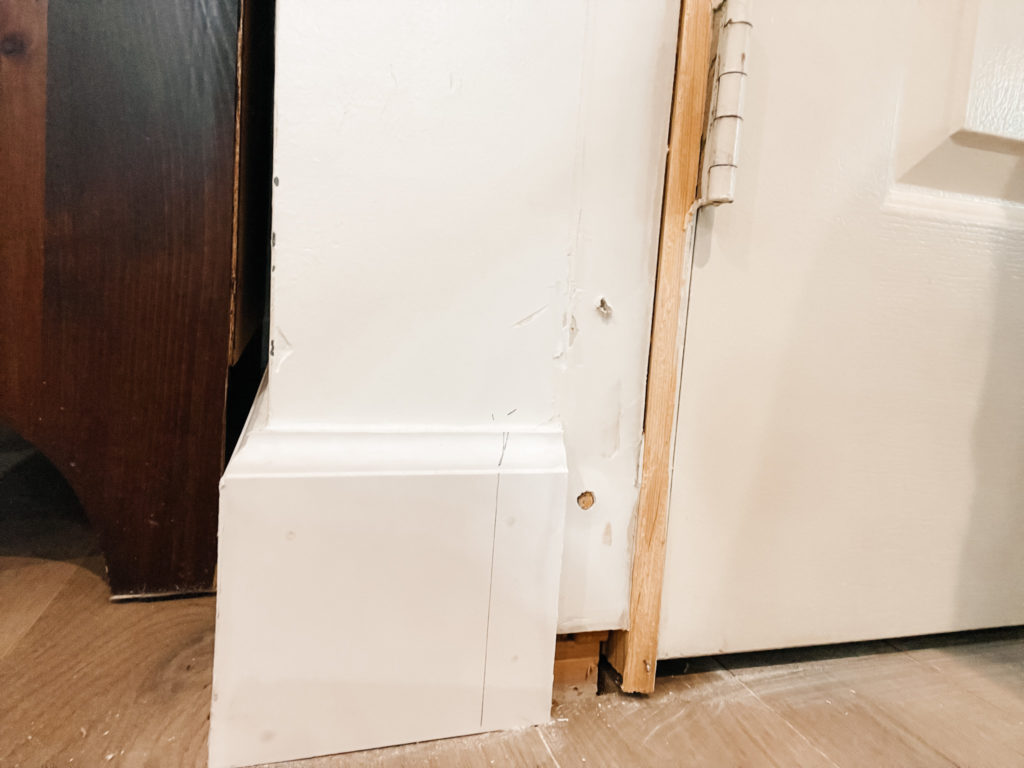
The first thing I realized very quickly was that the base molding was going to need to be cut. The original trim much like most traditional molding was 2 ½ inches wide. My very technical way of handling this was lining up the new trim where I was going to want it and using that as my stencil. I then cut out the little piece with my Dremel Oscillating Tool.
Like with any trim, when you are working with an existing door or window, you want to make sure that the new molding is secure. Each piece of trim should be nailed into both the door frame and the drywall as you go.
Once the two side pieces were cut and installed, I was able to move forward with the first top piece. We cut the top piece to hang ½ inch over the side molding on each side. Just to make my life easier, I made a mark a half inch in on each side so I knew exactly where the trim should sit.
The top piece had that same ½ inch increase on each side which gives this beautiful, clean look.
Finally, I filled the holes with wood filler, sanded and caulked the new trim and our new craftsman style molding was ready for paint!
And then we paint to get that black interior front door!
Since the front door and sidelights hadn’t been painted in quite a few years and was last painted with a semi-gloss paint, there are a few steps we went through to prep the area:
- Sand the wood. You’ll want to rough the paint up a little bit in order to give the new paint something to hold on to. A light sanding will do. (wipe the area down with a damp cloth after)
- Prime the wood. Because I only lightly sanded and wanted the new paint to stick, I used a primer on all the old paint.
- Do a second light sanding on the primer.
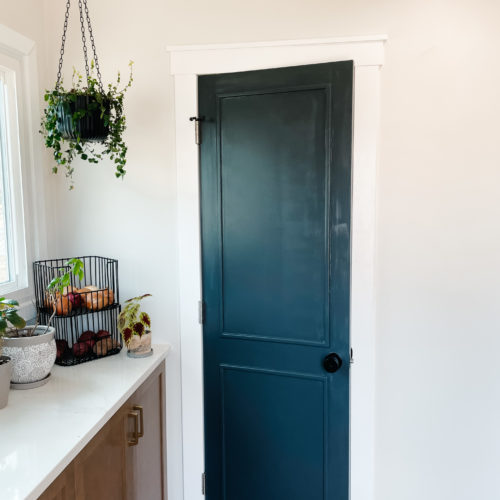
We chose Black Satin by Behr for the door color which I feel is a really great soft black that doesn’t come off too stark and intense. I used a brush first to get the in all of the grooves and along the edges and then went back over the flat surfaces and the grooves with a high density foam roller. The foam roller does a great job smoothing everything out to give a nice clean finish.
To Tape or Not to Tape
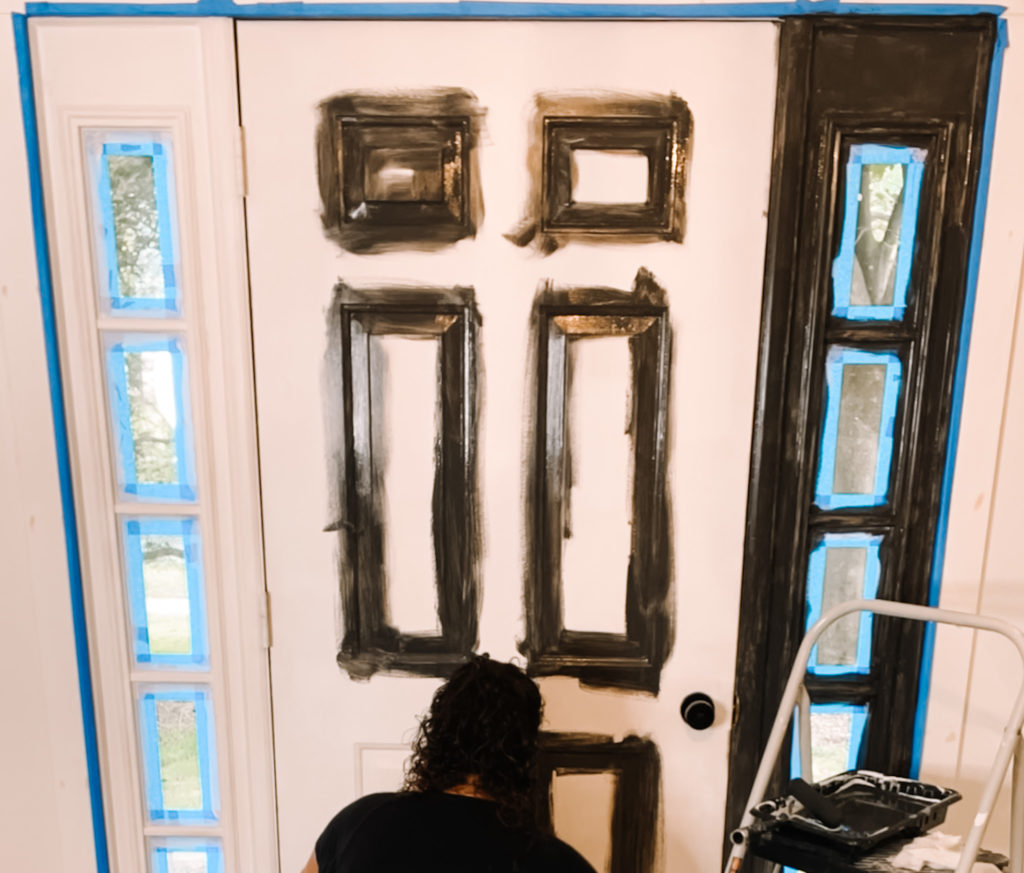
If we’re being truthful, I almost never tape. I did this time because the last time I painted glass it was such a pain to get the edges clean again. Now that I’ve been through the process with tape, I would say next time I would tape the glass, forget about the rest. When I pulled a lot of the tape off, the paint came with it.
Being the OCD psycho that I am, I’m not ashamed to admit that I went back around with a small brush and touched up all of the edges.
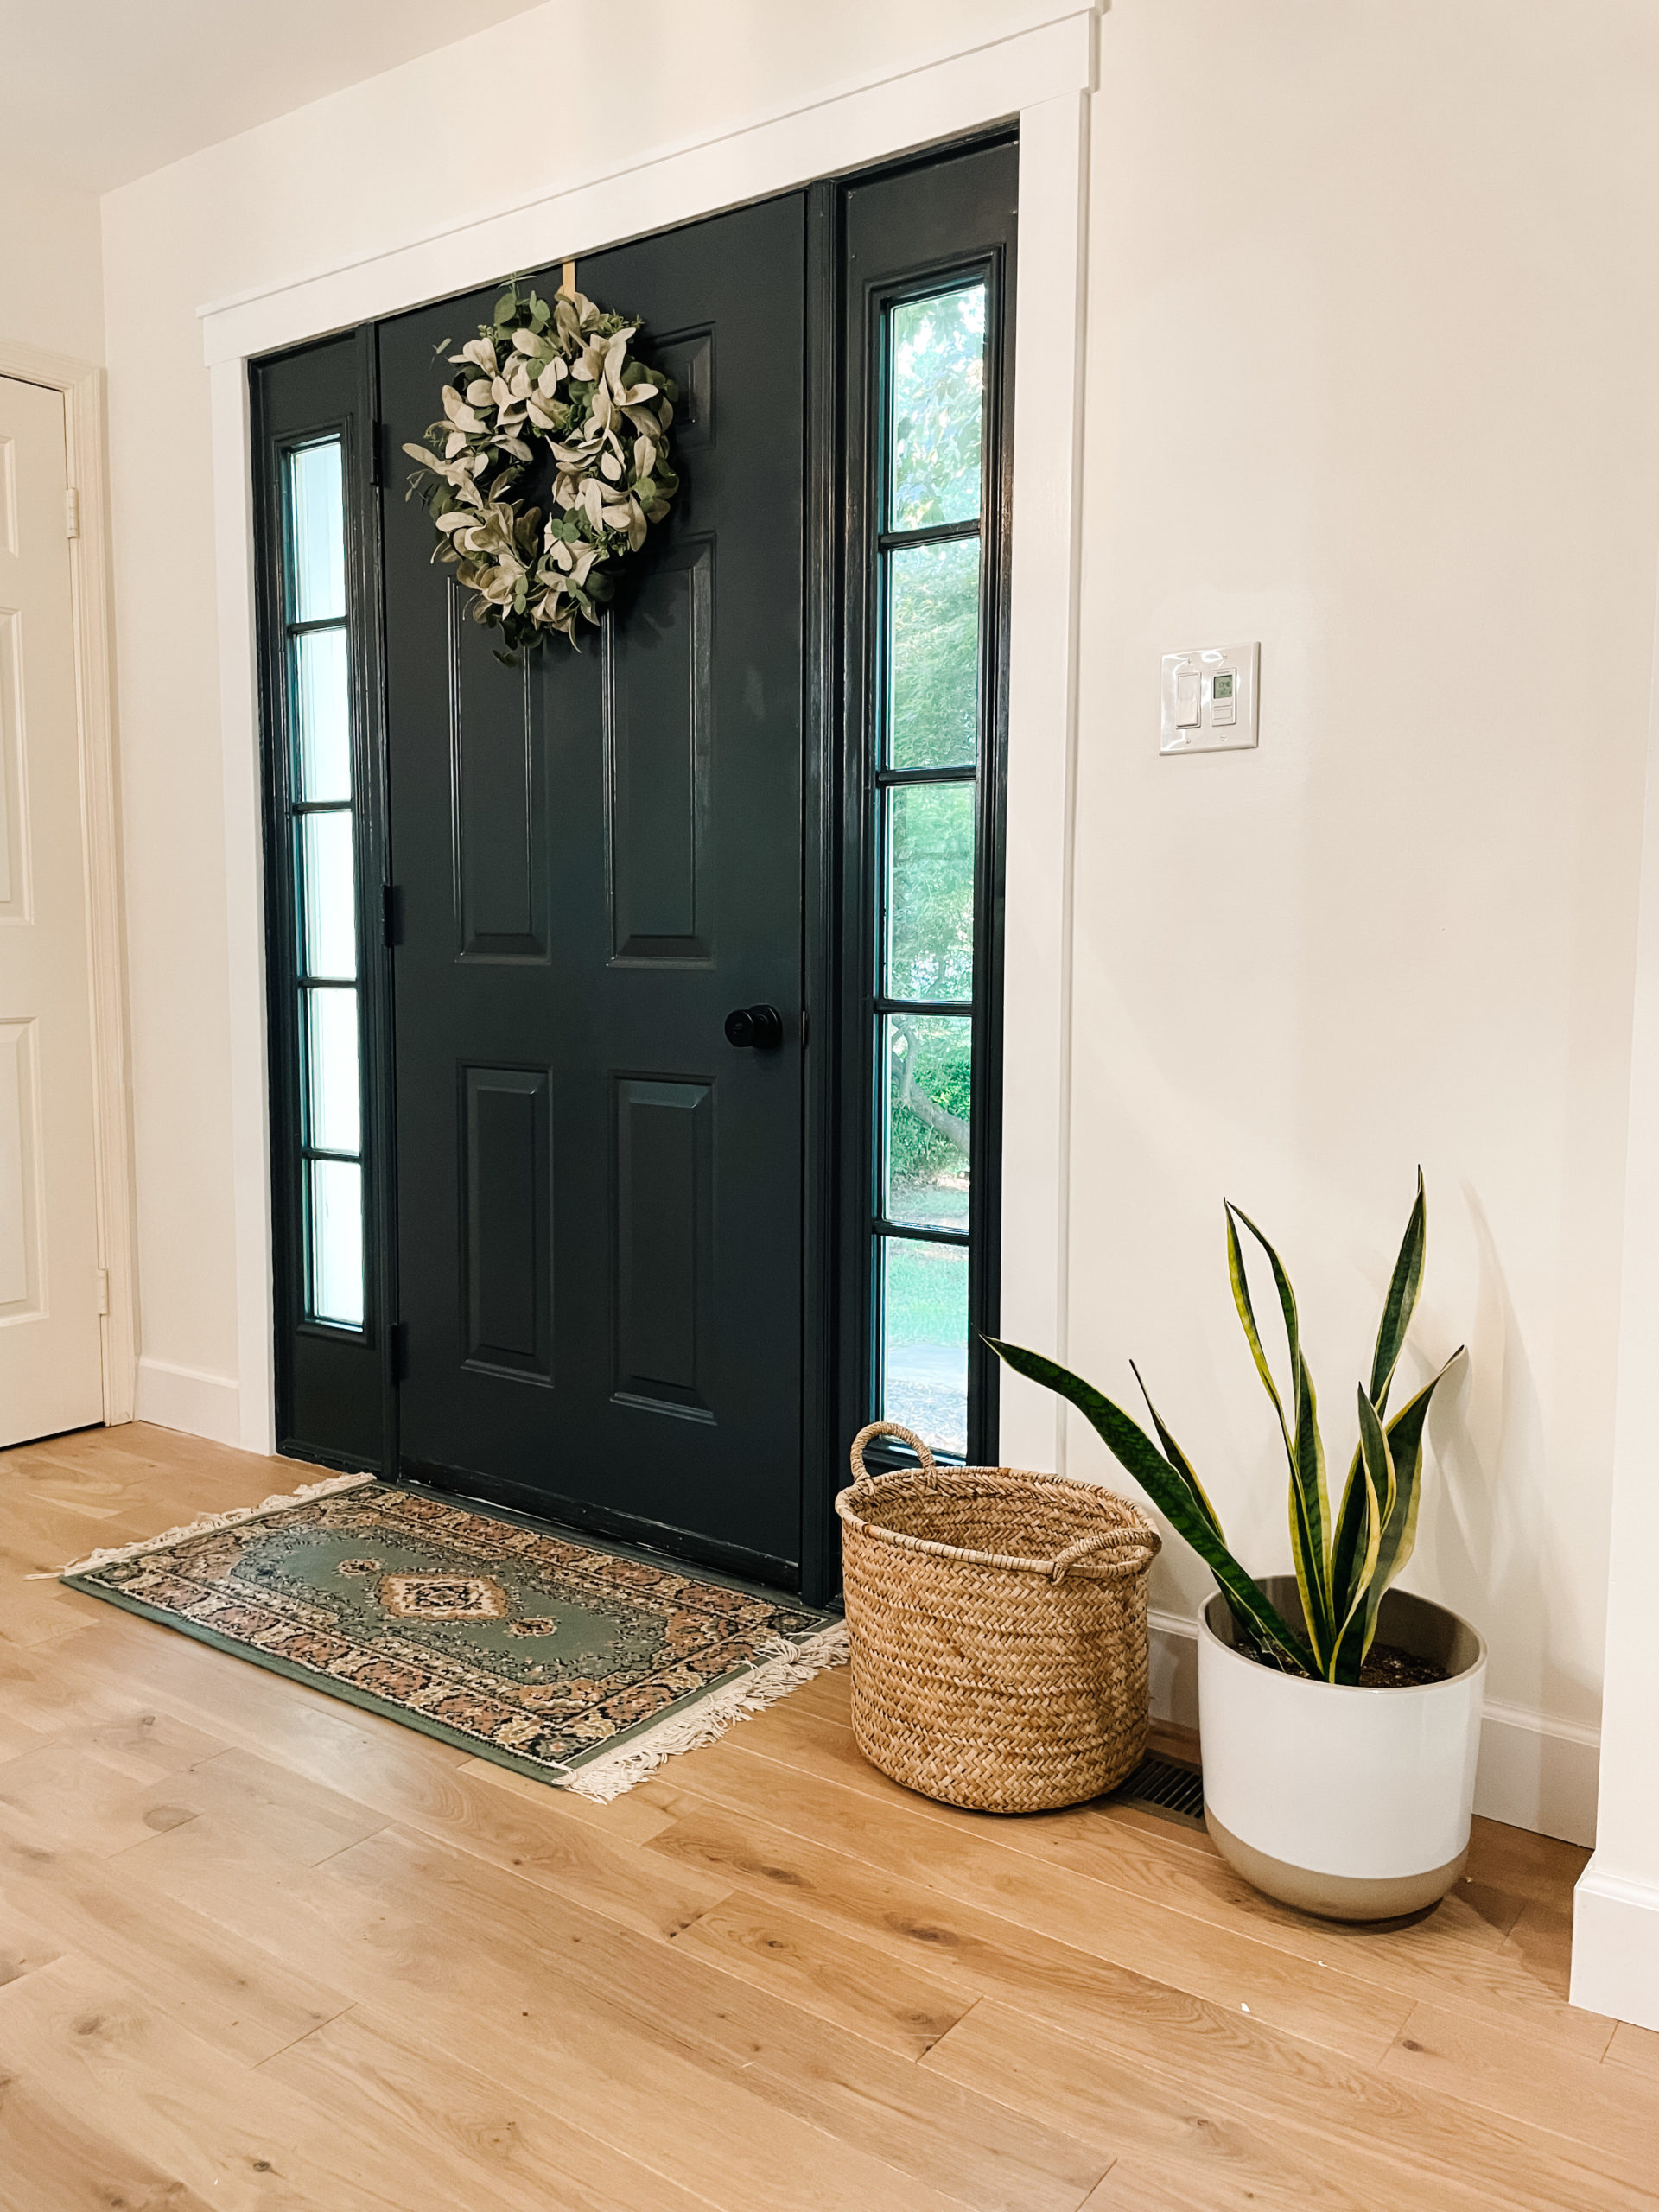
Overall, we love the result. It’s fresh, modern and wayyy less expensive than replacing the door for a new look. What do you think? Have I changed your mind on black interior front doors?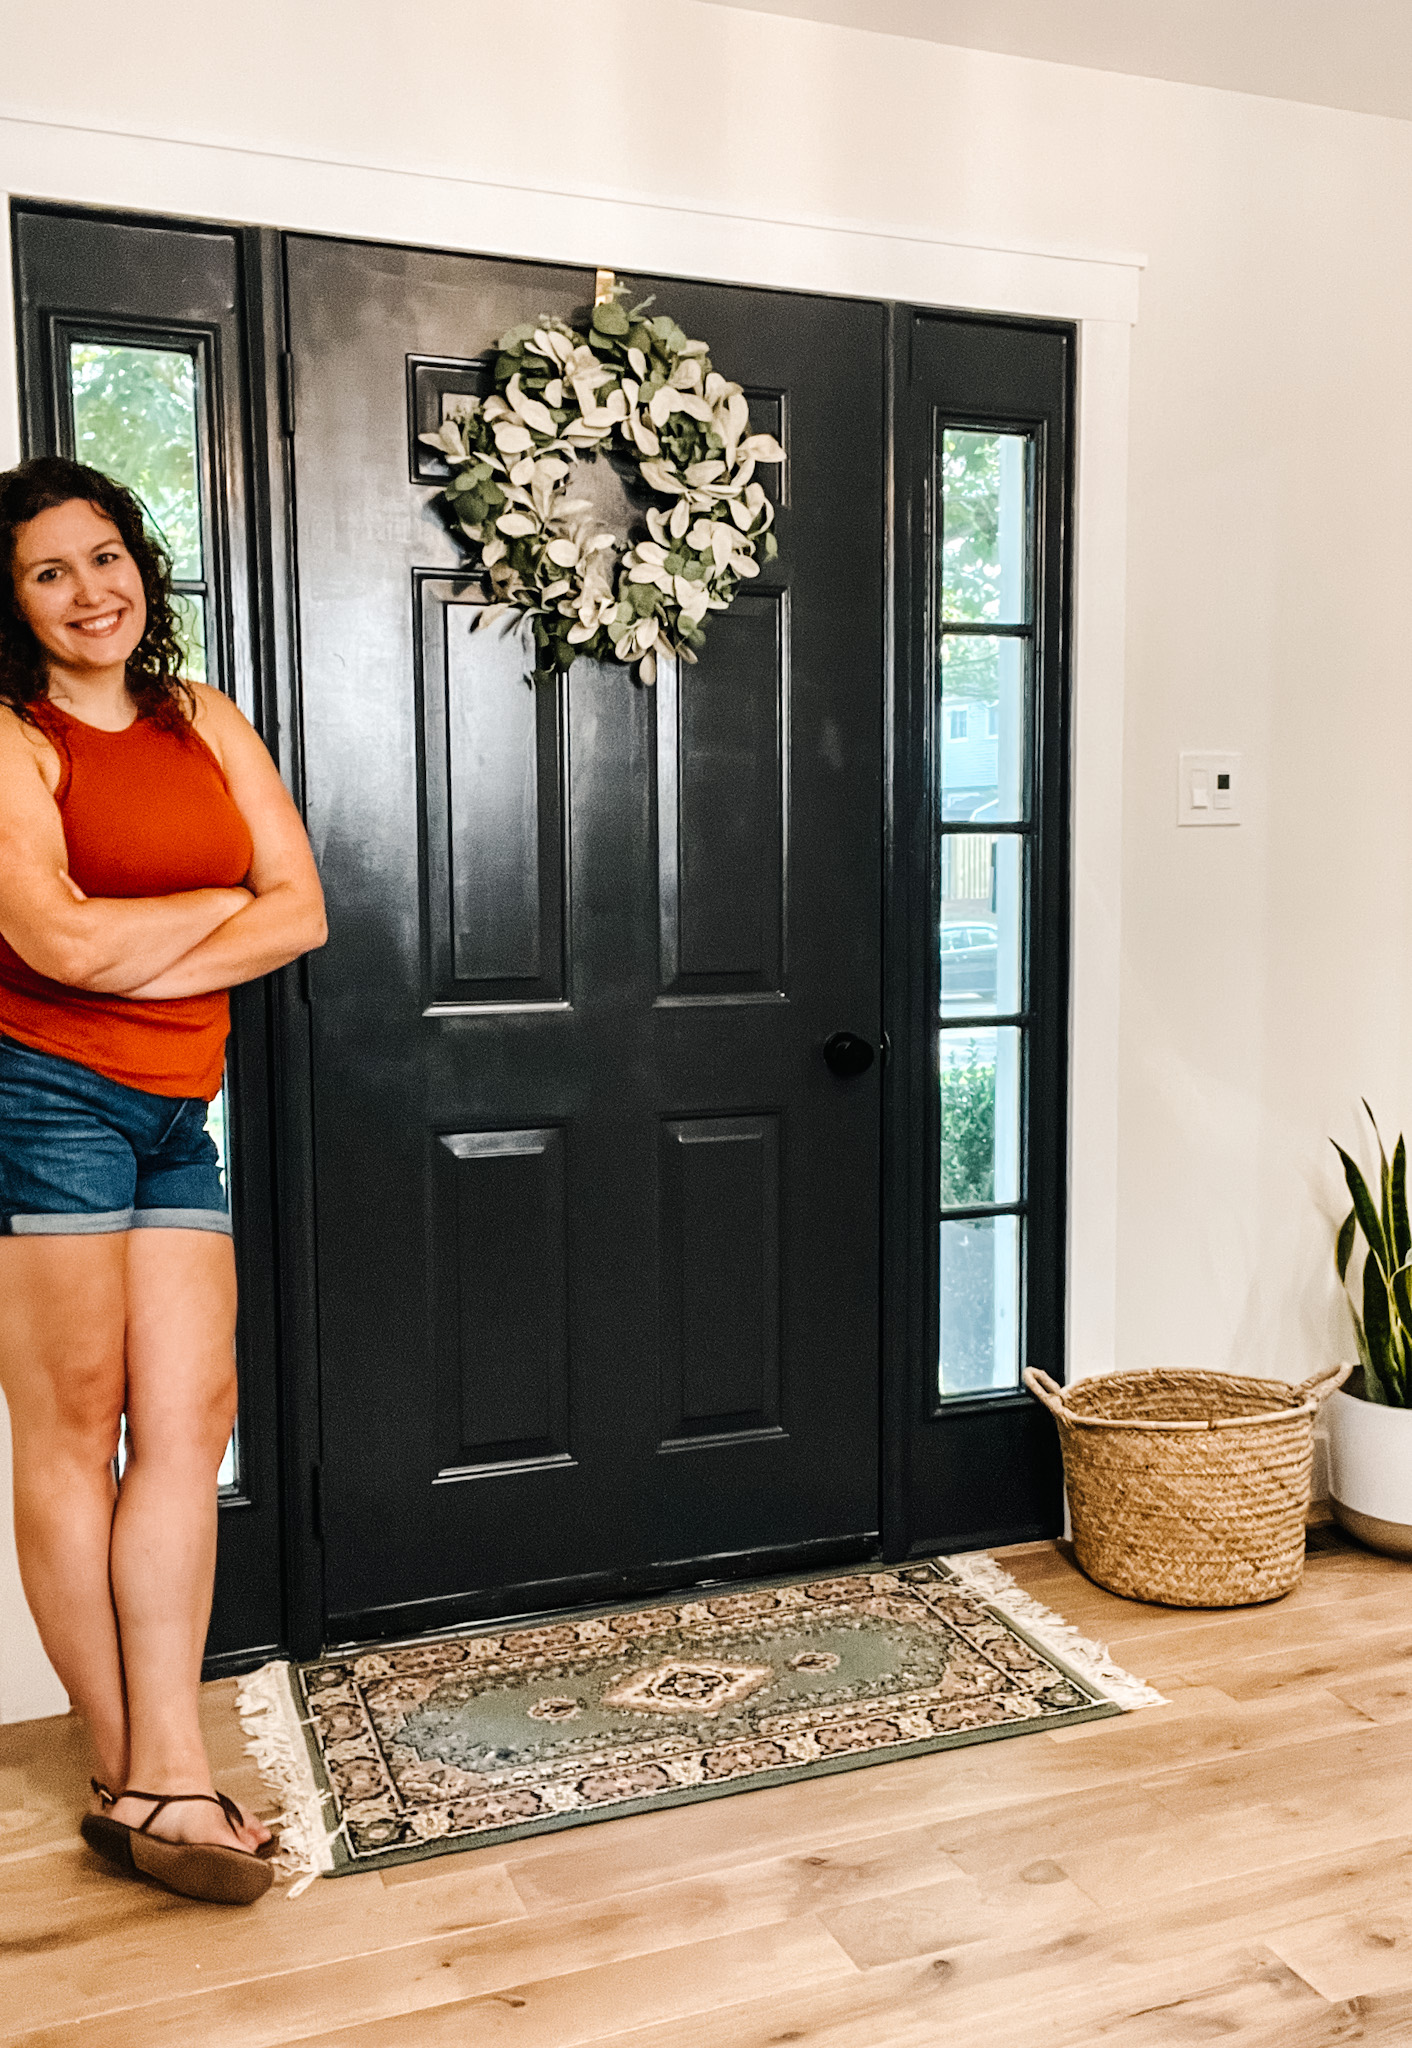


Excellent job. Repainting the outside black. I’ll now do the inside too!!! Thanks for the pics.
Good luck! I bet it will turn out great!
I’m in the process of doing the same but hasn’t even thought of dating my trim! I love this craftsman inspired trim and just added this to my project list (oh boy!). Two separate questions for you: 1. What color is your wall paint 2. What floors do you have? I’m also redoing the floors on my main level this fall and this is exactly the look I’m going for. Absolutely gorgeous. Thank you for sharing!
Selena
Hi Selena – I’m so glad you’re inspired! The wall color is Simple White by Sherwin Williams (SW 7021). It’s the perfect white! The floors are white oak toledo from Floor & Decor. Good luck! I hope it turns out amazing!
I’m thinking on painting my front door black as well, actually I have the same door & side windows as you, wondering what brand and colour paint you used?
Hi Pam! It makes such a difference!The color we used is Black Satin by Behr. It’s a great muted black – we’ve used it on all of our doors.
I love it! How did you paint the internal slats on the side windows? Mine are inside the glass panes
Mine are on the outside of the glass so I was just able to paint them. You won’t be able to paint them; however I’ve seen people use electrical tape to cover the internal slats or if you want a more finished look, you can use something like https://www.newpanes.com/ which is paintable and will sit on your glass.
Hello, I went for it and painted my door black and I absolutely love the look.
I do have a question?? My doors threshold is wood and the black paint is chipping off and I see the white primer popping through. Have you had this problem too? I’m guessing this is going to be an ongoing issue and my best remedy may be some type of new threshold plate.??
Any ideas would be greatly appreciated. Thanks
Hmmm our threshold is metal so we didn’t have that issue at all. I’m surprised it’s chipping already! Did you sand after priming it all? That can be useful in helping the paint stick better. I wonder if a clear top coat would also help protect the wood? If you’re set on keeping the wood I would say sanding it down and using a black stain may do better with wear and tear, but given you’ve already painted, I would recommend doing a light sanding and painting another coat of black first to see if that works.
Love black doors! I see the wall color is simply white, do you happen to know the trim color? I’m going for this same looking and having such a hard time nailing down which colors I want to go with. Yours are perfect!
Hi Cheyenne, We just used the Behr standard white paint that’s in the can before adding color. It’s a great crisp white. Ours is in semi gloss.
Why would you not paint the trim black as well? Would it not have made the door even larger looking? More finished?
Hi Sheila – I honestly hadn’t considered it since the trim around the rest of the doors is white, but you’re totally right! I might go back and paint it now!