Our How-To Home

  • How-To
  • DIY
  • Lifestyle
    • Recipes
    • Kristen’s Book Club
  • Blog
    • Home Updates

Explore

  • How-To
  • DIY
  • Lifestyle
  • Blog
  • About Us
  • Ask Us Anything
  • Kristen’s Book Club

Connect

You are here: Home / How-To / Make a Doorway in an Existing Wall

How-To · November 4, 2021

Make a Doorway in an Existing Wall

It’s been such a whirl wind so far and I feel like we’ve barely touched the actual bathroom! But now that the original closet door is closed up, we really need to move forward on this project, which means creating a new doorway and for now, building a closet that’s at least functional again asap. I very quickly learned how to make a doorway in our existing wall.

Don’t feel like reading? No biggie! Check out the video below for step by step instructions or scroll below to see what I did! 

I had an idea of what the plan was going to be for this doorway, but the measurements were a bit fuzzy. Here’s what I did know:

  1. The new closet doors were going to be barn doors, which means we have flexibility in the actual door length.
  2. Barn doors require extra support as the carry more weight than traditional doors. This means I needed to install a header.
  3. This was NOT a load bearing wall and would not have any plumbing or air ducts running in it (hallelujah!)

I basically started by estimating how wide I wanted my doorway to be. (This was a VERY scientific process of walking around my house and measuring doors to see what I liked) and then began making my hole. To a certain extent, I also had to think about what our future closet remodel was going to look like and where we were should install the light switch in the new configuration. The estimated width very quickly turned into… demo to the nearest stud.

The main reason you do this is for reattaching drywall later on. If you demo the drywall in the middle of the studs, the existing drywall has no support and you won’t have anything to attach the new one too. This will leave your walls incredibly flimsy and will almost guarantee cracks later down the road. 

I demo’d from stud to stud and then some extra across the top where I’ll need to add some additional supports. Next, I removed the extra stud using the same technique I used in the bathroom wall (using a saw, I cut the stud on an angle and then pulled the pieces away from each other).  

How to make a doorway

With everything removed, I started by using my multi-tool to cut out the chunk of one of the studs that I needed to add my header. This was the only stud that I ended up cutting into for this project. I wanted to keep the others whole to keep the wall stable. The more studs you have running floor to ceiling, the more structural and sound your wall will be. It’s important to note that this is NOT a load bearing wall and I knew that before any cuts were made.

To build the header:

  1. I measured the distance between the studs and cut down 2×4’s to that length.
  2. I then drilled 2 2×4’s together to double the width of the header.
  3. Using spare pieces of wood. I drilled support pieces into the existing studs for the header to sit on top of.
  4. Finally, I drilled construction screws into the new header to connect it to the supports and studs until secure.

Once the first side was complete, I went ahead and did the same thing on the other side. I made sure that the left and the right side were level to each other and then set the middle header to connect the two sides. This was especially tricky since my first side was not exactly level but, in the end, I got it to work.

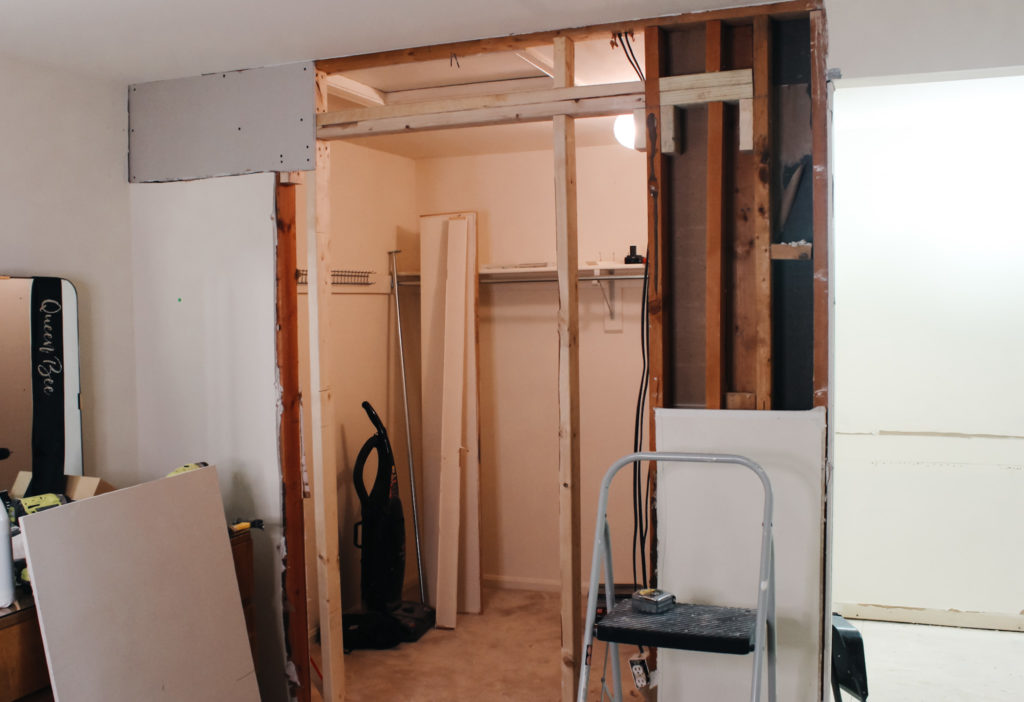
Finally, I determined how big I wanted to doorway to be and cut two pieces of wood that I would secure to the floor as my “base pieces”. The last studs connected the base pieces to the header and then the header to the ceiling.

To finish out this part of the project, all I had to do was add the drywall across the new beams. 

I will say, for my first doorway, I’m pretty happy with how it turned out. The wall is strong, well built and can support the heavy weight of an iron beam and barn doors. Learning how to make a doorway was a lot easier than I expected and I’m really glad I did it!

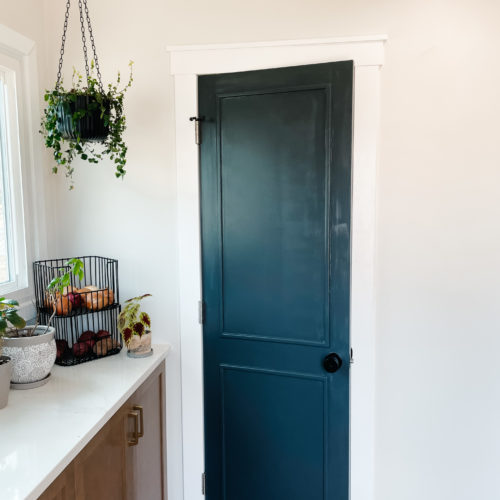
Next, I’m getting started on the closet doors and I cannot wait to see that vision come to life!

Follow along and find out how I restored old french doors and made them into mirrored barn doors with this easy tutorial! It takes our whole bedroom to the next level and I couldn’t be more proud!

Posted By: Kristen · In: How-To

Moving A Doorway: Demo And Rebuild In One Day
Easy DIY Mirror Barn Doors Using Reclaimed French Doors

You’ll Also Love

Easily Install Cement Board to Prep for Tile Installation
Check Out These Easy Tricks to Install a Subfloor
black door with decorative trim and white craftsman moldingChange your Home’s Whole Look with Simple Custom Door Trim

Leave a Reply Cancel reply

Your email address will not be published. Required fields are marked *

Trending

  • Want a Black Interior Front Door? How New Trim And Paint Change Everything
  • Make Your Own Welcome Mat
  • Our Beautiful Traditional Brick House With Black Windows Remodel
  • This Simple Change Made Our Kitchen Island Look Super Custom
  • Christmas Garland with eucalyptus and pine cones
    This is How to Make Christmas Garland Look Expensive

Categories

  • Blog
  • DIY
  • How-To
  • Lifestyle
    • Kristen’s Book Club

More You’ll Love

We’re Installing a Window! – Giving New Light To Our Kitchen

We’re Installing a Window! – Giving New Light To Our Kitchen

Our Beautiful Traditional Brick House With Black Windows Remodel

Our Beautiful Traditional Brick House With Black Windows Remodel

Recipe for Homemade Croutons – The Best Hack for Leftover Bread

Recipe for Homemade Croutons – The Best Hack for Leftover Bread

ourhowtohome

Flip a dining set I thought … how hard could it Flip a dining set I thought … how hard could it be?! When you’re a type A perfectionist that needs to execute to your exact vision and have a 4 month old needing you all the time, apparently very hard. 

But man is she pretty. 

My margins on this are basically nonexistent with all of the mistakes (cough:: learning opportunities) I had a long the way but I’m proud of that it came out exactly as I envisioned. Now the big question: how much do you think I can sell it for?

#furnitureflip #tabledesign #upcycle #refurb #kitcheninspiration #dininginstyle #diningroom #reelit #furnituremakeover #reelsofinstagram #kitchentable #upcycledfurniture
We’re coming up to the end of the furniture flip We’re coming up to the end of the furniture flip that I thought was going to take 2 weeks and actually took 2 months. It was been quite a journey to get here but I’m so happy with how it’s looking! 

#furnitureflip #kitchentable #naturalwood #wecandohardthings #diningroomdecor #kitchendecor #diningtable #furnituremakeover #trusttheprocess #furnitureflipper #reelsinstagram #facebookmarketplace
Scarlett Annette Mangold ♥️ You are so so lov Scarlett Annette Mangold ♥️ 
You are so so loved baby girl.
One view of this nursery just isn’t enough😍 One view of this nursery just isn’t enough😍

We’re days away from meeting our little girl and if she’s anything like her parents we’re in big trouble! 

At least the room is cute. 

#nursery #babygirl #nurserydecor #nurseryinspo #nurserydesign #safaribaby #safaritheme #littlegirlsroom #38weekspregnant #whitefurniture #refurbishedfurniture #refinishedfurniture #diyhomedecor #diyprojects #housetohome
We’re so ready for you baby girl! When we starte We’re so ready for you baby girl! When we started working in the nursery there was not a chance I thought it would be totally ready in time. Close? Sure. But finished? No way. 

We are so lucky to have so many people help us along the way (and for getting so many great deals on marketplace to bring this room together!) 

Now all we need is a little girl to use it!

#nursery #nurserydecor #nurseryinspo #babygirl #babygirlnursery #safari #animalnursery #facebookmarketplace #refurbished #38weekspregnant #nurseryideas #babygirlroom #homedesign #bedroomdesign #changingstation #safaribaby
Bookshelves for the nursery are FINISHED!! Can yo Bookshelves for the nursery are FINISHED!!

Can you believe this was all done with scrap wood that we had in the garage? 

For our baby shower we asked guests to bring a book in lieu of a card and im obsessed. We have the perfect amount of new stories to fill our shelves and a million memories to make in this cozy nook. 

#booknook #bookshelves #bookshelvesofinstagram #childrensbooks #nursery #nurserydecor #nurseryinspo #scrapwood #scrapwoodproject #reelsinstagram #memoriesforlife #snuggletime #cozynook #reelsvideo #nurseryroom #nurseryinspiration #childrensroom #reelsviral #childrensroominspo
What a year it’s been! I feel like we’ve don What a year it’s been! 

I feel like we’ve done so much work to the house this year but when it’s almost all in one room, I’m realizing it doesn’t always look like it. 

With the nursery almost ready to go and baby girl coming any day, we can only begin to imagine the great things 2023 is going to have in store for us! 

Happy New Year everyone!

Thanks for sticking around and being a part of our story 💜

#newyearseve #2022recap #2022wrapped #homeprojects #2023 #happynewyear #housetoahome #primarybathroom #livingroom #homedecor #renovation #newyear #recap2022 #reelsofinstagram😍 #reelsvideo #homesweethome #homedesign #nursery #boardandbatten
Follow on Instagram
  • Privacy Policy

Copyright © 2025 Our How-To Home · Theme by 17th Avenue