Great News! Now that we have a fully secured and useable subfloor, we can actually get moving on other parts of the bathroom! To start, we’re going to install cement board over top of the new plywood to create a water-resistant barrier for our bathroom.
What is Cement Board?
Cement Board is a building material that is sold in sheets and is made of cement and fiberglass mesh. It is commonly used as a backing board for tile installation.
What Does Cement Board Do?
Beyond just serving as a backing board, cement board is also resistant to water. Making sure you install cement board in places where tile is common such as bathrooms, kitchens or foyers is crucial as they are often exposed to water which could lead to subfloor damage, mold or mildew.
Let’s Install Cement Board
Tools You’ll Need:
- Cement Board
- Electric Drill
- Hole Dozer Set
- Utility Knife
- Cement Board Screws (we used 1 1/4 backer-on screws)
- Cement Board Tape
- Spackle Knife
- Mortar*
- Measuring Tape & Pencil
*necessary tools for mortar include a bucket, mixing paddle for your drill and water
To make things easier on myself, I’m going to start by dry fitting my cement board pieces so that I can quickly secure them all at once.
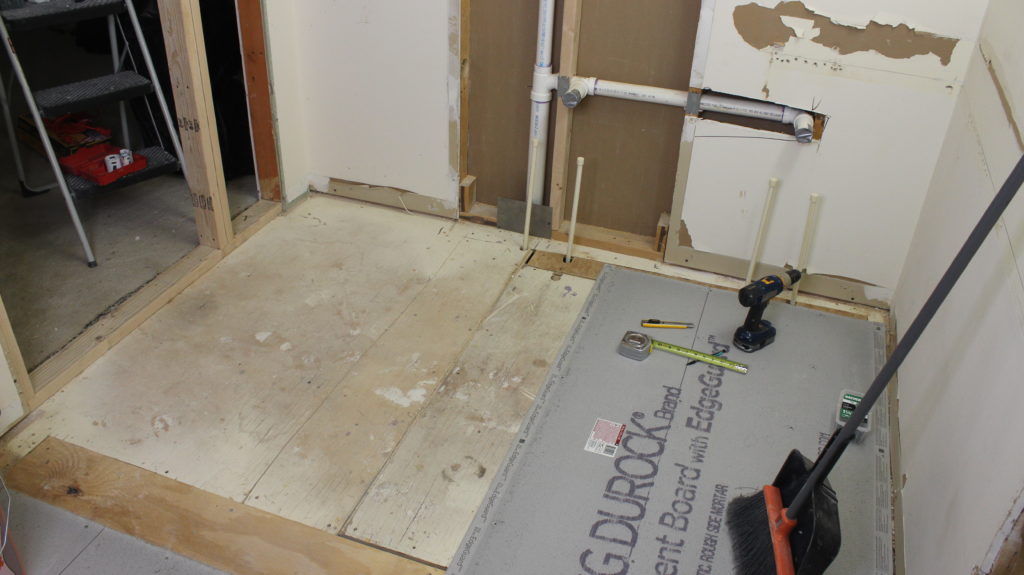
For the most part, you can treat cement board a lot like drywall. Namely, you can cut it with a utility knife, easily cut holes into it and screw through it. The biggest difference is that as I mentioned above, cement board is made from cement and fiberglass mesh which means it will be a little tougher to cut through.
During my dry fit, I started with the largest pieces and measured out where the plumbing holes (the shower drain, toilet and sink holes) were going to be in the floor. Then using my circular blade that attaches to my drill, I drilled into the cement board to create the holes. If there is any extra cement, hanging on after you make your cut, you can take your utility knife and simply trim it off.
You want the cement board holes to fit pretty tightly around the pipes so make sure to test your hole size as you go and not cut off too much to start.
Which side of the cement board do I use?
There is a right and wrong side of the cement board, but the good news is, it’s
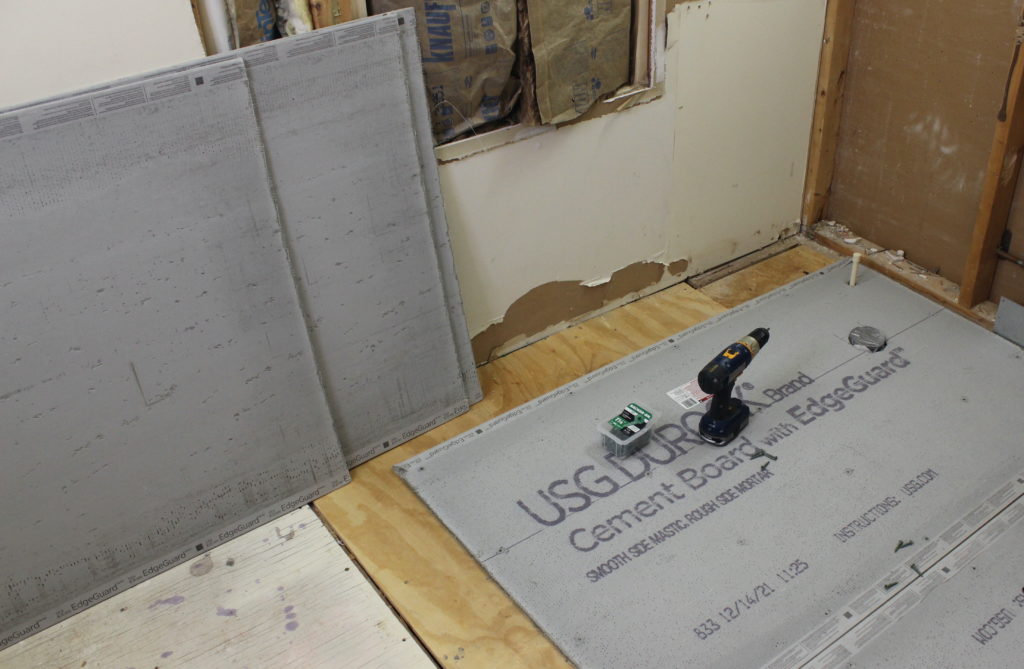
written right on the top. The rough side goes up, to add texture to whatever you attached on top (ie. Mortar and tile) and the smooth side on the bottom that sits on the plywood.
Once I have at least half of the half the room dry fitted, I got ready to screw the pieces down.
Quick Tip:
Like many projects, when you install cement board it requires special screws to secure to the subfloor. Not uncommonly, these screws are a special shape (in this case, a serrated flat head star shaped) and require a special bit to install them. Before you go out and buy a bit separately, check your screw box first. Often manufacturers will include the required bit in your box for easy use.
When you start screwing down your cement board, start in one corner and then work your way across and down the board (rather than doing all four corners first). This will help you avoid any air pockets which can lead to issues with your tile later on.
I worked my way across the room until all of the pieces were installed and then repeated the process by dry fitting and installing tile on the second half of the room.
Do I need to mortar under the cement board?
This has actually been a big debate in the comments of this video on YouTube. If you follow the instructions, it tells you that you must mortar the cement board to the subfloor and then mortar the file to the cement board. In my personal opinion, I think this is a mistake and something that Kevin and I have never done. In fact, when pulling up builder grade tiling projects, I’ve also never seen in done. Here is my reasoning:
Tastes change, things happen and at some point you may want to change your tile. Mortaring the cement board will mean that your cement board is permanently attached to you subfloor. This means you will not be able to remove the tile without removing and replacing your entire subfloor.
Alternatively, if the cement board is simply screwed to the subfloor, the tile and board can be removed and replaced without demoing your room to the rafters. To me personally, it just seems like the easier option on both ends.
Covering the seams using cement board tape and mortar
Once all of the cement board was screwed down, it was time to start covering the seams. Much like drywall, we’re going to start with tape. This tape however, is specific for cement board and is a little bit more heavy duty than the paper or fabric you may be used to. Cement Board tape is made from fiberglass mesh and is alkali-resistant (is resistant to deteriorating when exposed to alkaline materials such as cement). In my experience, this tape also sticks a little bit less so make sure that you really press it down with your spackle knife as you go.
Much like drywall tape, you can also cut the cement board tape using a spackle knife as I did in the video above. If you find this to be too much of a challenge, feel free to use a utility knife instead.
Keep going until all of your seams are covered with tape.
Finally we’re ready for mortar, the final step to install cement board! This will go over the tape just to keep the boards all in place and connected to each other. It also helps to fill any gaps between your boards.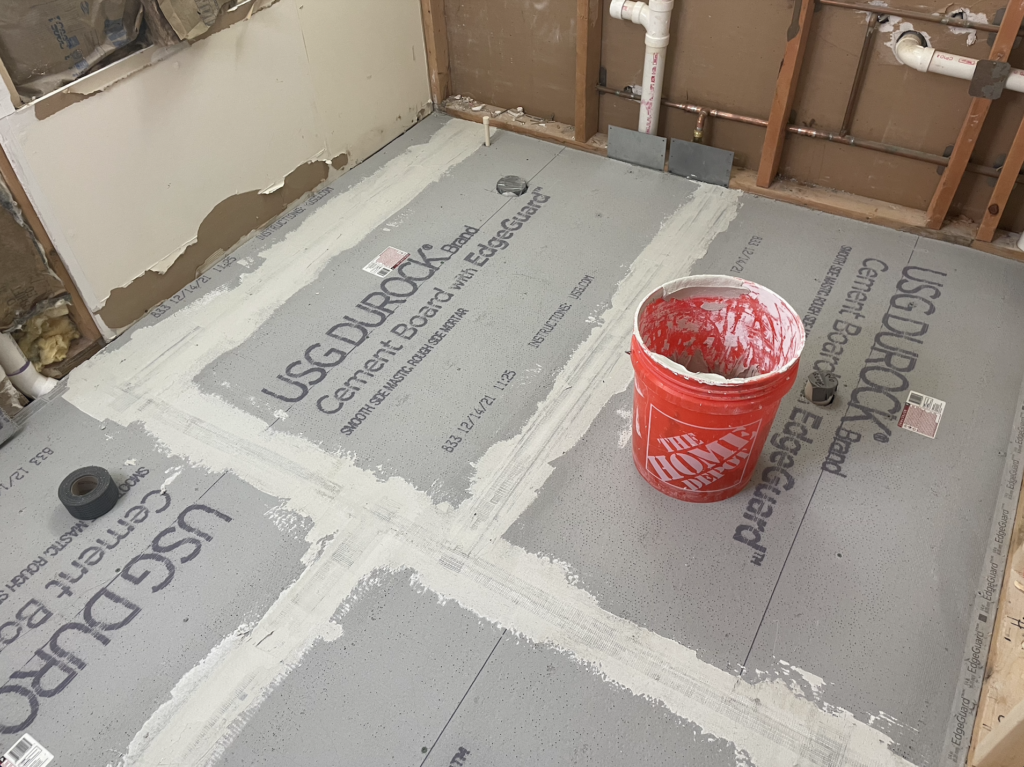
Following the instructions on the packaging, mix your mortar with water until you get a thick, smooth like peanut butta consistency. You’re not going to need a ton for this job so don’t make as much as if you were actually doing the tiling.
Spread a VERY thin layer over all of your seams until everything is covered. Wait for it to dry and then you’re done!
In the grand scheme of projects, this certainly wasn’t the sexiest, but I’m glad I was able to install cement board and cross it off the list. It was definitely necessary to and will keep our floors protected under the future tile.
Speaking of which, all we need to do is add the leveler and then tile will be the next floor project on the list. What color tile do you think we should choose?


Leave a Reply