Our How-To Home

  • How-To
  • DIY
  • Lifestyle
    • Recipes
    • Kristen’s Book Club
  • Blog
    • Home Updates

Explore

  • How-To
  • DIY
  • Lifestyle
  • Blog
  • About Us
  • Ask Us Anything
  • Kristen’s Book Club

Connect

You are here: Home / How-To / Easily Demo your Floors: Pulling up Carpet

How-To · June 10, 2021

Easily Demo your Floors: Pulling up Carpet

We did it! We’re finally at Part 3 of our How to Demo Floors series. I’m so glad I saved pulling up carpet for last because honestly, I’m exhausted! This is by far the easiest of the three floor types and can be done pretty quickly. 

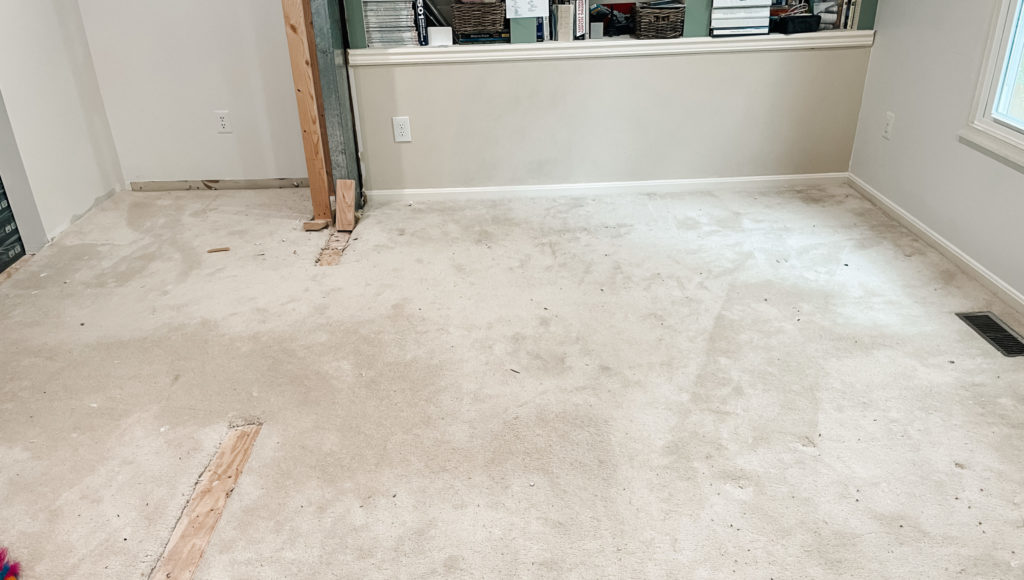
Carpet makes up about 50% of our first floor and is in the Dining Room, old Office and new Office spaces and I’m so grateful because I just want this demo to be FINISHED. There are also a ton of holes in the carpet from where we’ve moved walls and vents. Having one cohesive floor across the entire first floor is going to be such a big upgrade! 

See how it went on my channel or scroll down to do it yourself!

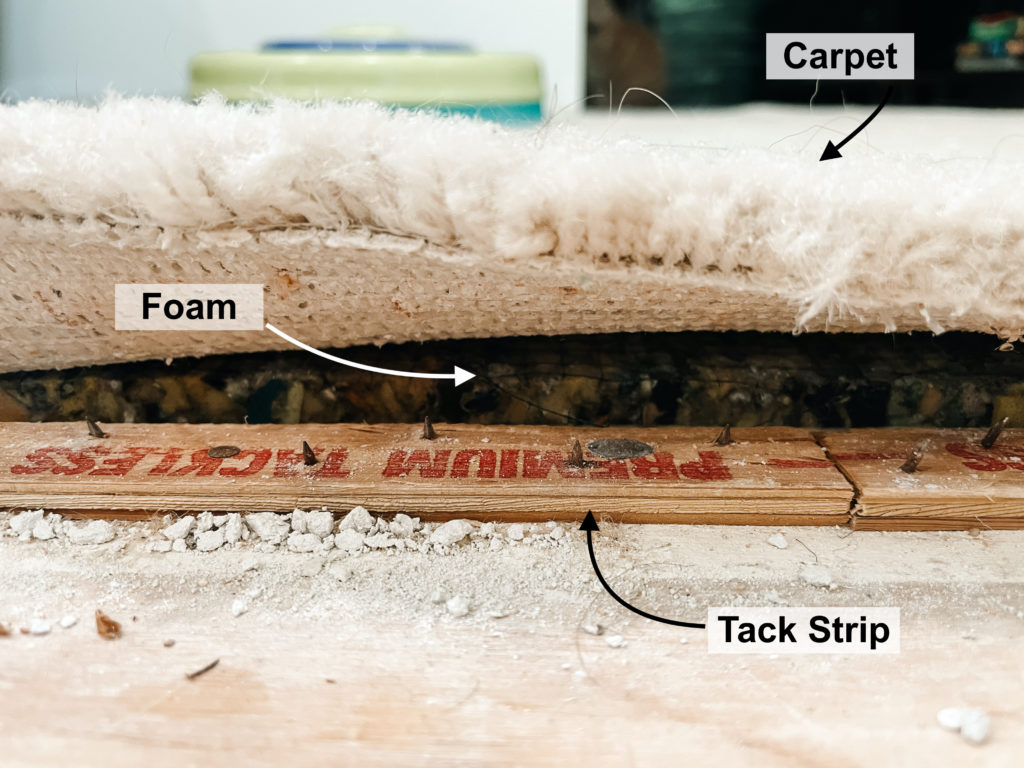
It all went pretty straight forward. The carpet has two layers to it. The carpet itself and then a foam cushion underneath. There is also a tack strip that runs along the outline of the room that helps to hold the carpet in place. Be carful when working with tack strip! It is lined with very sharp grips to hold the carpet in place and can be very painful if you’re not paying attention. Alway wear construction gloves if you have them. 


What do tools do you need for pulling up carpet?
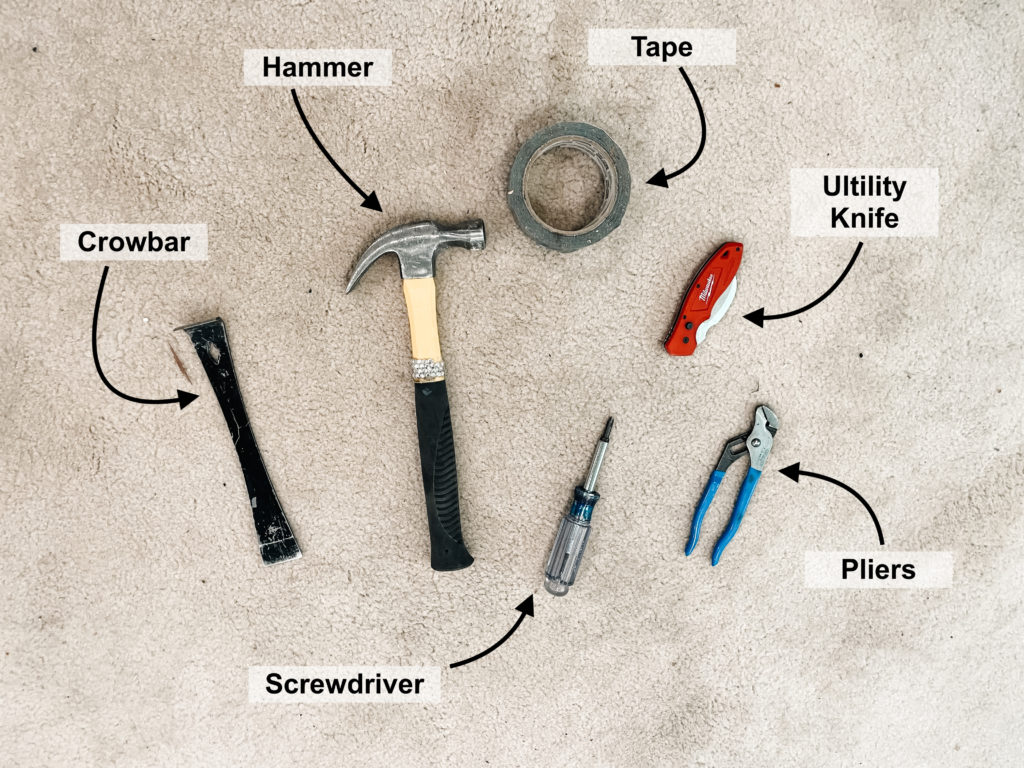
You’ll need:
  • A utility knife
  • A crowbar
  • A hammer
  • Duct Tape
  • A screwdriver
  • Pliers to pull up the leftover staples


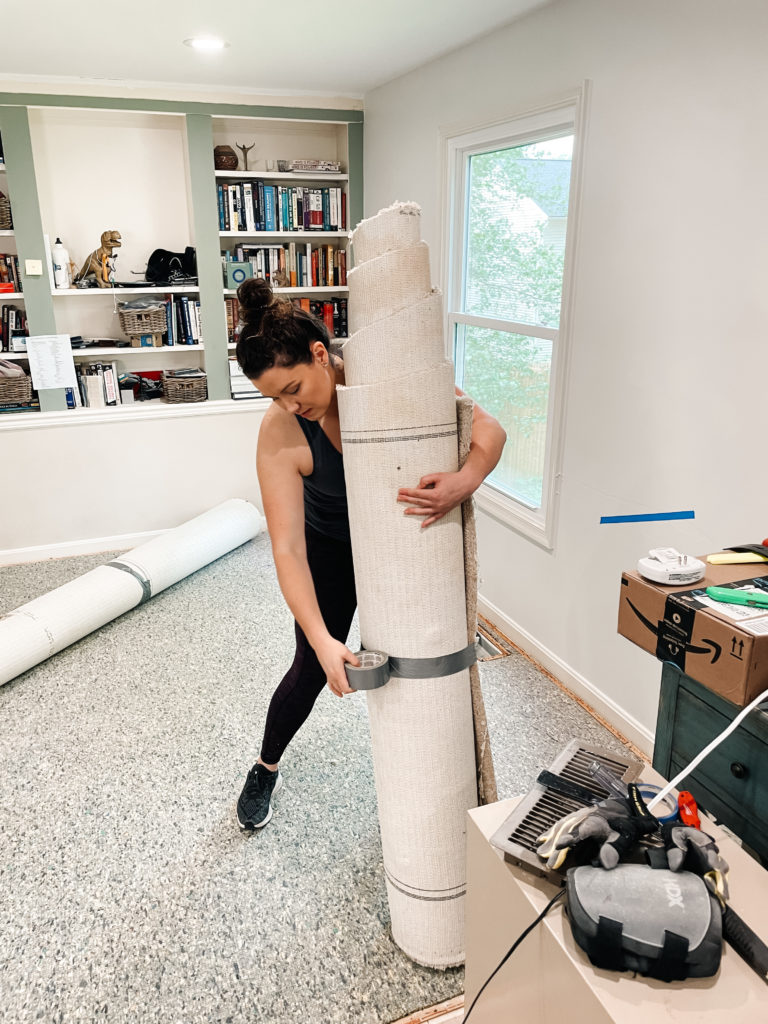
One of the biggest challenges with this project was always going to be successfully rolling up the carpet and getting it out to the garage without making a fool out of myself.

So, using my utility knife, I cut the carpet into large rectangles. As long as your knife is sharp this should be pretty simple. I have used duller knives in the past and it was a little bit messier (more so because the carpet fibers get everywhere). Then I rolled the carpet up and duct taped the rolls to make it more manageable to carry out.


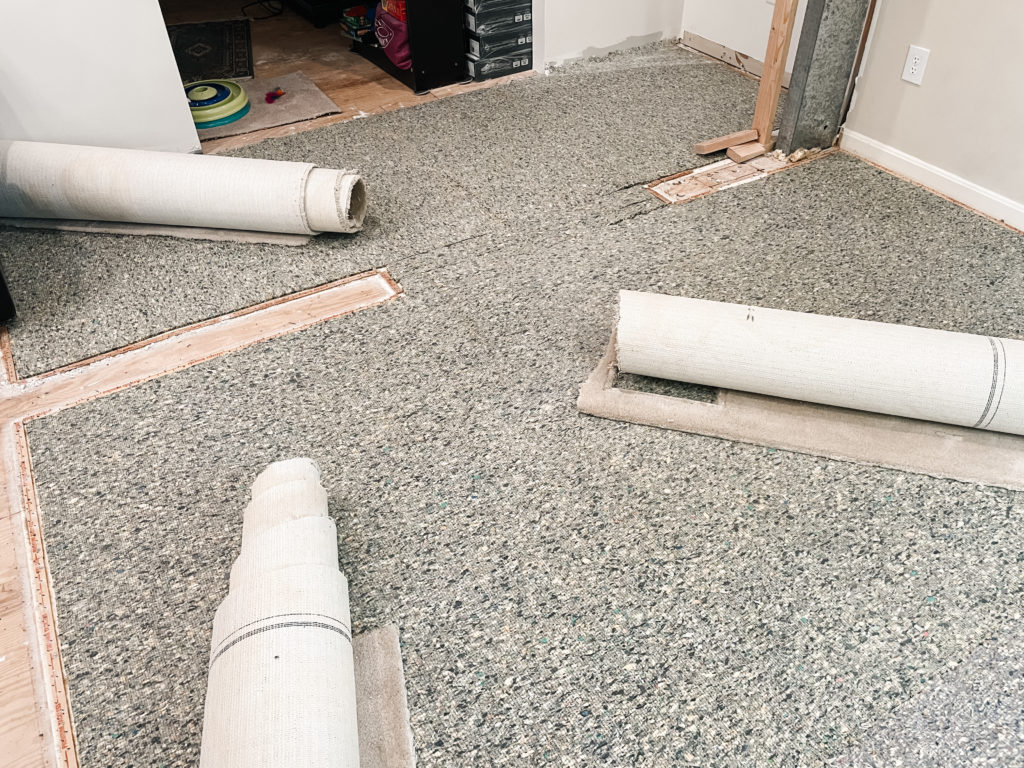
Once the carpet is up, this foam layer comes up really easily. The only thing attaching the foam to the subfloor are staples. I started by just worrying about getting the foam out and coming back for the staples later.

The foam layer is thin so you can simply just fold it like you would a giant towel to get rid of it.


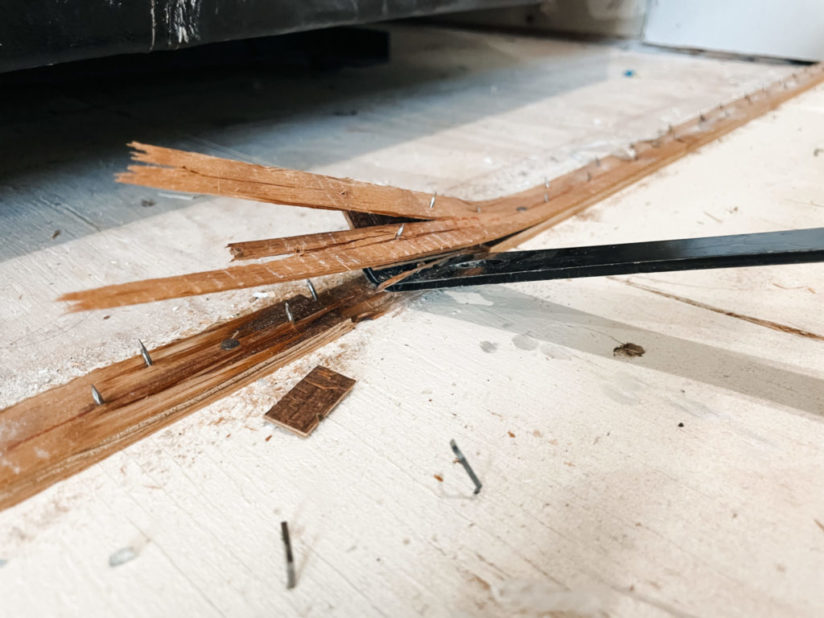
Then I removed to the tack strip.

Tack strip is basically just a thin piece of wood that outlines the room. It’s nailed into the subfloor and has tiny little pokers (tacks) that stick straight up to hold on to the carpet and keep it in place.

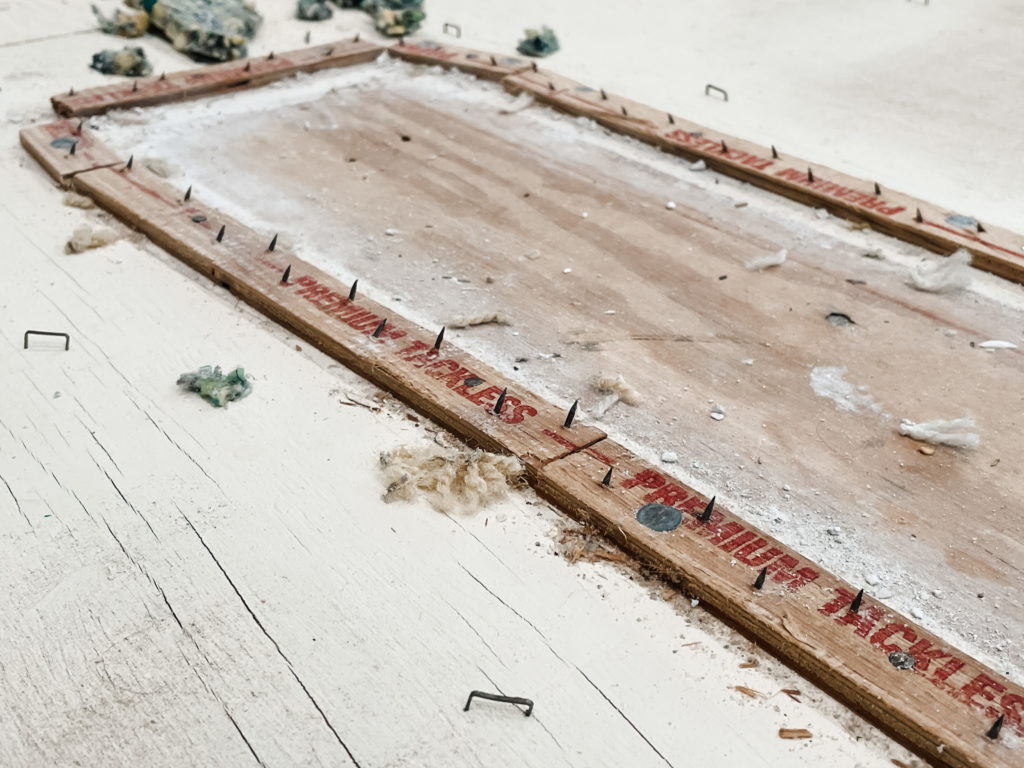
This is honestly a pain in the butt. I’m not sure if it’s just the particular strips used in this house because it’s old or if this is just how this stuff works, but it can be very finicky. What I learned was that the best way to pop it them up is to find the nails and wedge your crowbar in right where it’s nailed down.

I learned this the hard way by starting wherever I felt like for the first 20 minutes and absolutely shredding tack strip. It was a disaster. It wasn’t until Kevin mentioned it that I tried it at the nail. Learn from my mistakes!


How to Demo your Floors: Pulling up Carpet

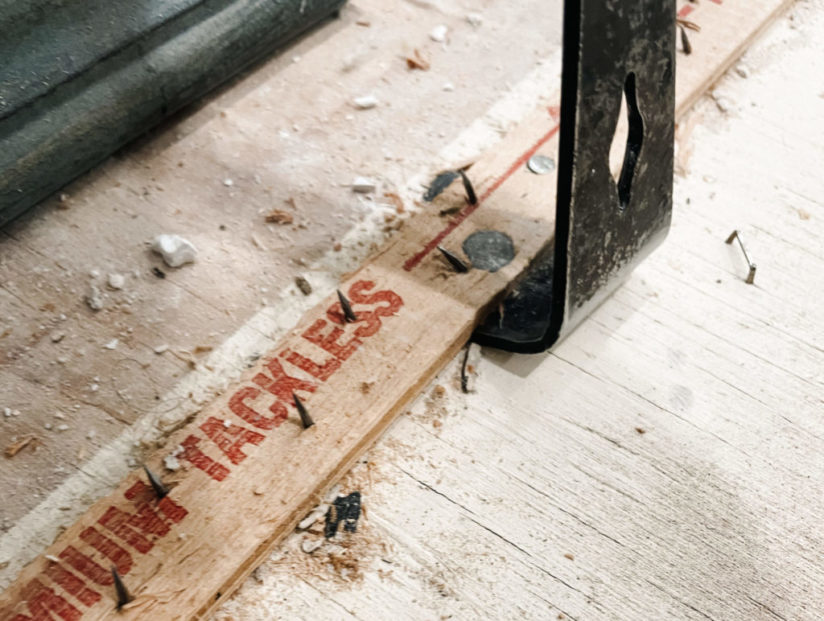
To finish off I popped out the leftover staples. They’re easy to find because they typically have these massive chunks of the foam layer attached to them. I guess in theory you could hammer them into the wood, but as you could see a lot of them were bent and twisted. So, I took a flat head screwdriver and popped them out. For those that got stuck, I just used my pliers to pull them the rest of the way out. You’ll want to make sure you get all of the staples out, especially if you are installing hardwood or tile in it’s place. The surface will need to be completely smooth ahead of your install. 

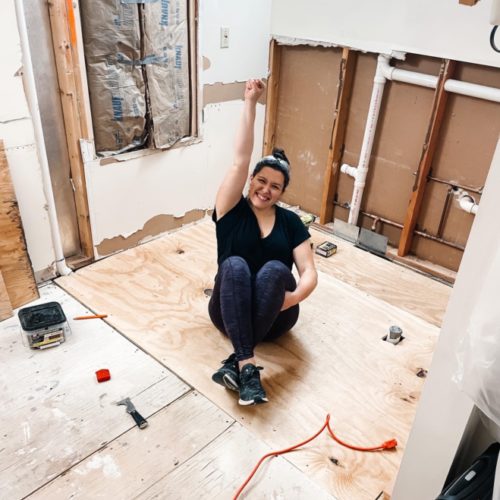
That’s it! Pulling up carpet is complete! 

Thanks so much for joining me on this floor demo journey. I don’t know about you guys, but I’m ready for some wine. A LOT of wine.  Overall, demoing our first floor myself saved us thousands of dollars. It was definitely worth it, but it was hard work! I think I’m going to take a break from hard labor and let the hardwood installers do their magic next week.

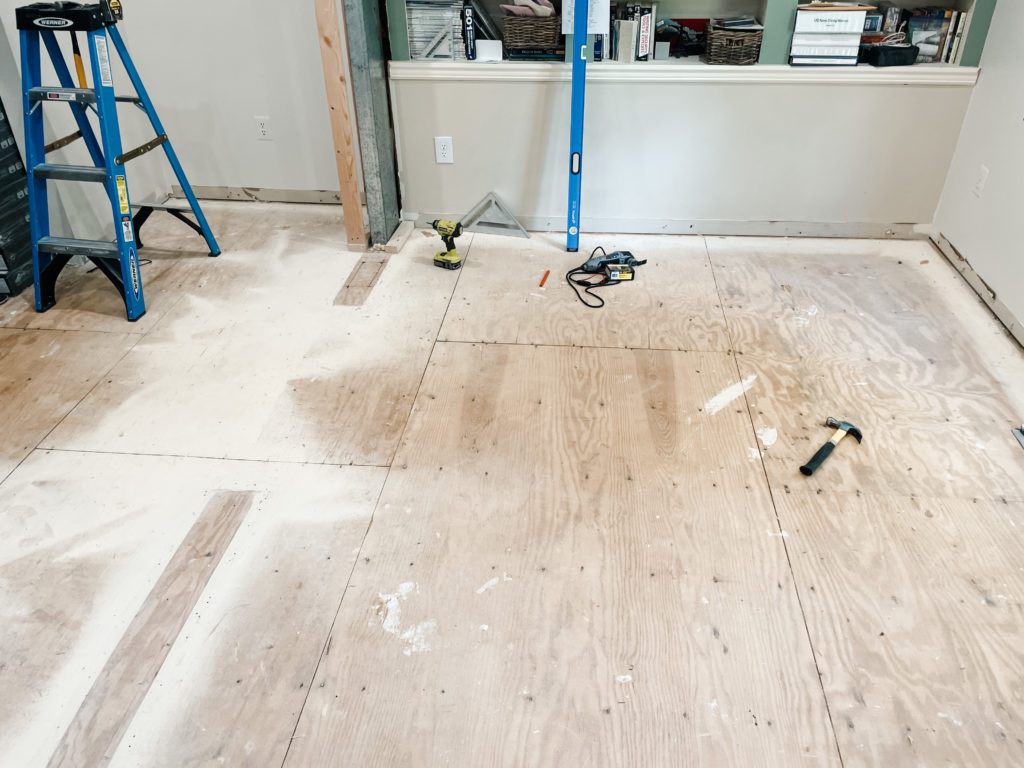
After living with the walls down for almost a year now, I can’t tell you how excited we are to have all one floor that’s one material, one level, and one color!

Stay tuned — new hardwood floors are coming in hot!
Update: Are you as excited to see as we are? Check out our updated flooring here!

Posted By: Kristen · In: How-To

We’re Installing a Window! – Giving New Light To Our Kitchen
Recipe for Homemade Croutons – The Best Hack for Leftover Bread

You’ll Also Love

Easily Install Cement Board to Prep for Tile Installation
Check Out These Easy Tricks to Install a Subfloor
Make a Doorway in an Existing Wall

Leave a Reply Cancel reply

Your email address will not be published. Required fields are marked *

Trending

  • Want a Black Interior Front Door? How New Trim And Paint Change Everything
  • Make Your Own Welcome Mat
  • Our Beautiful Traditional Brick House With Black Windows Remodel
  • This Simple Change Made Our Kitchen Island Look Super Custom
  • Christmas Garland with eucalyptus and pine cones
    This is How to Make Christmas Garland Look Expensive

Categories

  • Blog
  • DIY
  • How-To
  • Lifestyle
    • Kristen’s Book Club

More You’ll Love

Kitchen Update: Before And Demo Pictures Of The Kitchen Chaos

Kitchen Update: Before And Demo Pictures Of The Kitchen Chaos

Easy DIY Clay Vase – Using Paint & Baking Soda!

Easy DIY Clay Vase – Using Paint & Baking Soda!

Make Your Own Welcome Mat

Make Your Own Welcome Mat

ourhowtohome

Flip a dining set I thought … how hard could it Flip a dining set I thought … how hard could it be?! When you’re a type A perfectionist that needs to execute to your exact vision and have a 4 month old needing you all the time, apparently very hard. 

But man is she pretty. 

My margins on this are basically nonexistent with all of the mistakes (cough:: learning opportunities) I had a long the way but I’m proud of that it came out exactly as I envisioned. Now the big question: how much do you think I can sell it for?

#furnitureflip #tabledesign #upcycle #refurb #kitcheninspiration #dininginstyle #diningroom #reelit #furnituremakeover #reelsofinstagram #kitchentable #upcycledfurniture
We’re coming up to the end of the furniture flip We’re coming up to the end of the furniture flip that I thought was going to take 2 weeks and actually took 2 months. It was been quite a journey to get here but I’m so happy with how it’s looking! 

#furnitureflip #kitchentable #naturalwood #wecandohardthings #diningroomdecor #kitchendecor #diningtable #furnituremakeover #trusttheprocess #furnitureflipper #reelsinstagram #facebookmarketplace
Scarlett Annette Mangold ♥️ You are so so lov Scarlett Annette Mangold ♥️ 
You are so so loved baby girl.
One view of this nursery just isn’t enough😍 One view of this nursery just isn’t enough😍

We’re days away from meeting our little girl and if she’s anything like her parents we’re in big trouble! 

At least the room is cute. 

#nursery #babygirl #nurserydecor #nurseryinspo #nurserydesign #safaribaby #safaritheme #littlegirlsroom #38weekspregnant #whitefurniture #refurbishedfurniture #refinishedfurniture #diyhomedecor #diyprojects #housetohome
We’re so ready for you baby girl! When we starte We’re so ready for you baby girl! When we started working in the nursery there was not a chance I thought it would be totally ready in time. Close? Sure. But finished? No way. 

We are so lucky to have so many people help us along the way (and for getting so many great deals on marketplace to bring this room together!) 

Now all we need is a little girl to use it!

#nursery #nurserydecor #nurseryinspo #babygirl #babygirlnursery #safari #animalnursery #facebookmarketplace #refurbished #38weekspregnant #nurseryideas #babygirlroom #homedesign #bedroomdesign #changingstation #safaribaby
Bookshelves for the nursery are FINISHED!! Can yo Bookshelves for the nursery are FINISHED!!

Can you believe this was all done with scrap wood that we had in the garage? 

For our baby shower we asked guests to bring a book in lieu of a card and im obsessed. We have the perfect amount of new stories to fill our shelves and a million memories to make in this cozy nook. 

#booknook #bookshelves #bookshelvesofinstagram #childrensbooks #nursery #nurserydecor #nurseryinspo #scrapwood #scrapwoodproject #reelsinstagram #memoriesforlife #snuggletime #cozynook #reelsvideo #nurseryroom #nurseryinspiration #childrensroom #reelsviral #childrensroominspo
What a year it’s been! I feel like we’ve don What a year it’s been! 

I feel like we’ve done so much work to the house this year but when it’s almost all in one room, I’m realizing it doesn’t always look like it. 

With the nursery almost ready to go and baby girl coming any day, we can only begin to imagine the great things 2023 is going to have in store for us! 

Happy New Year everyone!

Thanks for sticking around and being a part of our story 💜

#newyearseve #2022recap #2022wrapped #homeprojects #2023 #happynewyear #housetoahome #primarybathroom #livingroom #homedecor #renovation #newyear #recap2022 #reelsofinstagram😍 #reelsvideo #homesweethome #homedesign #nursery #boardandbatten
Follow on Instagram
  • Privacy Policy

Copyright © 2025 Our How-To Home · Theme by 17th Avenue