Our How-To Home

  • How-To
  • DIY
  • Lifestyle
    • Recipes
    • Kristen’s Book Club
  • Blog
    • Home Updates

Explore

  • How-To
  • DIY
  • Lifestyle
  • Blog
  • About Us
  • Ask Us Anything
  • Kristen’s Book Club

Connect

You are here: Home / DIY / Quickly Make Your Own Chic DIY Hanging Planter

DIY · August 25, 2021

Quickly Make Your Own Chic DIY Hanging Planter

Have you ever imagined something in your head but can’t find it in any store? I feel that way ALL. THE. TIME. To the point where it’s actually really annoying. In this case, all I wanted was a simple black hanging planter for our kitchen. Everywhere I looked they were either too complicated, too expensive or you could only buy multiples for more money. I got to the point where I just decided I CAN MAKE THIS MYSELF. This is how you too can make your own DIY hanging planter.

What you’ll need for this projectDIY hanging planter
  • A pot/bowl made out of heavy plastic or metal
  • Drill with a large bit
  • Chain
  • A hook set with anchor
  • Pliers
  • Plant of choice
Optional*
  • Saw
  • Spray paint
  • 80 grit sand paper

*because you’re particular like me

Let me start by saying I made this more complicated for myself than I needed to. I reeeeaaalllyy struggled to find a pot that I liked. When I finally did, it was entirely too tall and it wasn’t the right color. My plan quickly became: cut down the pot, spray paint it the color I want and make that pot!

The first step was deciding on the height that I wanted for this planter, taking a saw and cutting it down to size. This was totally my choice and did not need to be done. The pot is made out of a heavy duty plastic so I should have anticipated that the edges would end up super jagged using the hand saw, but here we are. I used the sand paper to clean up my “work”, but had to be very gentle so not to scratch the plastic finish.DIY hanging planter

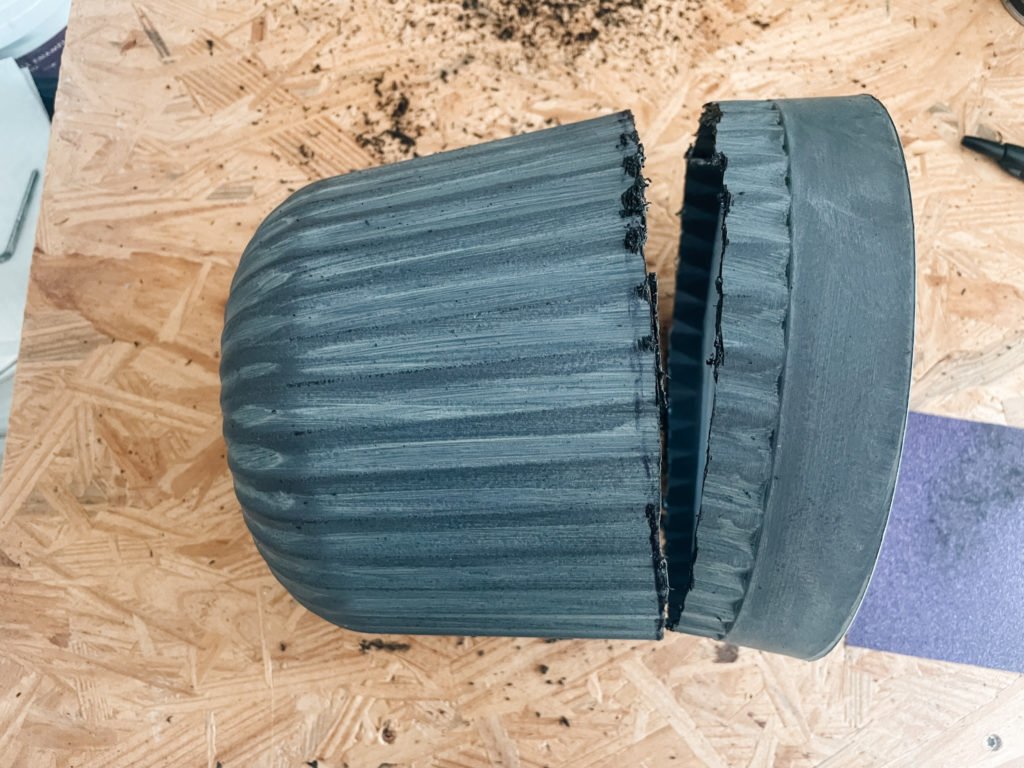
Once the pot was prepped, I took my drill and poked three holes through the pot which would become my hooks. Because the pot was made of plastic, it was easy-ish to drill the hole once it gets going, but the plastic is also bendable which made getting started really challenging.

We fixed this by using our makeshift plywood table as a base for pressure.DIY hanging planter

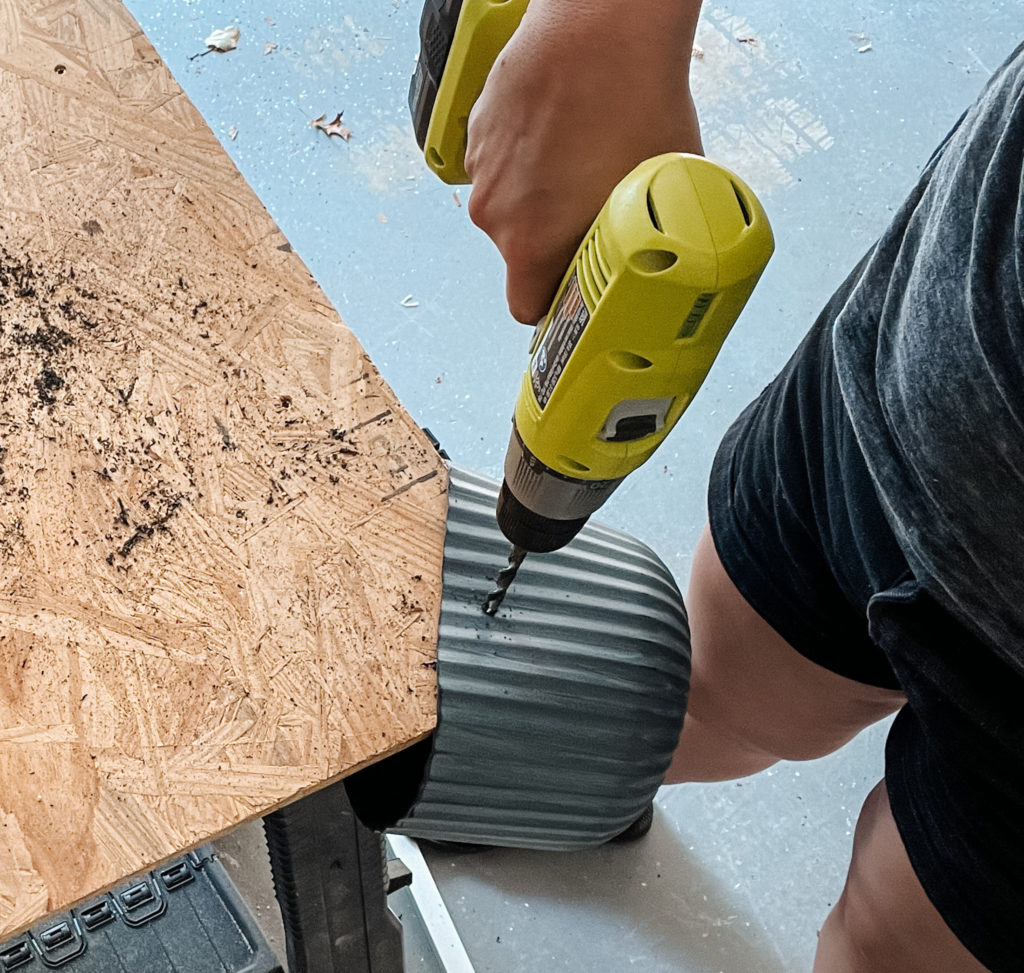
The holes need to be wide enough for the chain link to fit through so once the initial holes were made, I just used the bit to widen the hole by running the bit in a circular motion wearing down the sides until I got to the desired size.

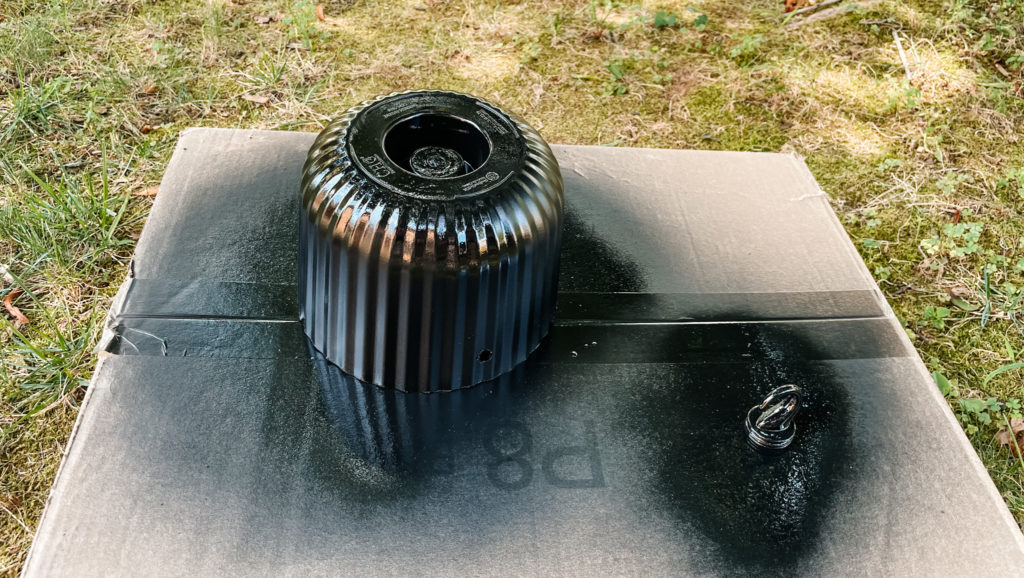
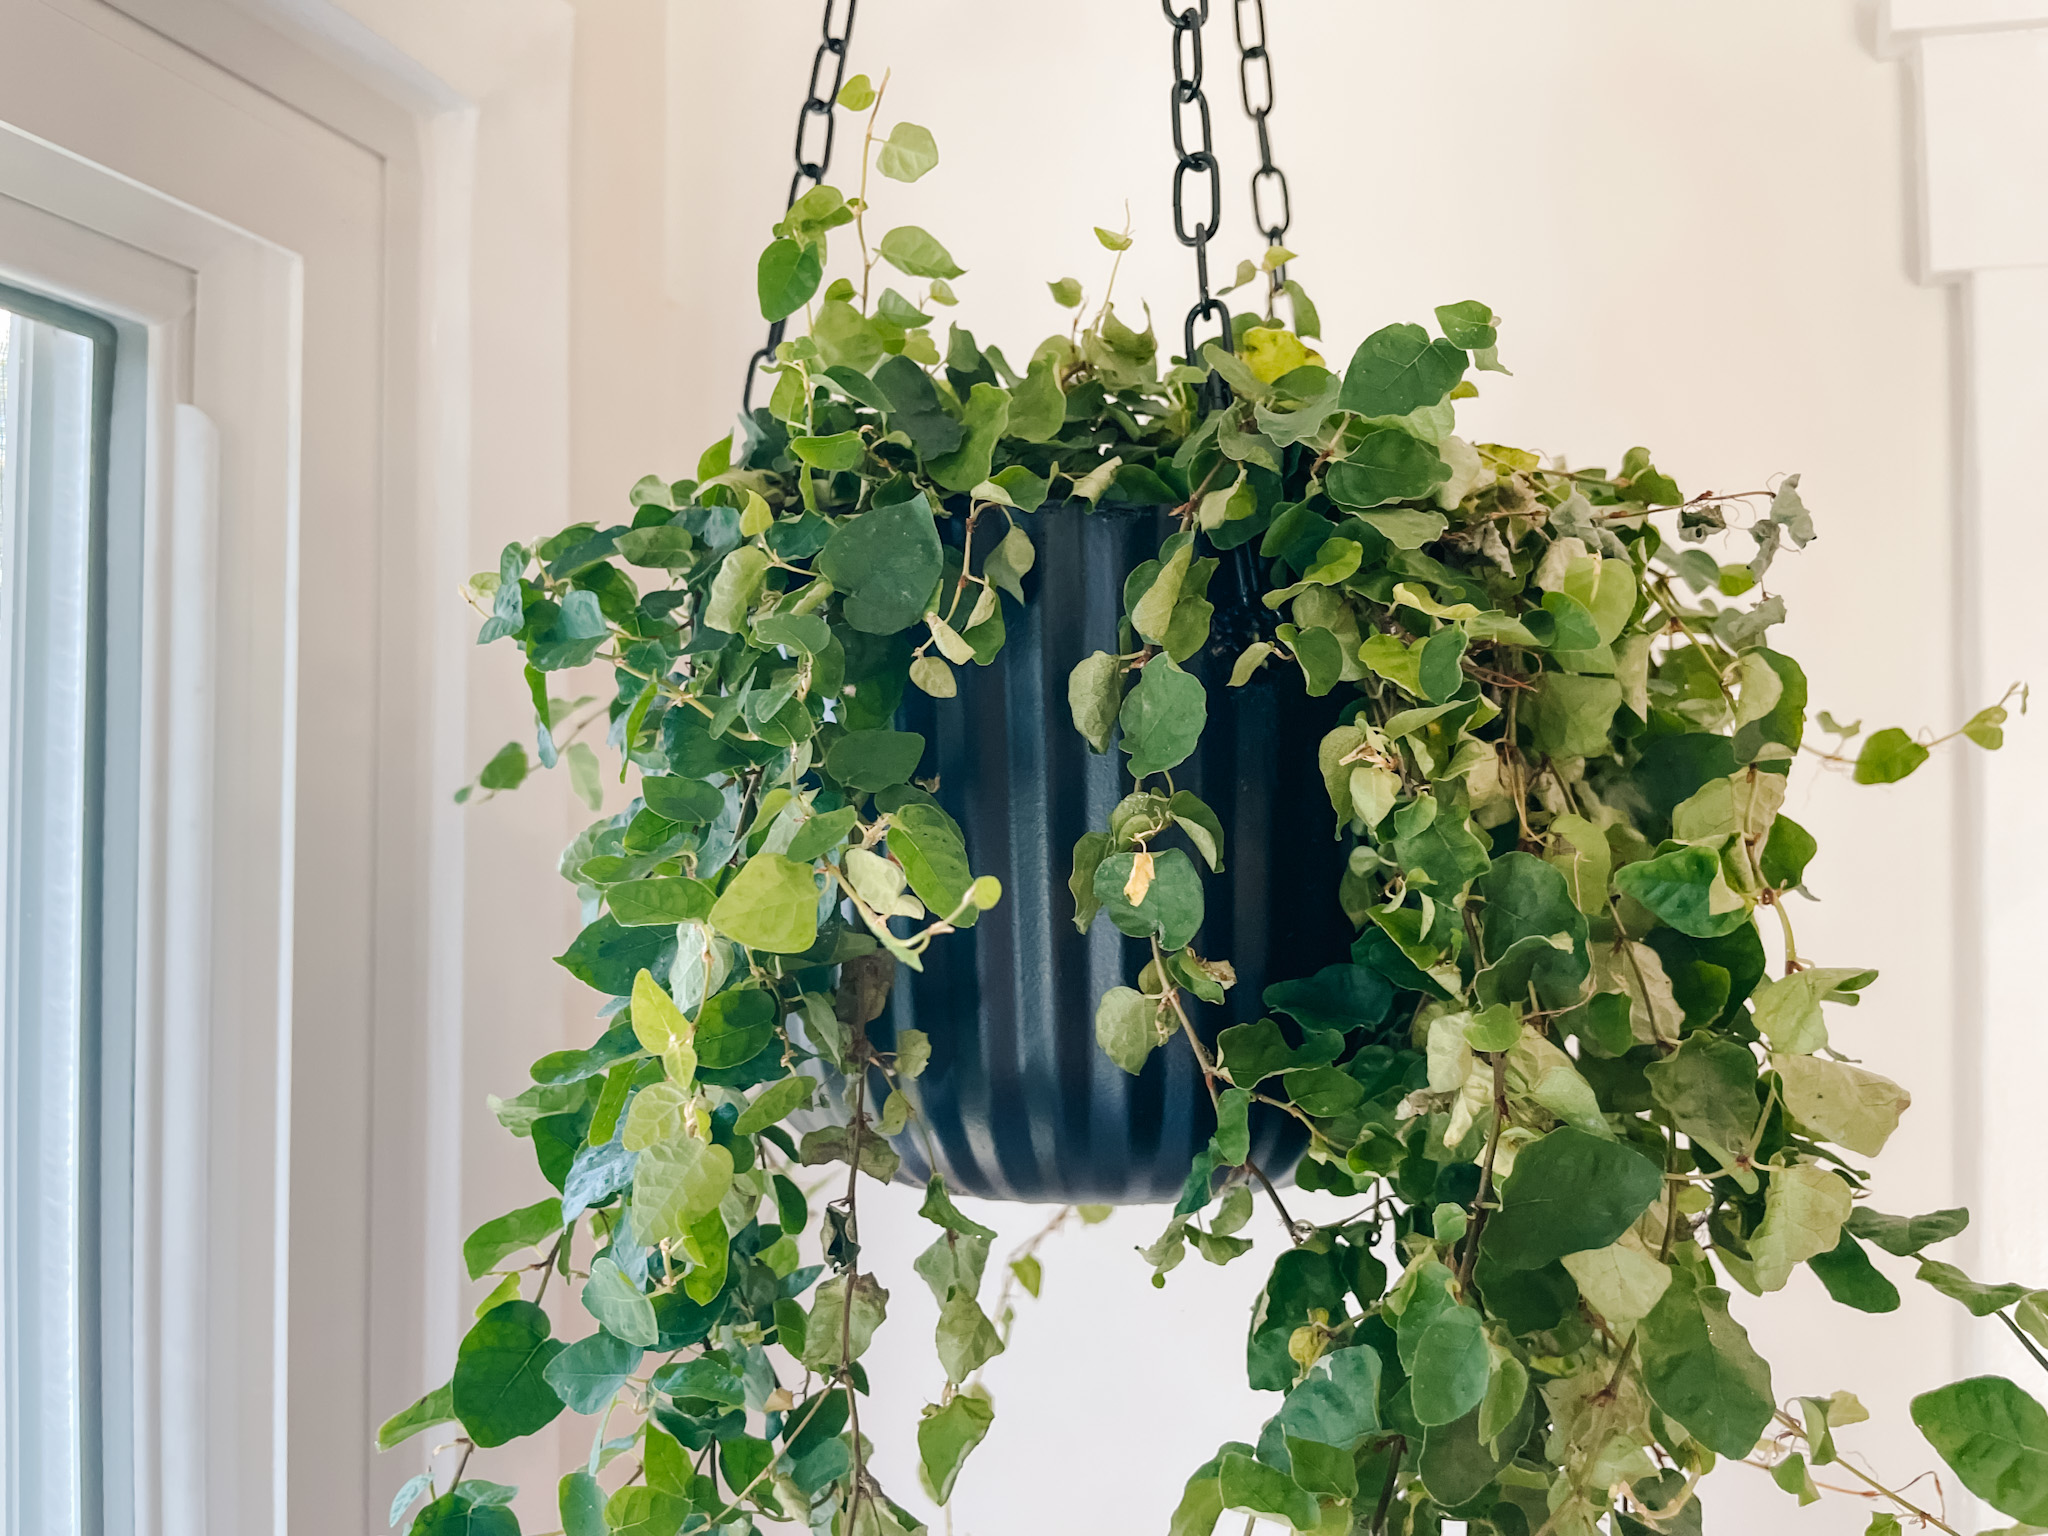
The pot was pretty much good to go after that and ready for paint. I used a matte black and sprayed in light layers until the whole pot was covered. I also painted the ceiling hook black so the whole thing look would blend together.

The inside of my pot was already black, but if it wasn’t, I would have also painted the top rim of the inside that you didn’t see that above the dirt line. 


DIY hanging planter


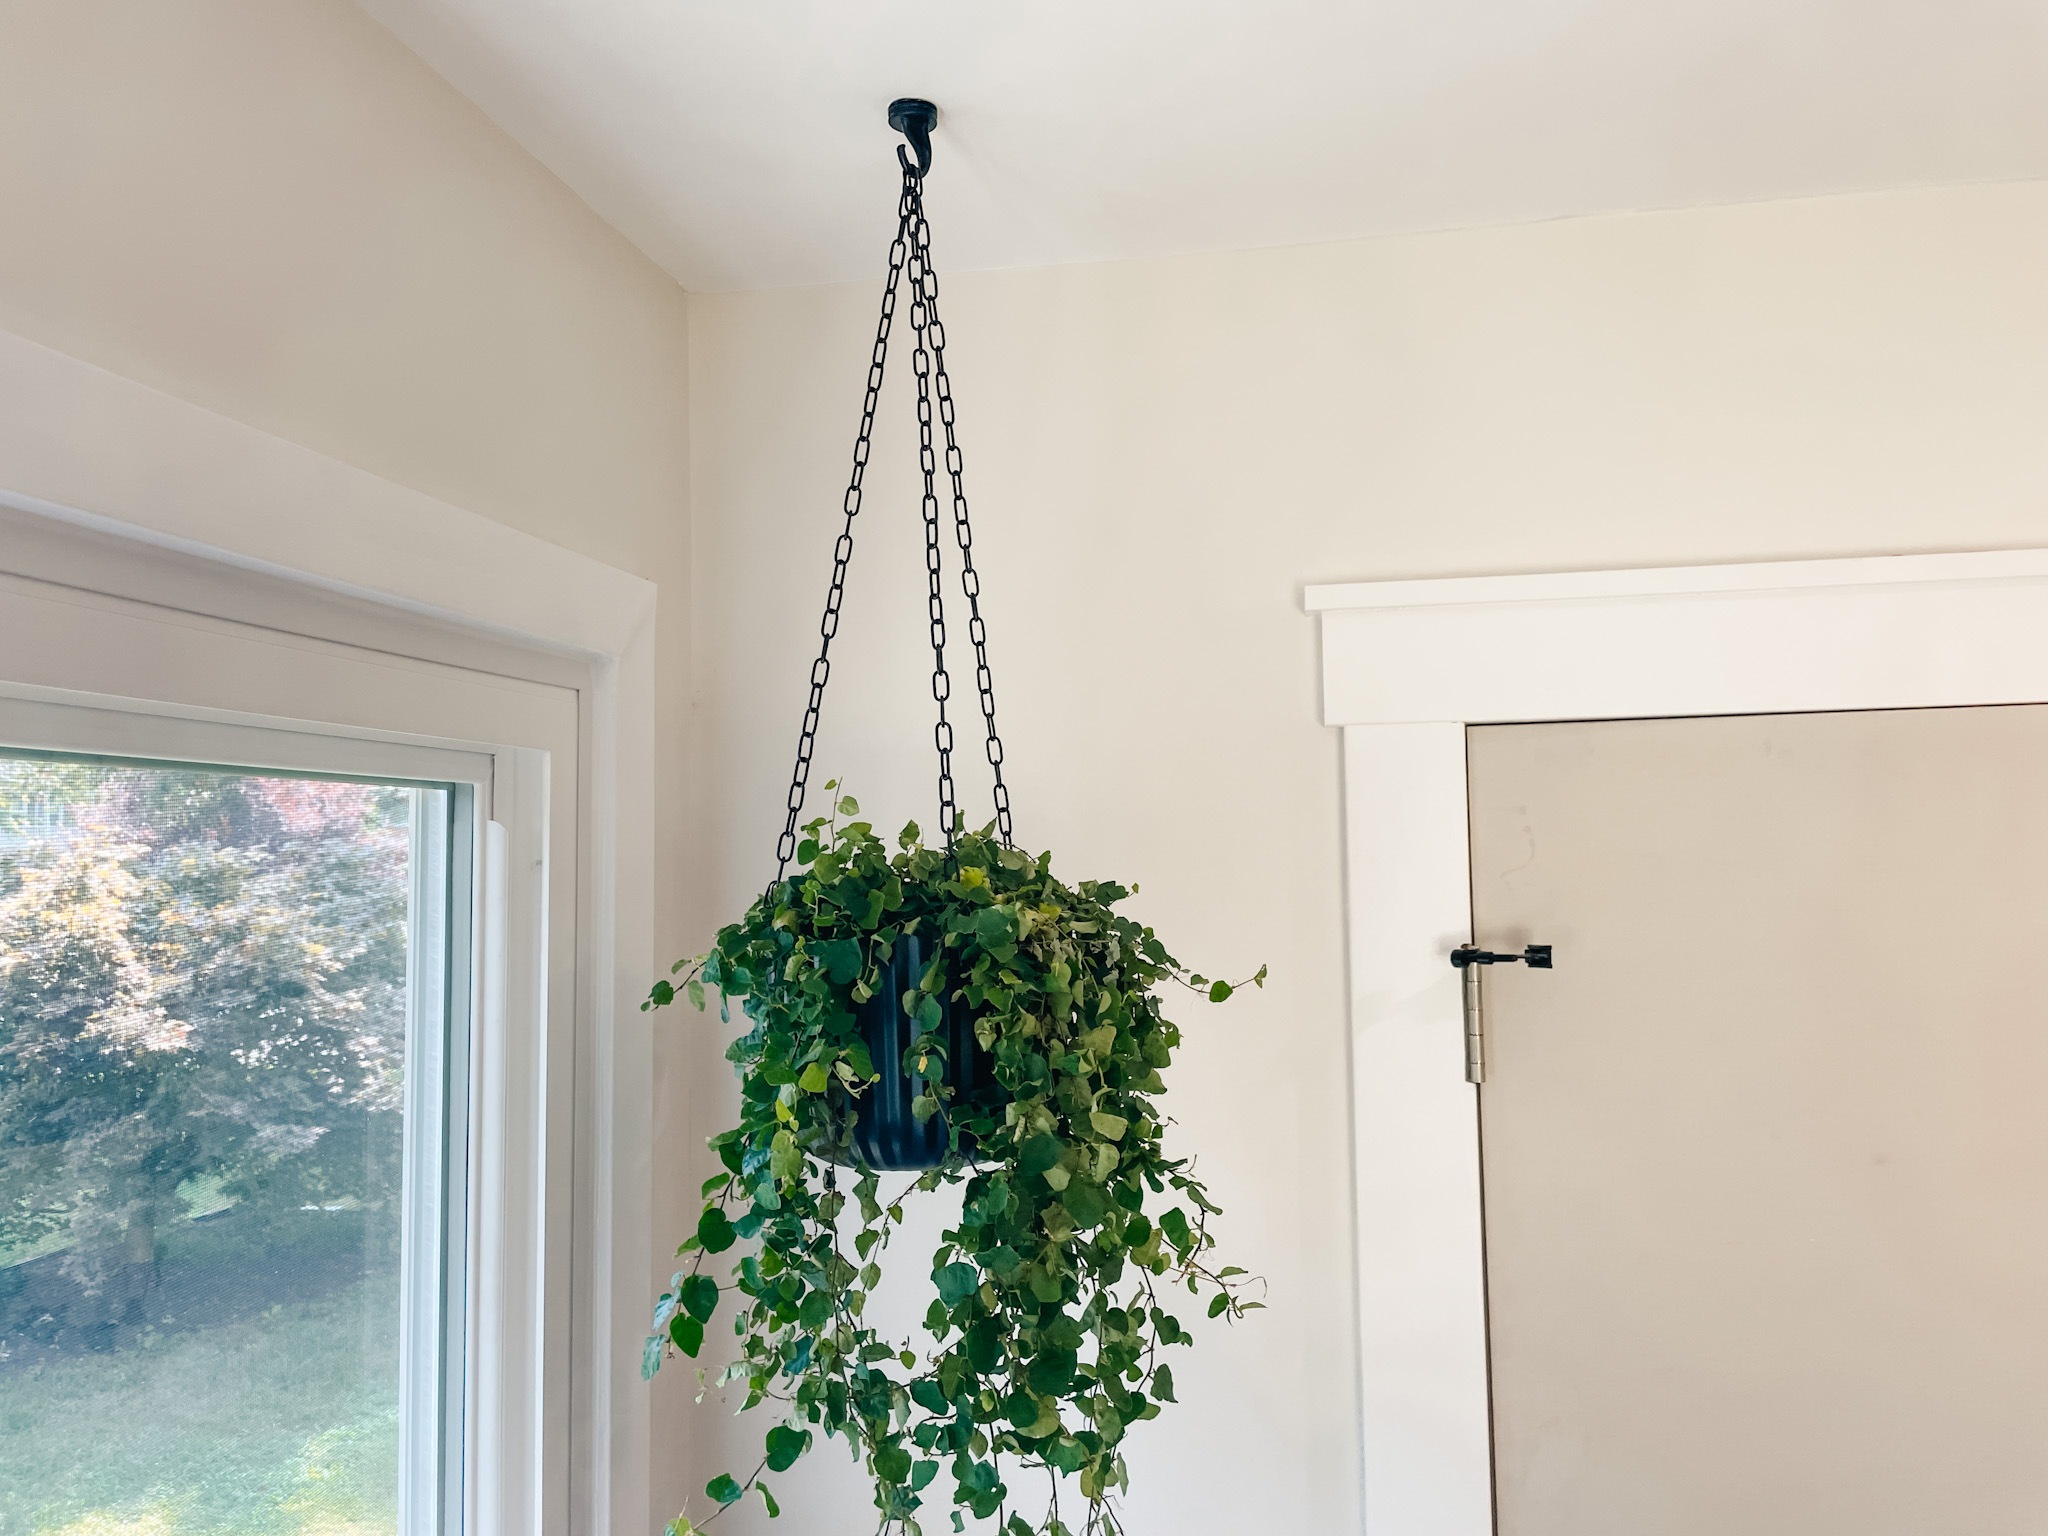
While the paint was drying, I broke down the chain into 3 equal lengths. You can get chain from any hardware store. It comes in bulk so you can get any size you want and even cut it at the store if that is easier for you.

Once the pot was dry (which took longer than I had hoped, but I didn’t want to scratch the pot with the chain) I started the assembly.  

Actually assembling the DIY hanging planter

You can keep this as simple or as complicated as you want, but I went with simple.

DIY hanging planter

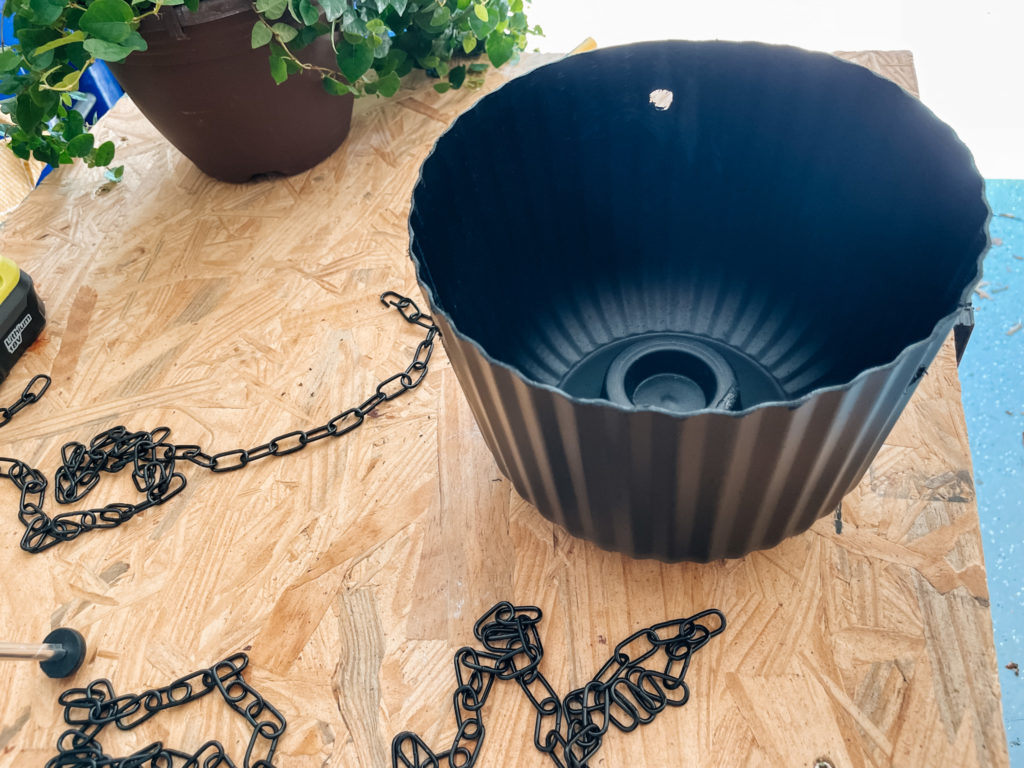
After putting the chain through the hole, I pried one of the chain links apart and then used it to secure the chain to itself.

As an alternative, we also looked at options using a hook to attach the chain to the pot. This was actually my first choice, but I couldn’t find a hook that was the correct look and size in our local hardware store. 

Put a plant in her because she’s done!

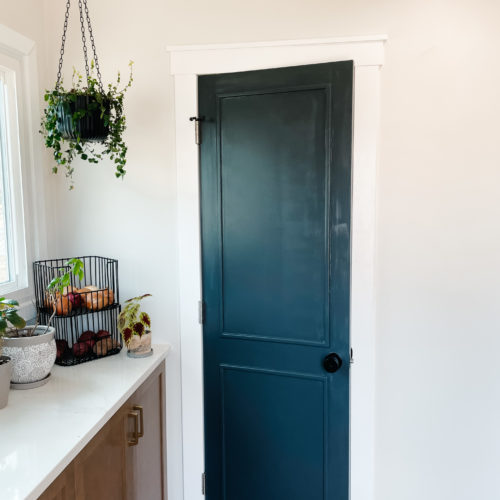
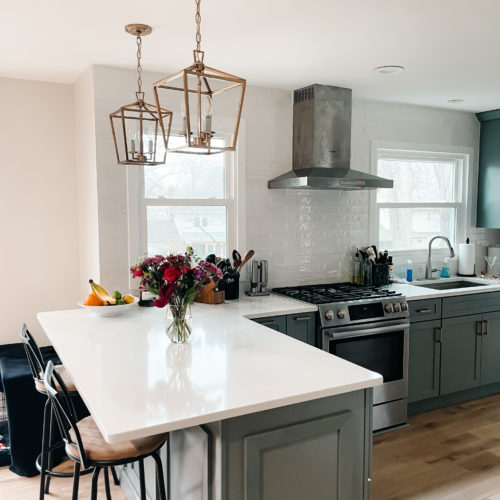
Just kidding. We actually did a dry fit first to check the height and cut the chains down to the proper size. THEN I planted our new plant baby and took her for a test drive in the kitchen. I think it turned out great! It’s simple and elegant and gives the corner some much needed color!

Take Away: The only change I would make to this DIY hanging planter is that I think I put too much dirt in the hole because now when I water it the plant, the water pours right out of the holes! For now I’m just taking the plant down and watering it in the sink, but eventually I’ll probably have to deal with the dirt!

UPDATE: After a few months of taking the plant down to water it, I realized that the water wasn’t draining out the holes like it originally did. The dirt must have eventually compacted and settled a bit more into the planter. As of now, I am no longer taking the plan down to water it. 

Posted By: Kristen · In: DIY

Get the Room: Details & Links – The Powder Room
Want a Black Interior Front Door? How New Trim And Paint Change Everything

You’ll Also Love

black door with decorative trim and white craftsman moldingChange your Home’s Whole Look with Simple Custom Door Trim
kitchen with sage cabinets, white tile backsplash and brushed silver appliancesEasy to Follow Instructions for Installing a Backsplash in the Kitchen
kitchen with sage cabinets, white quartz, brushed silver bosch appliances and gold hardwareGet the Room: Details & Links – The Kitchen

Leave a Reply Cancel reply

Your email address will not be published. Required fields are marked *

Recipe Rating


Trending

  • Want a Black Interior Front Door? How New Trim And Paint Change Everything
  • Our Beautiful Traditional Brick House With Black Windows Remodel
  • Mini Chicken and Waffles – The Ultimate Brunch Appetizer!
  • Glass Barn Doors Gave Our Office A Stunning Modern Look
  • Gray, black and gold powder bathroom
    Get the Room: Details & Links – The Powder Room

Categories

  • Blog
  • DIY
  • How-To
  • Lifestyle
    • Kristen’s Book Club

More You’ll Love

DIY Black Metal Sliding Doors: This Update Is So Easy!

DIY Black Metal Sliding Doors: This Update Is So Easy!

Sparkling Bourbon Cider – An Excellent Fall Cocktail

Sparkling Bourbon Cider – An Excellent Fall Cocktail

11 Ways to Get the Most Out of Your Home Renovation

11 Ways to Get the Most Out of Your Home Renovation

ourhowtohome

Scarlett Annette Mangold ♥️ You are so so lov Scarlett Annette Mangold ♥️ 
You are so so loved baby girl.
One view of this nursery just isn’t enough😍 One view of this nursery just isn’t enough😍

We’re days away from meeting our little girl and if she’s anything like her parents we’re in big trouble! 

At least the room is cute. 

#nursery #babygirl #nurserydecor #nurseryinspo #nurserydesign #safaribaby #safaritheme #littlegirlsroom #38weekspregnant #whitefurniture #refurbishedfurniture #refinishedfurniture #diyhomedecor #diyprojects #housetohome
We’re so ready for you baby girl! When we starte We’re so ready for you baby girl! When we started working in the nursery there was not a chance I thought it would be totally ready in time. Close? Sure. But finished? No way. 

We are so lucky to have so many people help us along the way (and for getting so many great deals on marketplace to bring this room together!) 

Now all we need is a little girl to use it!

#nursery #nurserydecor #nurseryinspo #babygirl #babygirlnursery #safari #animalnursery #facebookmarketplace #refurbished #38weekspregnant #nurseryideas #babygirlroom #homedesign #bedroomdesign #changingstation #safaribaby
Bookshelves for the nursery are FINISHED!! Can yo Bookshelves for the nursery are FINISHED!!

Can you believe this was all done with scrap wood that we had in the garage? 

For our baby shower we asked guests to bring a book in lieu of a card and im obsessed. We have the perfect amount of new stories to fill our shelves and a million memories to make in this cozy nook. 

#booknook #bookshelves #bookshelvesofinstagram #childrensbooks #nursery #nurserydecor #nurseryinspo #scrapwood #scrapwoodproject #reelsinstagram #memoriesforlife #snuggletime #cozynook #reelsvideo #nurseryroom #nurseryinspiration #childrensroom #reelsviral #childrensroominspo
What a year it’s been! I feel like we’ve don What a year it’s been! 

I feel like we’ve done so much work to the house this year but when it’s almost all in one room, I’m realizing it doesn’t always look like it. 

With the nursery almost ready to go and baby girl coming any day, we can only begin to imagine the great things 2023 is going to have in store for us! 

Happy New Year everyone!

Thanks for sticking around and being a part of our story 💜

#newyearseve #2022recap #2022wrapped #homeprojects #2023 #happynewyear #housetoahome #primarybathroom #livingroom #homedecor #renovation #newyear #recap2022 #reelsofinstagram😍 #reelsvideo #homesweethome #homedesign #nursery #boardandbatten
GAME CHANGER After years of making gingerbread h GAME CHANGER 

After years of making gingerbread houses and waiting the torturous overnight for the icing to dry we finally asked the question - why are we doing it this way?
 
Hot glue for the win! We saved the icing for decorating and the brownstones we’re ready for decorating immediately. 

Even Kevin who was a skeptical gingerbread traditionalist agrees… we’re never going back!

#nevergoingback #gamechanger #rowhomes #gingerbreadhouse #gingerbread #reelsinstagram #instagood #christmascrafts #christmasdecor #reelinstagram #christmasreels #holidayseason #christmasvibes
When I found this sleigh in the Target dollar sect When I found this sleigh in the Target dollar section, I knew it needed to be part of our holiday decor this year. Only problem? It needed a little something extra- queue for the stain! 

This updated sleigh is so cute and the perfect addition to our mantle. I found this pine cone filler and mini ornaments to complete the look! 

#christmasdecor #sleigh #pinecone #miniornaments #mantledecor #merrychristmas #holidaydecor #holidaycrafts #reelsvideo #merryandbright #stain #sleighride #christmastime #holidayseason #reelforyou #christmasmantel
Load More... Follow on Instagram
  • Privacy Policy

Copyright © 2023 Our How-To Home · Theme by 17th Avenue