Our How-To Home

  • How-To
  • DIY
  • Lifestyle
    • Recipes
    • Kristen’s Book Club
  • Blog
    • Home Updates

Explore

  • How-To
  • DIY
  • Lifestyle
  • Blog
  • About Us
  • Ask Us Anything
  • Kristen’s Book Club

Connect

You are here: Home / How-To / Easily Demo your Floors: Pulling up Vinyl Flooring

How-To · May 28, 2021

Easily Demo your Floors: Pulling up Vinyl Flooring

It’s new floors season! What does that mean? It means we’re finally getting new floors on our first floor!

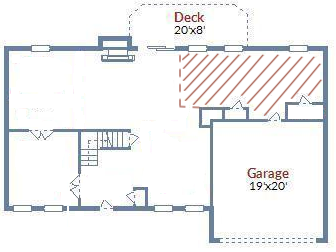
After a year in this house and an obscene amount of demo, we’re going to be pulling up flooring on our entire first floor to prep for the new hard wood floors that will be going in within the next few weeks and we’re starting with pulling up vinyl flooring in our kitchen! We currently have three different types of flooring on this level:

  • Linoleum/Vinyl
  • Hardwood
  • Carpet

These floors currently include our living room, office and dining room (carpet), kitchen & old powder room (linoleum/vinyl) and foyer, family room (hardwood).

So we’re going to do what we do best, show you how to tear them out. In this 3-part series, we’ll pull out each floor and trust me, some are definitely more of a challenge/traumatic than others! (I’m looking at you Hardwoods)

As I mentioned, we’re going to be pulling up vinyl flooring in the kitchen and what used to be the bathroom but is now just more kitchen.

I’m calling it both linoleum and vinyl because the removal is essentially the same for both. You can see we have two different layers of flooring from years past which is totally fine and really doesn’t add any more work to the project.

From the looks of it, there’s definitely vinyl on the top layer, but the middle layer aka the OG flooring is debatable. Just know that whatever you’re trying to tear up, the following instructions apply.

Too long, need a visual? Check out the video below!   
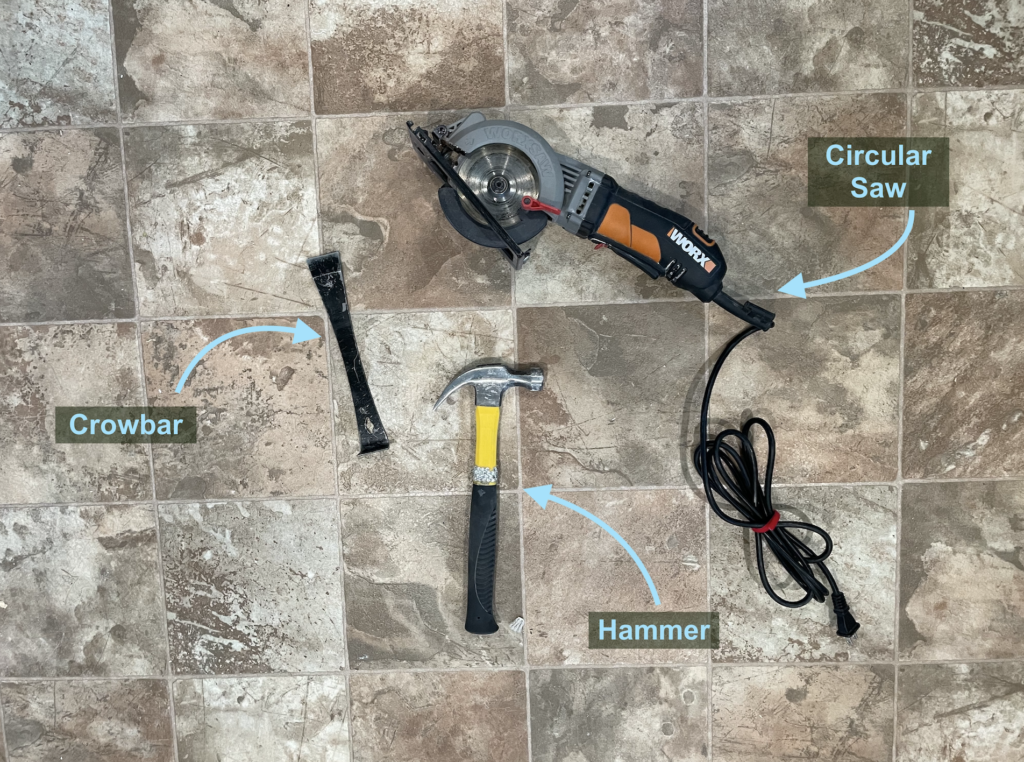
   

What you need:


  • A circular saw
  • Hammer
  • Crowbar


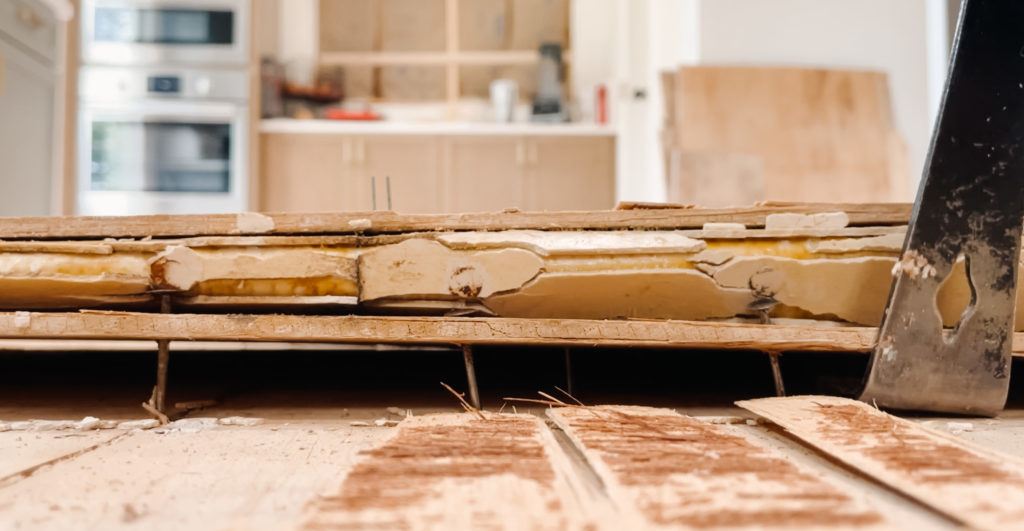
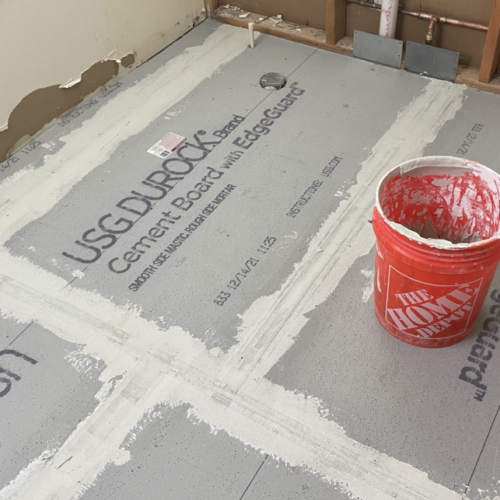
This project is pretty straight forward and has you can see, doesn’t need a lot of tools. The layers on your floor should look like this:

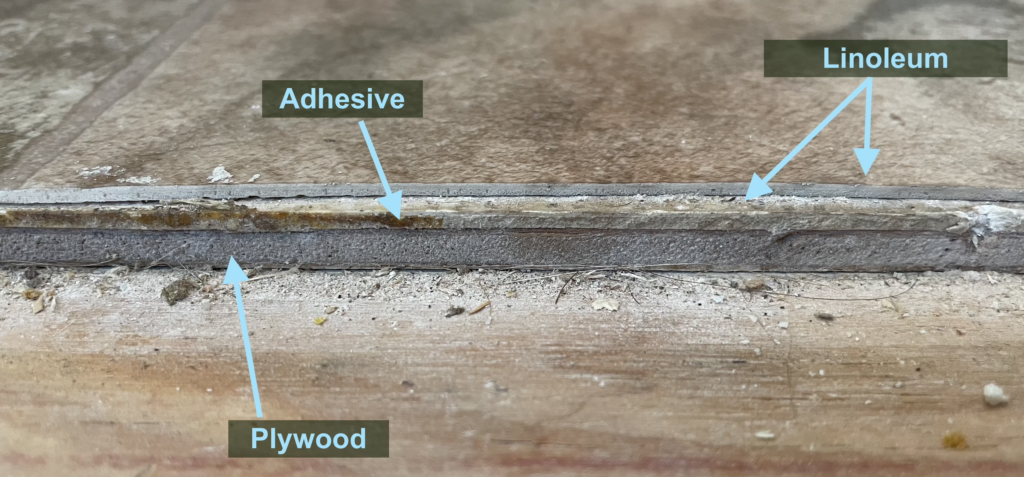
Linoleum/Vinyl, adhesive somewhere in there to hold it together and then a plywood base. This all sits on top of the subfloor.

The game plan for pulling up vinyl flooring: 

So really all we need to do is cut the linoleum/plywood into manageable pieces (more so that I can carry them without yelling for Kevin to help me) and then pop them up using the crowbar.

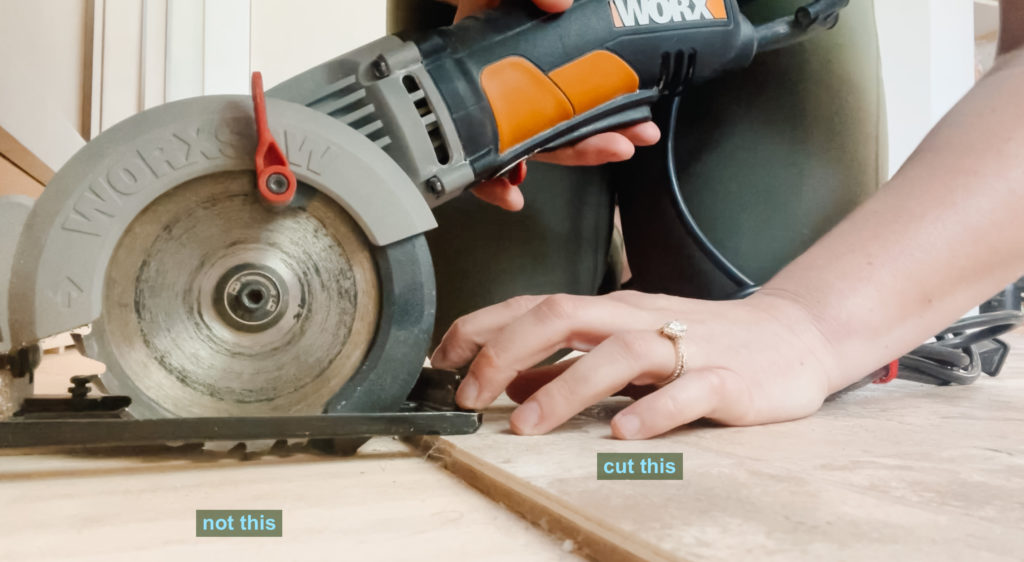
To start, we’re going to set our blade height on the circular saw. The goal is to cut through the vinyl and plywood but NOT subfloor. Cutting through the subfloor could create big problems with the integrity of your floor.


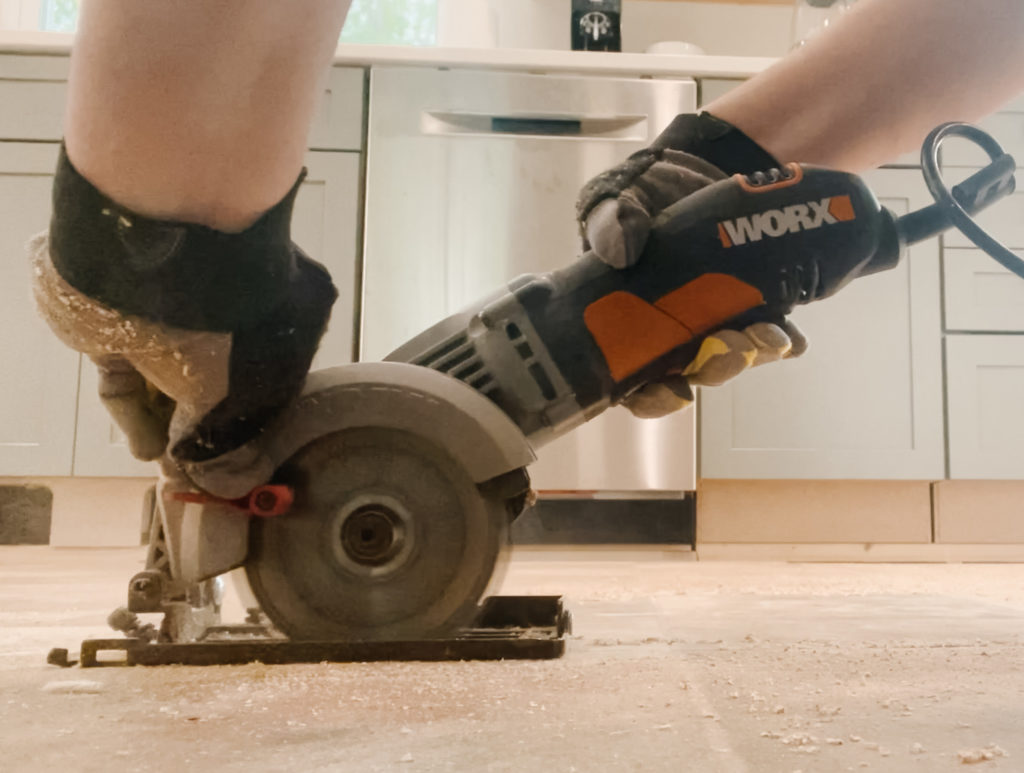
If we’re being honest, there are times that I’ve had to go over the same spot a few times while I figure out the appropriate blade height. This is definitely a better safe than sorry situation.

Once the blade is set, I found it easier to cut a majority of the floor into a grid pattern first and then rip it all out at once. This process goes pretty quickly.  

Next taking your crowbar and line it up along the edge of the plywood you want to pull up. Then taking your hammer, hit the crowbar to wedge in in between the plywood and the subfloor. This should happen pretty easily since it is only being held together with nails.

Use that crowbar for what it was made for!

Crowbars are all about leverage so just push the top of the bar down away from the inserted part and let the tool do all the work prying up the board. Depending on how trigger happy the nail gun guy was when installing your original floor, it may be useful to have a few different size crowbars so that you get more leverage if you need it. 

Continue to work your way up and down the piece of plywood as it loosens from the subfloor more and more.  Eventually you can use your hands and just give it that last pull to get the piece up.

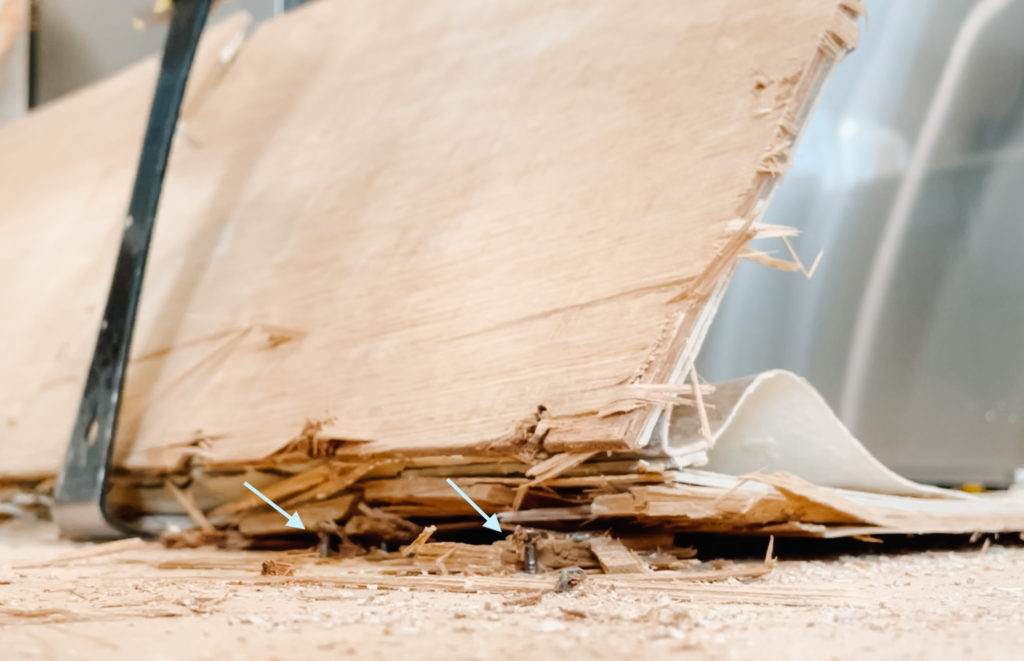
I did come across one issue towards then end where there were larger nails in the plywood and these were a BEAST. I was not a happy camper and as you can see just about tore that wood to shreds. I’m not sure if this is normal, but be mindful that this could happen.

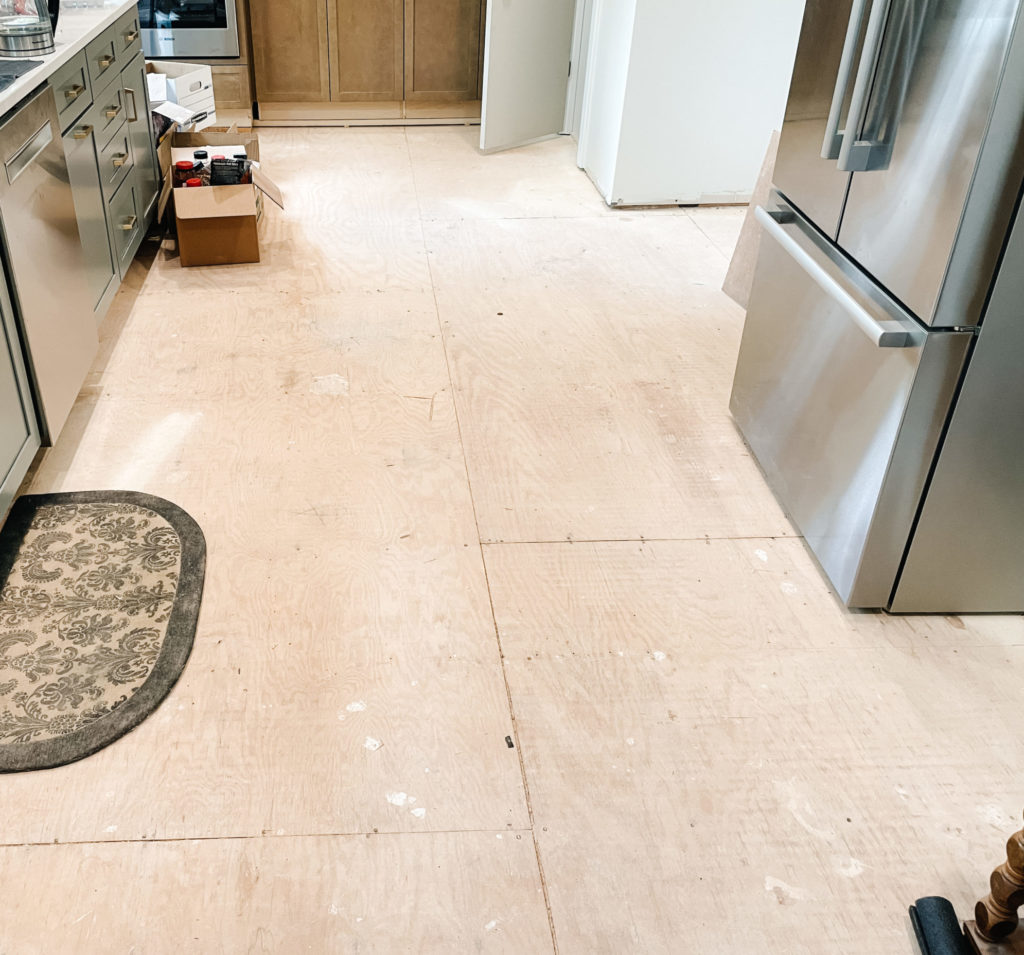
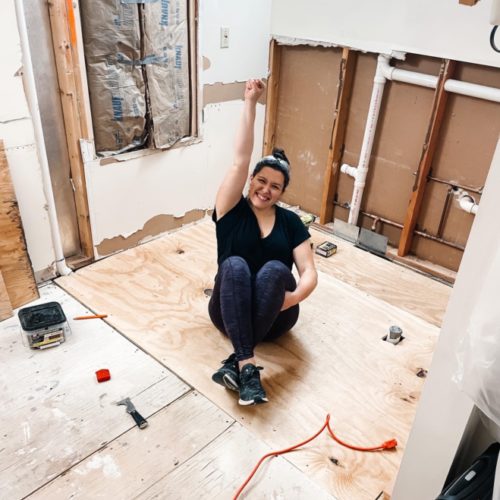
I will warn you. This all sounds simple and it really was, but I was SWEATY. (As you can tell in the video, I am not one of those girls that keeps her cute ponytail throughout the hustle. I was a HOT MESS). This is work, but totally worth it. Those large chunks of vinyl have been broken down to smaller pieces we can load in the truck and take to our local dump. One floor down, two to go!

PS. Its 100% going to get worse before it gets better, but in the end it’s all going to be worth it! 

Posted By: Kristen · In: How-To

There’s a Hole in your Subfloor? Here’s How to Fill it
Easily Demo your Floors: Remove Nailed Down Hardwood Flooring

You’ll Also Love

Easily Install Cement Board to Prep for Tile Installation
Check Out These Easy Tricks to Install a Subfloor
Make a Doorway in an Existing Wall

Leave a Reply Cancel reply

Your email address will not be published. Required fields are marked *

Recipe Rating


Trending

  • Want a Black Interior Front Door? How New Trim And Paint Change Everything
  • Our Beautiful Traditional Brick House With Black Windows Remodel
  • Mini Chicken and Waffles – The Ultimate Brunch Appetizer!
  • Glass Barn Doors Gave Our Office A Stunning Modern Look
  • Gray, black and gold powder bathroom
    Get the Room: Details & Links – The Powder Room

Categories

  • Blog
  • DIY
  • How-To
  • Lifestyle
    • Kristen’s Book Club

More You’ll Love

Get the Room: Details & Links – The Powder Room

Get the Room: Details & Links – The Powder Room

Sparkling Bourbon Cider – An Excellent Fall Cocktail

Sparkling Bourbon Cider – An Excellent Fall Cocktail

Easy Landscape Lighting Makes Our House Look Glamorous

Easy Landscape Lighting Makes Our House Look Glamorous

ourhowtohome

Scarlett Annette Mangold ♥️ You are so so lov Scarlett Annette Mangold ♥️ 
You are so so loved baby girl.
One view of this nursery just isn’t enough😍 One view of this nursery just isn’t enough😍

We’re days away from meeting our little girl and if she’s anything like her parents we’re in big trouble! 

At least the room is cute. 

#nursery #babygirl #nurserydecor #nurseryinspo #nurserydesign #safaribaby #safaritheme #littlegirlsroom #38weekspregnant #whitefurniture #refurbishedfurniture #refinishedfurniture #diyhomedecor #diyprojects #housetohome
We’re so ready for you baby girl! When we starte We’re so ready for you baby girl! When we started working in the nursery there was not a chance I thought it would be totally ready in time. Close? Sure. But finished? No way. 

We are so lucky to have so many people help us along the way (and for getting so many great deals on marketplace to bring this room together!) 

Now all we need is a little girl to use it!

#nursery #nurserydecor #nurseryinspo #babygirl #babygirlnursery #safari #animalnursery #facebookmarketplace #refurbished #38weekspregnant #nurseryideas #babygirlroom #homedesign #bedroomdesign #changingstation #safaribaby
Bookshelves for the nursery are FINISHED!! Can yo Bookshelves for the nursery are FINISHED!!

Can you believe this was all done with scrap wood that we had in the garage? 

For our baby shower we asked guests to bring a book in lieu of a card and im obsessed. We have the perfect amount of new stories to fill our shelves and a million memories to make in this cozy nook. 

#booknook #bookshelves #bookshelvesofinstagram #childrensbooks #nursery #nurserydecor #nurseryinspo #scrapwood #scrapwoodproject #reelsinstagram #memoriesforlife #snuggletime #cozynook #reelsvideo #nurseryroom #nurseryinspiration #childrensroom #reelsviral #childrensroominspo
What a year it’s been! I feel like we’ve don What a year it’s been! 

I feel like we’ve done so much work to the house this year but when it’s almost all in one room, I’m realizing it doesn’t always look like it. 

With the nursery almost ready to go and baby girl coming any day, we can only begin to imagine the great things 2023 is going to have in store for us! 

Happy New Year everyone!

Thanks for sticking around and being a part of our story 💜

#newyearseve #2022recap #2022wrapped #homeprojects #2023 #happynewyear #housetoahome #primarybathroom #livingroom #homedecor #renovation #newyear #recap2022 #reelsofinstagram😍 #reelsvideo #homesweethome #homedesign #nursery #boardandbatten
GAME CHANGER After years of making gingerbread h GAME CHANGER 

After years of making gingerbread houses and waiting the torturous overnight for the icing to dry we finally asked the question - why are we doing it this way?
 
Hot glue for the win! We saved the icing for decorating and the brownstones we’re ready for decorating immediately. 

Even Kevin who was a skeptical gingerbread traditionalist agrees… we’re never going back!

#nevergoingback #gamechanger #rowhomes #gingerbreadhouse #gingerbread #reelsinstagram #instagood #christmascrafts #christmasdecor #reelinstagram #christmasreels #holidayseason #christmasvibes
When I found this sleigh in the Target dollar sect When I found this sleigh in the Target dollar section, I knew it needed to be part of our holiday decor this year. Only problem? It needed a little something extra- queue for the stain! 

This updated sleigh is so cute and the perfect addition to our mantle. I found this pine cone filler and mini ornaments to complete the look! 

#christmasdecor #sleigh #pinecone #miniornaments #mantledecor #merrychristmas #holidaydecor #holidaycrafts #reelsvideo #merryandbright #stain #sleighride #christmastime #holidayseason #reelforyou #christmasmantel
Load More... Follow on Instagram
  • Privacy Policy

Copyright © 2023 Our How-To Home · Theme by 17th Avenue