The journey to new floors in our house has been anything but easy. I guess we should have expected it when we decided it was a great idea to knock down 6 walls. (I stand by it, totally worth it). That journey includes learning how to fill in holes in the subfloor!
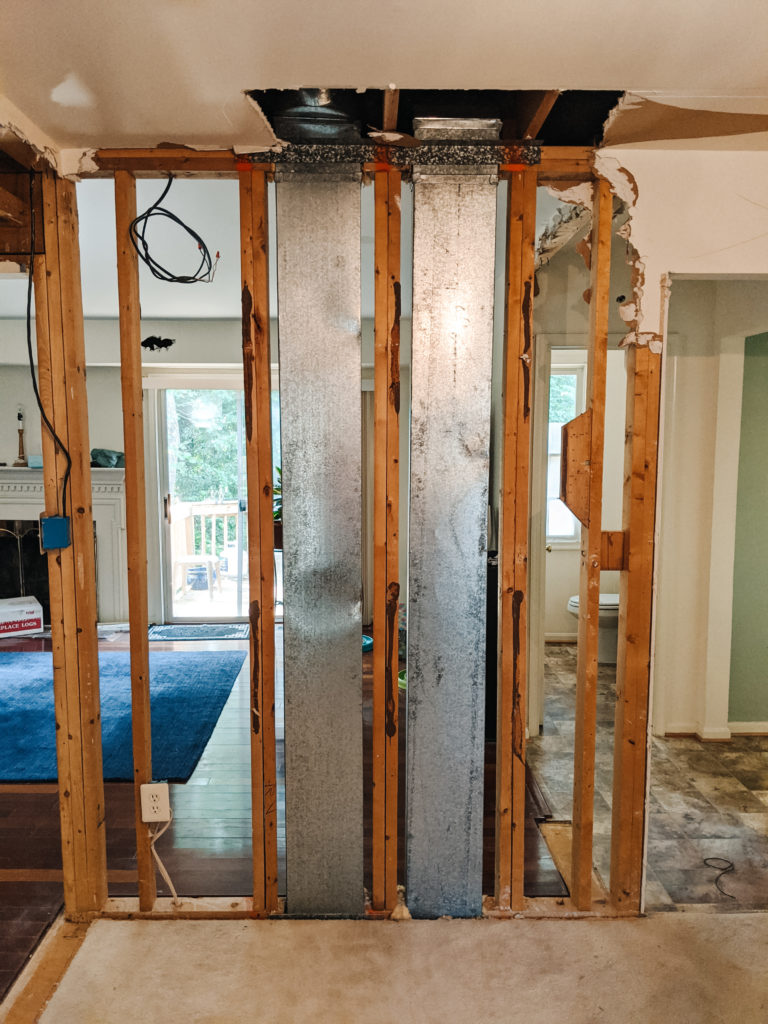
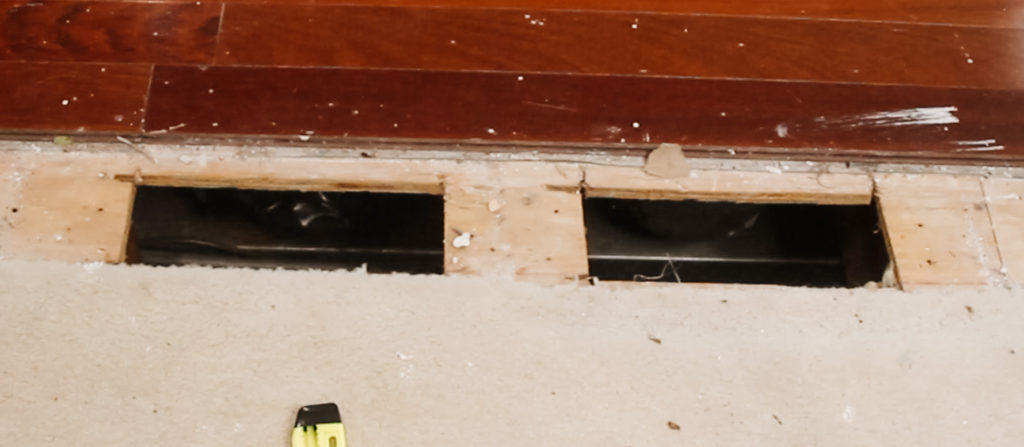
We expected to have surprises in the wall and knew one would be load bearing, but it didn’t stop these vents from receiving a welcome in the form of a longgg string of curse words when the drywall came down.
Now we’re here.
We have new flooring being installed in the next few weeks and we need to get these holes filled in before that happens. So, I’m going to show you how to fill holes in the subfloor.
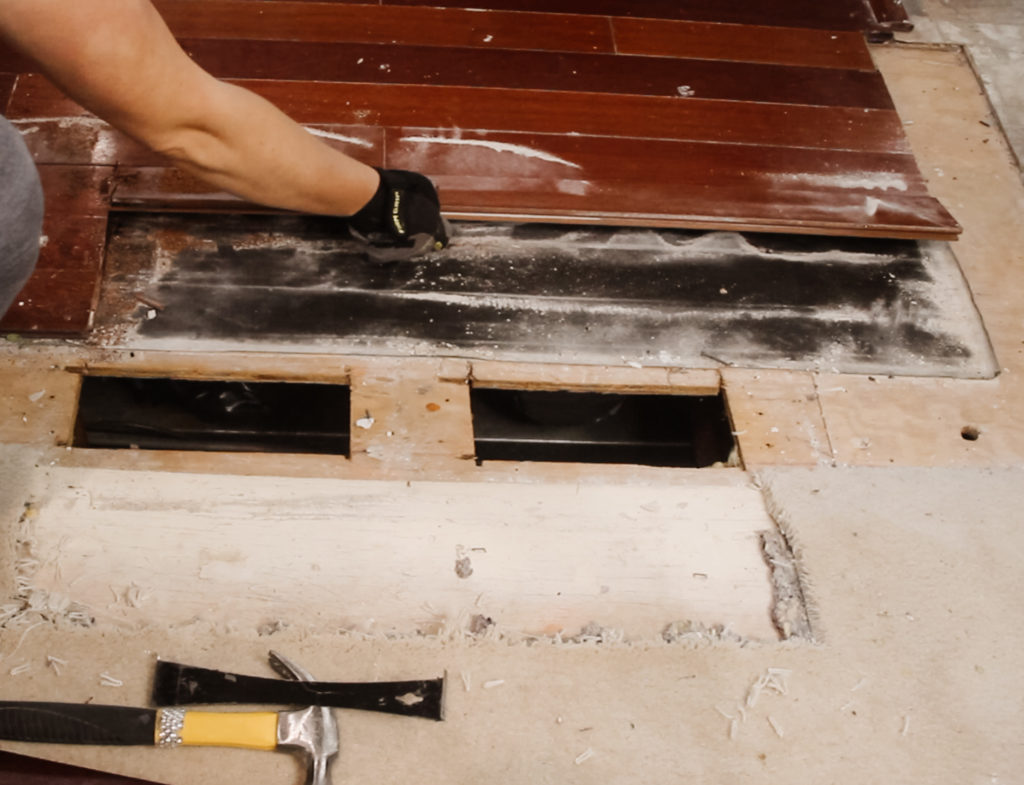
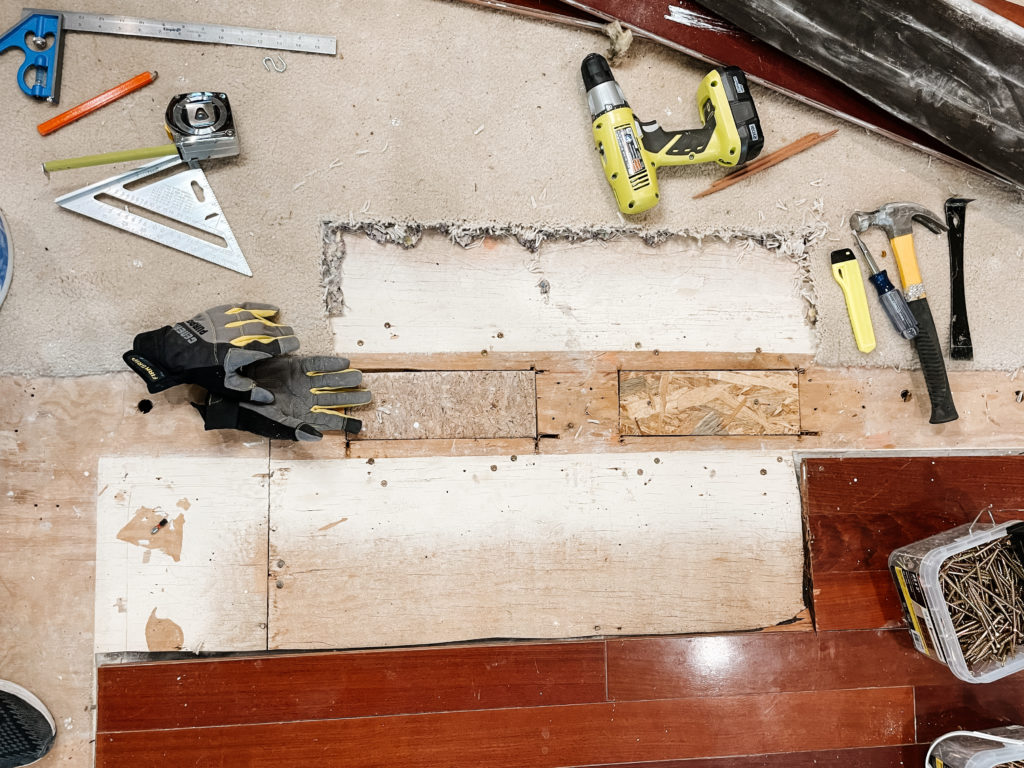
The venting has been moved to another wall and we’re left with these two holes in our floor. There were also pipes in the wall which you can see by the two small circle holes on the ends, but they’re so small we’re not going to worry about fill them.
Since this is where a wall used to be, you can see there is carpet on one side and hardwood floors on the other. We’ll have to take out a little bit of each which means we need a lot more tools than if it was just plywood. Just follow along to the floor removal parts that make sense for your project and ignore the rest.
What you’ll need for this project: 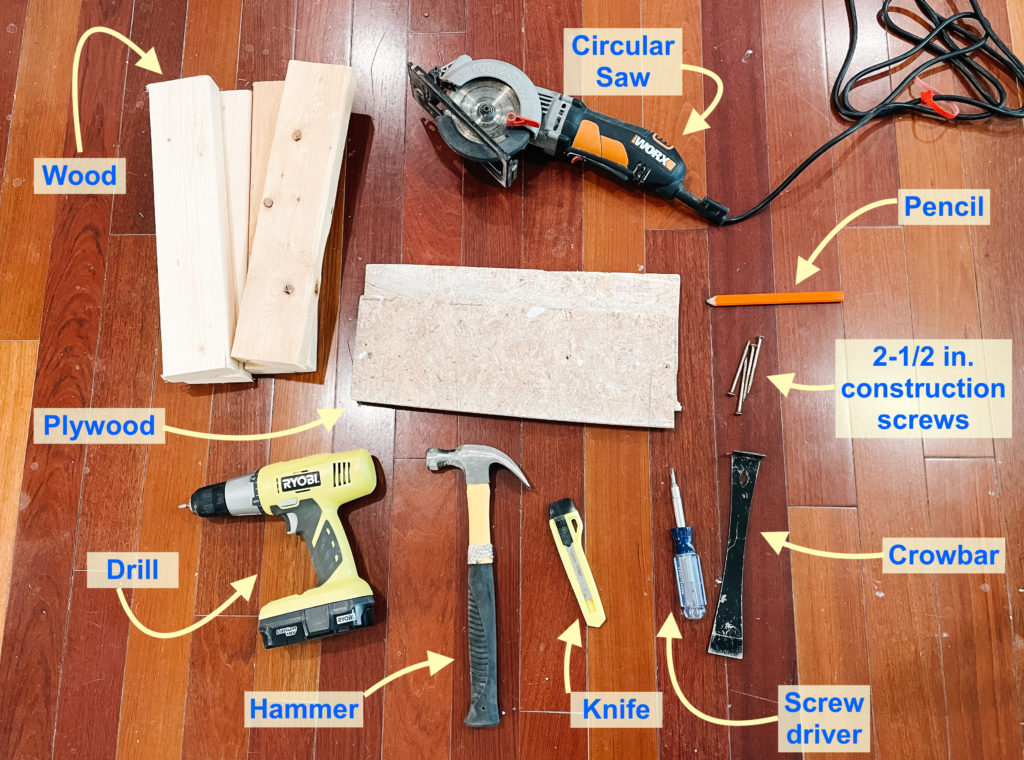
- Drill
- Hammer
- Pencil
- Wood
- Plywood*
- Circular saw
- Knife
- Screwdriver
- Crowbar
- 2-1/2 in construction screws
Not pictured: Measuring tape
* plywood should be the same thickness as existing floor – typically this is either 5/8 or ¾
And for those that would prefer to just watch the video – here you go!
Let’s get started: How to Fill in Holes in the Subfloor
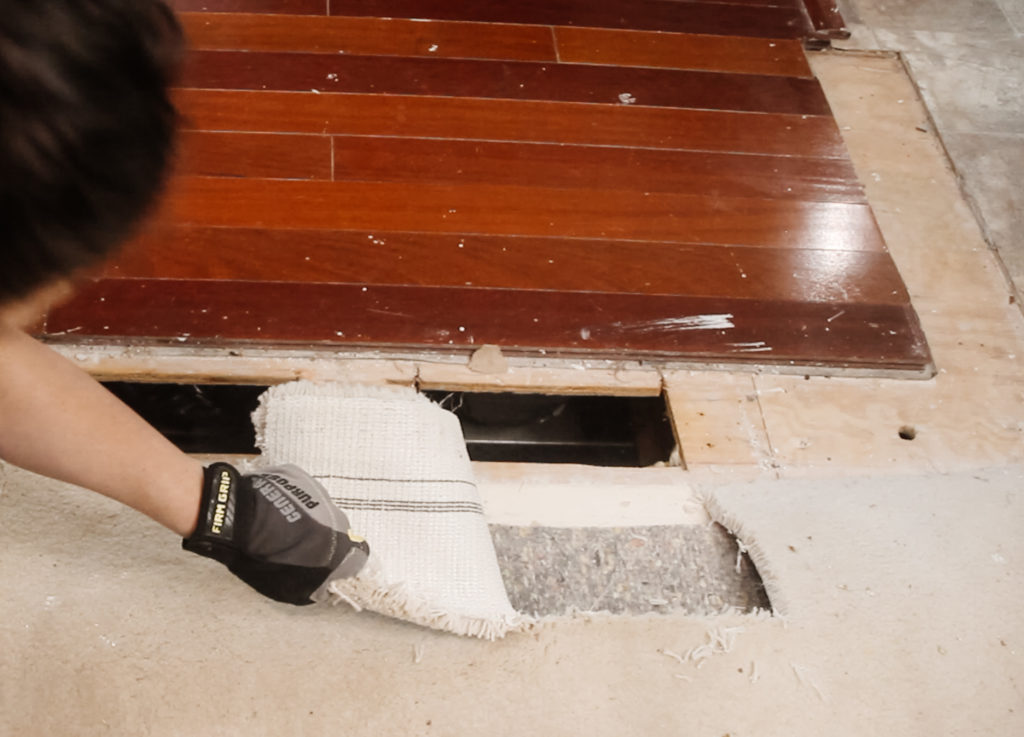
You can use your knife to just cut out the carpet and padding that you don’t need and stay tuned for my How to remove carpet blog coming soon!
Don’t forget that you’ll also need to remove the staples that are stuck in the plywood. For this, I typically just use a flathead screwdriver.
Hardwood
Next, I moved on to the hardwood side where I used the crowbar and the hammer to pry up the hardwood pieces. You can learn more about how to remove hardwood in our How to demo your floor series coming in the next few weeks!
You can see from previous pictures; the first two planks were a piece of cake because they ended almost exactly where I needed them to for this project. The third plank however was not so easy since it extended way further into the other planks. In hindsight, I didn’t even need to pull it out, but: 1) I wanted a nice clean space and 2) I’m an overachiever so I pull out the circular saw and cut that sucker out.
The black paper you see under the wood is the underlayment. That is used for sound absorption and to smooth out smaller imperfections so the floor sits more evenly. You can just cut it out with a knife
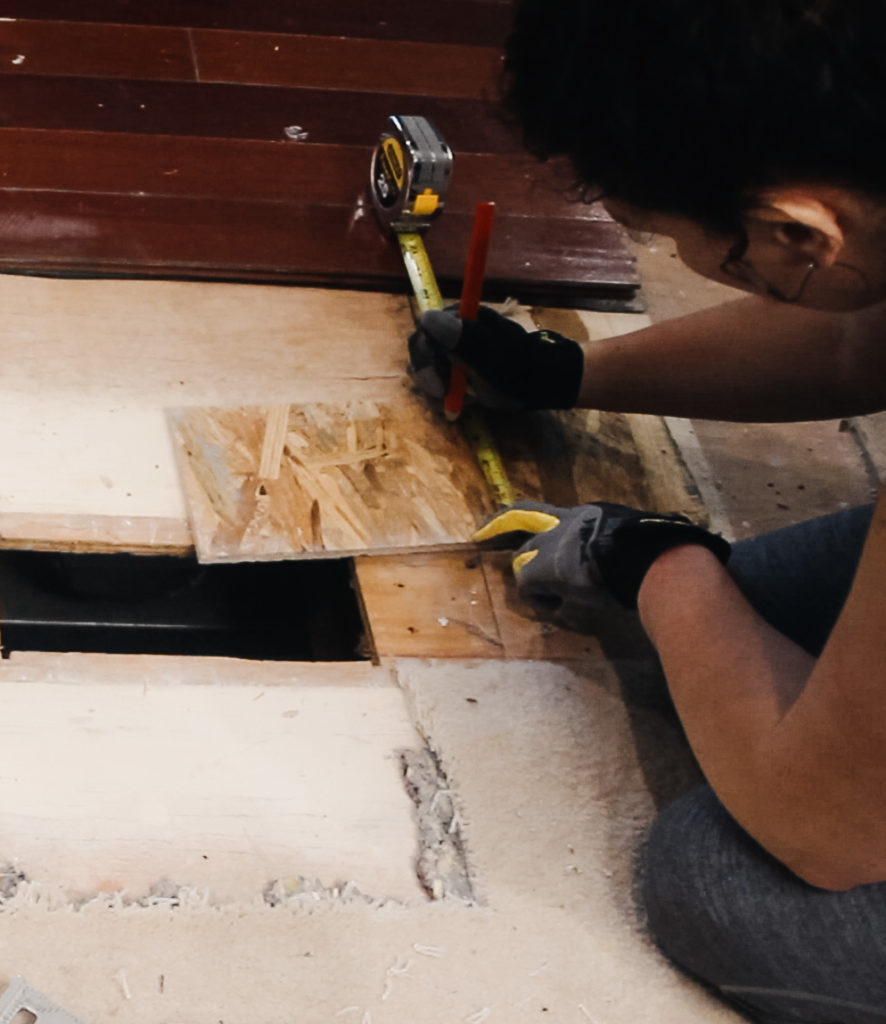
Measuring the Plywood
Now that the area is clear, we make sure the plywood is the correct size to fit in the holes by measuring the existing whole and re-creating that size square on the pieces of plywood.
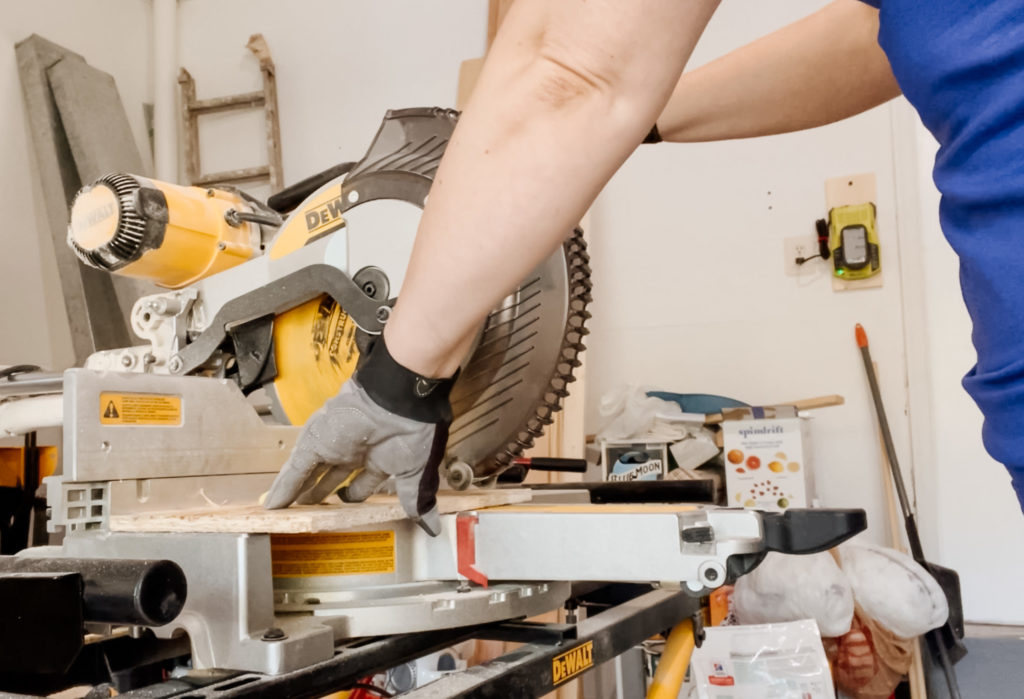
I then cut the plywood pieces down to size using a mitre saw. A table saw would have been more ideal, but ours was buried in the garage and we didn’t feel like pulling it out. You could also do this by hand using the circular saw or a hand saw if one of those is available.
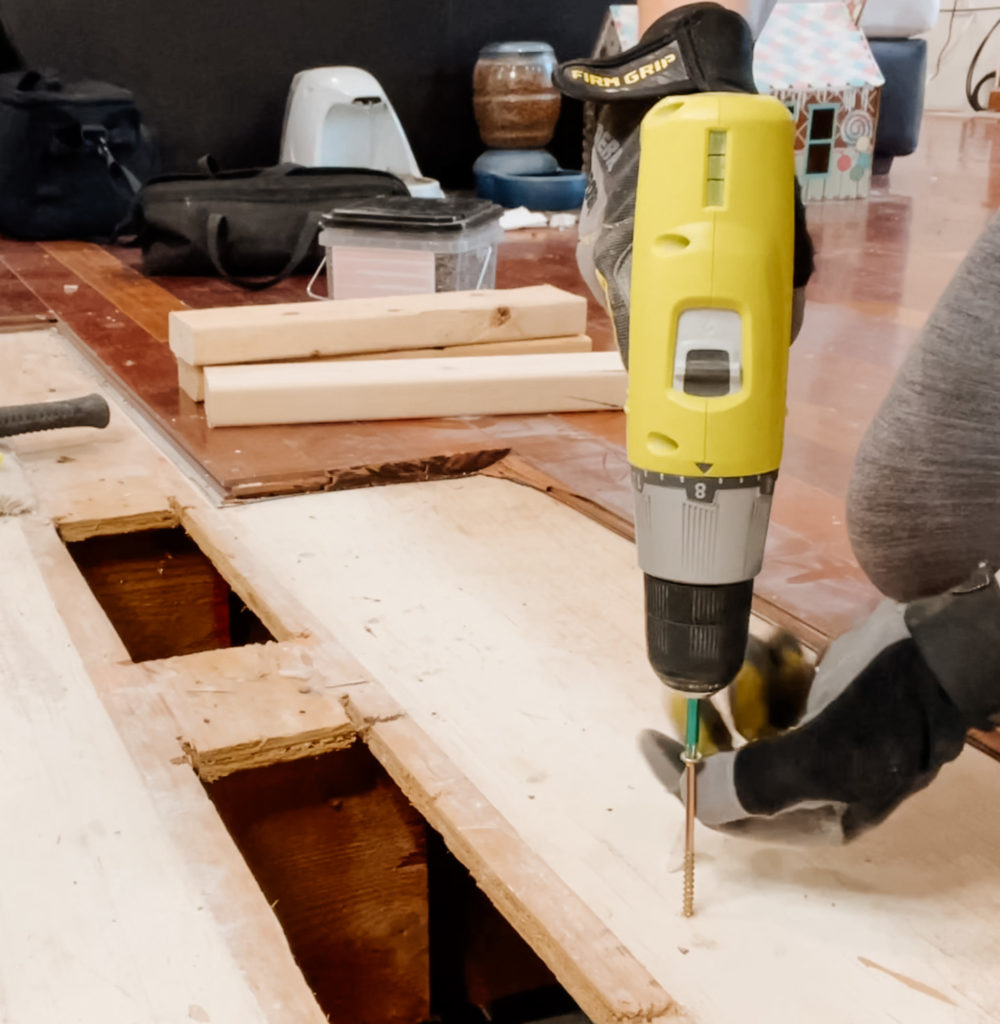
The wood pieces, that you see in the what you need list are crucial to this project. Those are going to be what we use to support the new floor piece. What kind of wood you use is really up to you as long as it’s strong. I used extra pieces of 2×4’s that we had in the garage, but you really just need sturdy long wood. I cut them to about 1-1/2 feet in length which gave me about 6 inches on either side of the hole. This way there is enough room to drill into them on each side of the hole. (I know this doesn’t make total sense yet, but keep going!)
Putting it all together
So how is this all going to work?
It’s actually pretty easy from here on out. The 2×4 pieces are going to be screwed into the existing plywood subfloor and serve as a support for the new plywood that we’ll put over top.

The supports are needed for two reasons. First, it gives you something to screw the plywood into. Second, it helps carry any weight that gets put on it as people walk over it.
Let’s say you somehow managed to screw just the plywood down without supports. Overtime, the plywood would start to act like a trampoline, basically giving way to your foot as you stand on it. Eventually the plywood would give out completely and your foot would go right through it to the ceiling below. As fun as that sounds, let’s just pass and move right to the fix.
By screwing the planks into the existing floor, it’s sharing the weight and distributing it over a larger area.
When prepping the area, I put the wood plank in the hold to see where to position my screws. Like many humans, I only have 2 hands which means I can’t hold: the drill, the screw and the plank of wood. Here you have two options:
- Get clamp to hold the plank in place while you screw it all together
Don’t have a clamp or too lazy to go get one?
Cool, me too.
- I drilled my screws into the plywood just enough so that they were firmly in the above subfloor. That way I could hold the 2×4 with one hand and drill with the other and still have a sturdy screw.
Put two screws on each side of the wood and continue to do the same thing so that your hole is supported on bother sides.
Finally, take those fitted pieces of plywood and screw them into your supports. I did 2 screws in each plywood piece (one in each 2×4). The floor then felt secure, so I didn’t add anymore, but you can add a few additional screws if needed.
This is what it looks like when it’s done. New floor ready and as a bonus, no one’s going to fall through the floor in the meantime!
That’s it! That’s how to fill in holes in the subfloor. Thanks for reading! If you found this helpful. Let me know if you have any additional questions below!


Leave a Reply