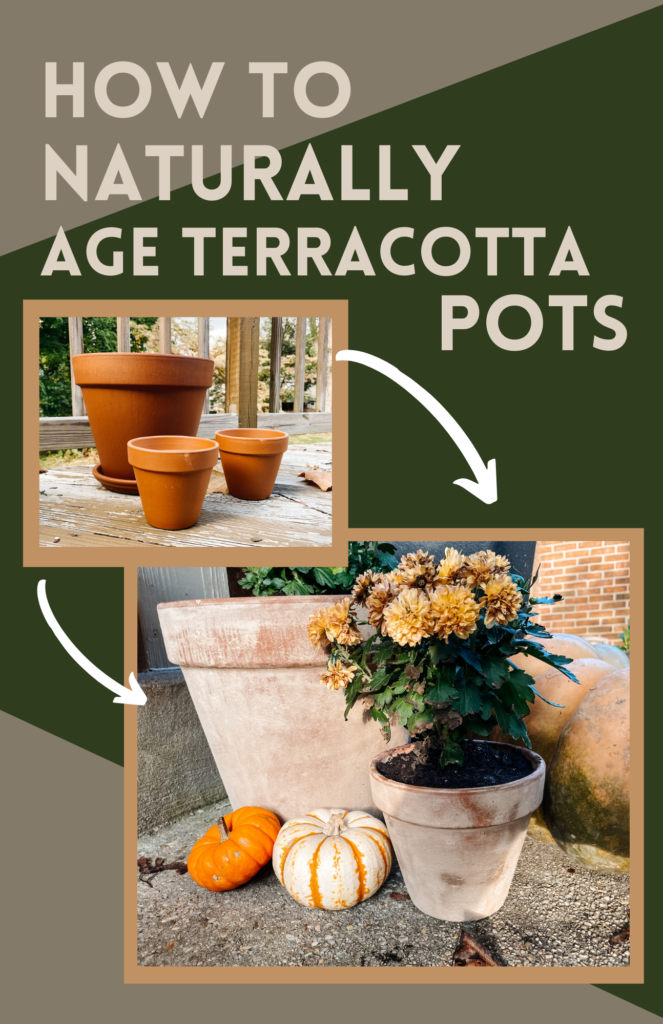
Terracotta pots. They’re beautiful, super functional, and super inexpensive. Basically they’re everything you want in outdoor decor. But if we’re being honest, (we’re friends, so I know I can be) Terracotta pots are pretty boring looking when new. In the stores, whitewashed or pre-aged terracotta can be three times the price as your standard run of the mill pot. I’m going to get the look for a fraction of the cost by “aging” them myself and don’t worry, I’ll show you how to naturally age terracotta pots too.
First I should mention that there are a number of ways to age terracotta pots. If you’re looking for a super quick way and play to just use your pots for flowers, watered-down white paint is a great option. But I’m looking for a produce friendly option for my pots so I can keep my options open in the summer.
Since terracotta is extremely porous, they will absorb any chemicals into them and then in turn pass them along to your plants. Using natural ingredients will allow the pots to potentially used for herbs or vegetables in the future (as opposed to just flowers). Another option I came across in my research was using the yogurt method and letting the pot sit in the sun for a few weeks. Firstly, ain’t nobody got time for that and secondly, it apparently smells really bad.
So here we are, the organic lime method. I originally found this idea earlier this year when Lauren Conrad was looking for a natural solution for her pots.
For this project, you’ll need:
- Terracotta Pots
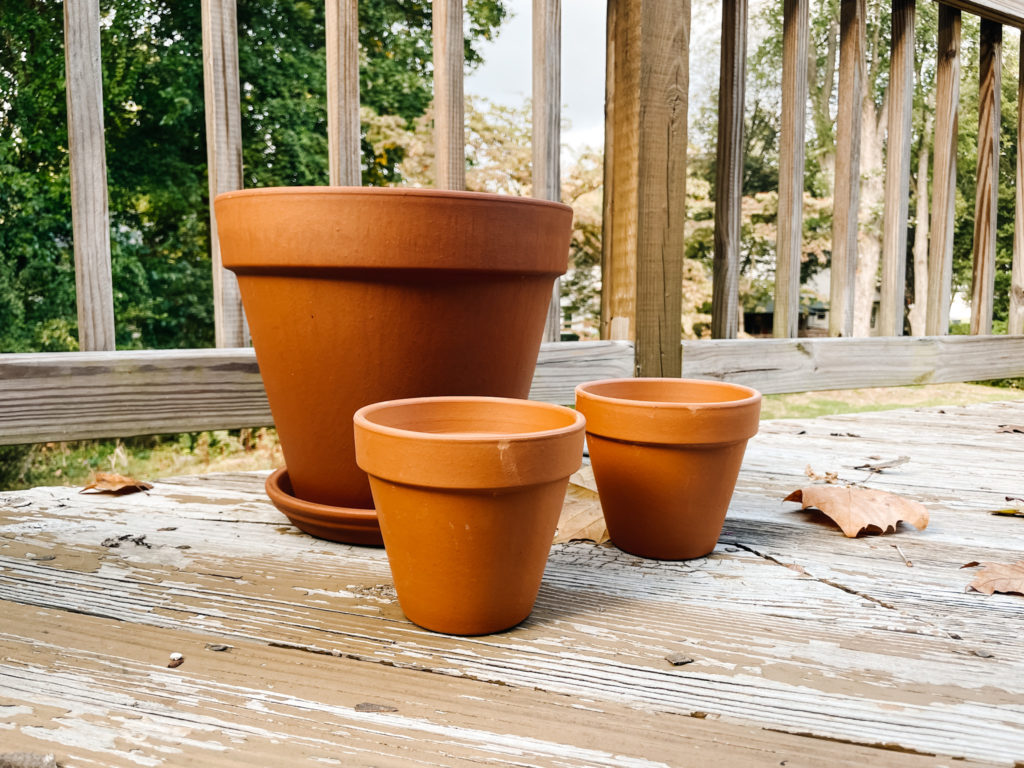
- Water
- Organic Garden Lime
- A large container such as a bucket
- Paint brush
- Sandpaper (optional)
How to naturally age terracotta pots
This is a pretty messy project so I strongly recommend doing this outside in an area you can get dirty.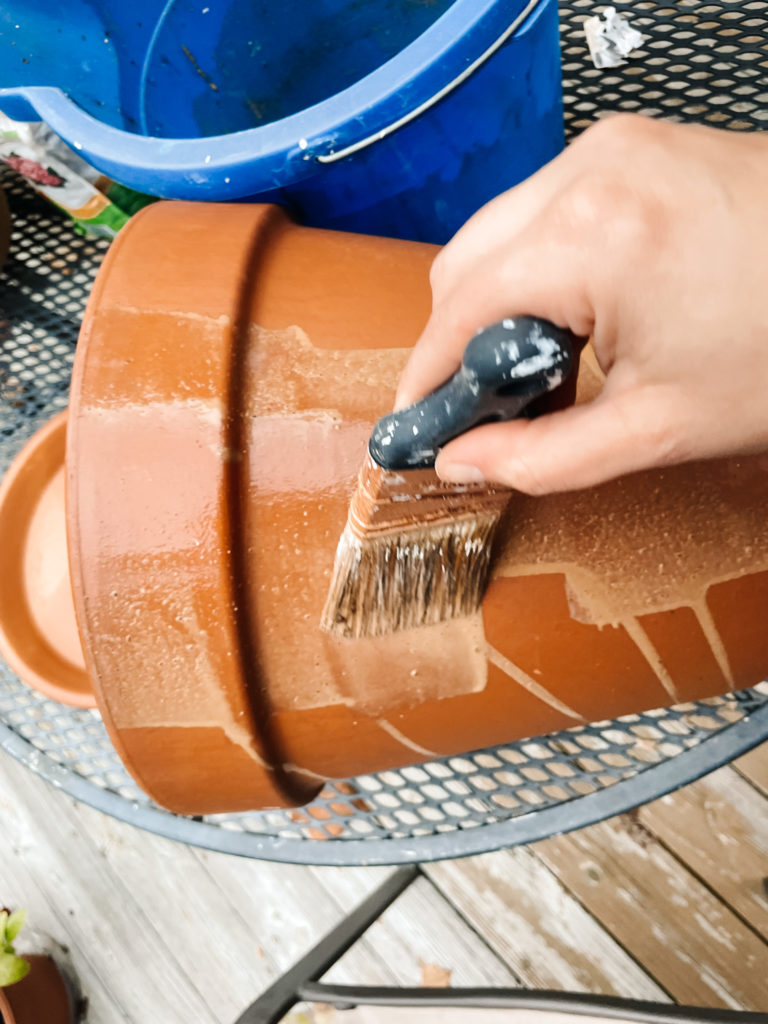
- First, you’ll need to create your lime solution. You can estimate a 1:1 ratio of Garden Lime to water. (For example: 1 cup of Lime to 1 cup of water). Mix well using your paint brush. The Lime will settle to the bottom of your container so to a certain extent, that is to be expected.
The more watery your mixture is, the shearer your layers will be. If you’ want a grittier look, you can add more lime to this ratio.
- Once mixed, begin painting your pots with the mixture. The more sediment you add, to your pots, the rougher and grittier it will look. I’m going for a smoother finish so I opted for several light layers.
The lime will dry very quickly as you go, but you can continue to add layers to cover up any drips or imperfections that you notice.
- Don’t forget to paint the inside rim of your pots as well where the dirt will not cover!

- Overall, I ended up doing about 4 coats of the lime solution per pot to make sure that I had plenty of layer for a smooth finish.
- Once the pots are dry, you can take your hand or some sand paper and begin rubbing off the excess. My lime came off very easily and I did not end up needing the sandpaper, however if I had added more sediment, it probably would have been necessary.
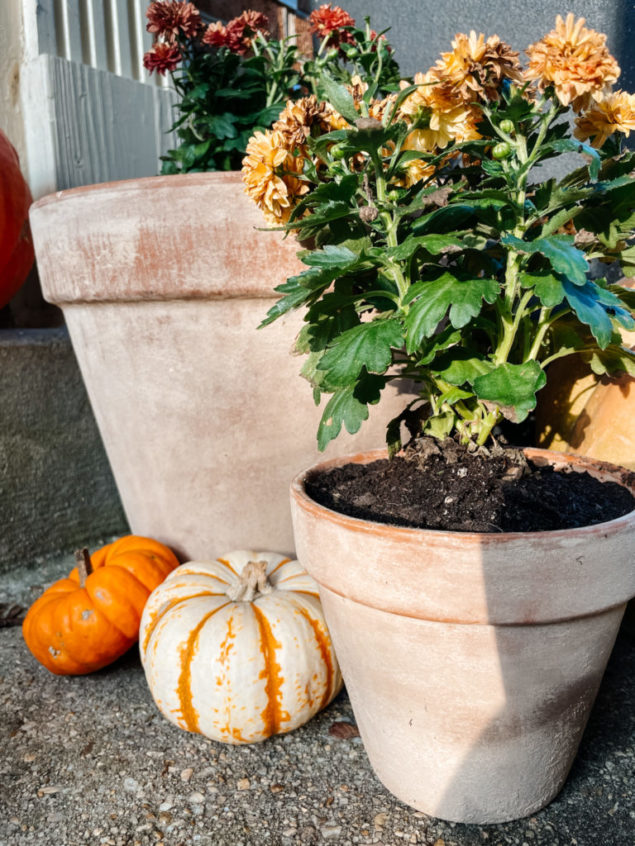
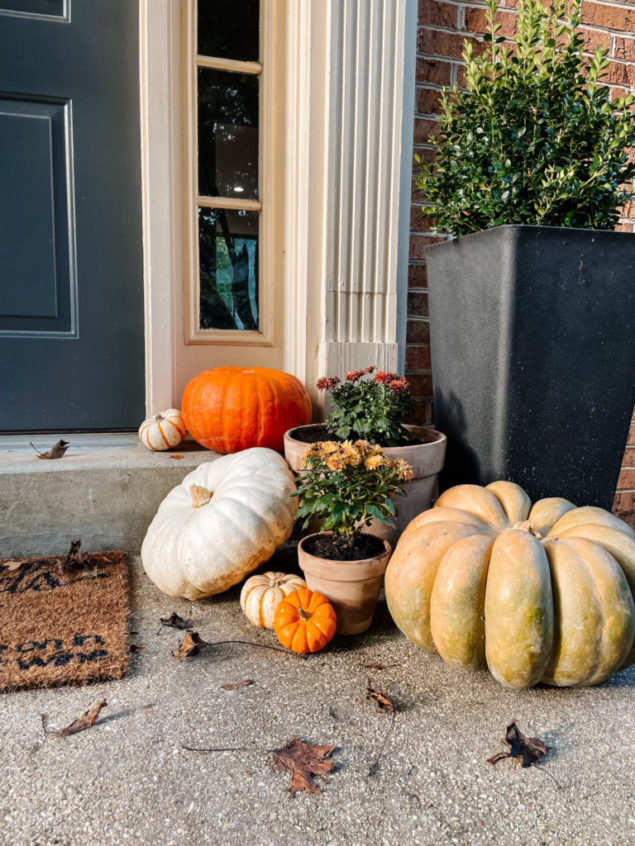
I absolutely love the finish! It’s the exact color and texture I was hoping for when I thought to age terracotta pots and fits in perfect with our design esthetic.
One thing I am nervous about is whether or not the lime is going to stay on the pot long term. For that reason, I’m going to let these sit inside for about 24 hours just to let them fully dry and hopefully let that terracotta soak in that lime.
After that they’re going outside and I’ll keep you posted on how they do!
You can find more about Lauren’s original post here.
UPDATE: As of now we are 6 months in. I was pretty worried that the rain was going to immediately wash the lime away and leave me with weirdly stained pots. Fortunately, the lime has really soaked into the pots and created a beautiful, more realistically aged look that I love. I can’t wait to get this filled again in the spring for a full update, but as of now! I highly recommend this technique.


Thanks for this great tutorial. Of all the places I looked your method seemed the easiest and the results are exactly what I am going for.
I’m so glad it was helpful! Good luck on your project!