Our How-To Home

  • How-To
  • DIY
  • Lifestyle
    • Recipes
    • Kristen’s Book Club
  • Blog
    • Home Updates

Explore

  • How-To
  • DIY
  • Lifestyle
  • Blog
  • About Us
  • Ask Us Anything
  • Kristen’s Book Club

Connect

You are here: Home / How-To / Install Soaker Hoses in your Garden for a Hassle Free Summer

How-To, In the Garden · July 27, 2021

Install Soaker Hoses in your Garden for a Hassle Free Summer

I’ve always liked having plants around, both inside and out. They make your house look good, smell good, and it’s always fun growing your own food. However, watering them every day is one of the biggest hassles and so time consuming. In the past, we’d either have to stand outside holding a hose for who knows how long or leave the hose on one plant and constantly have to go out to move it. One day we decided there had to be a better way and found one! Now we’re going to show you how to install soaker hoses in your garden.

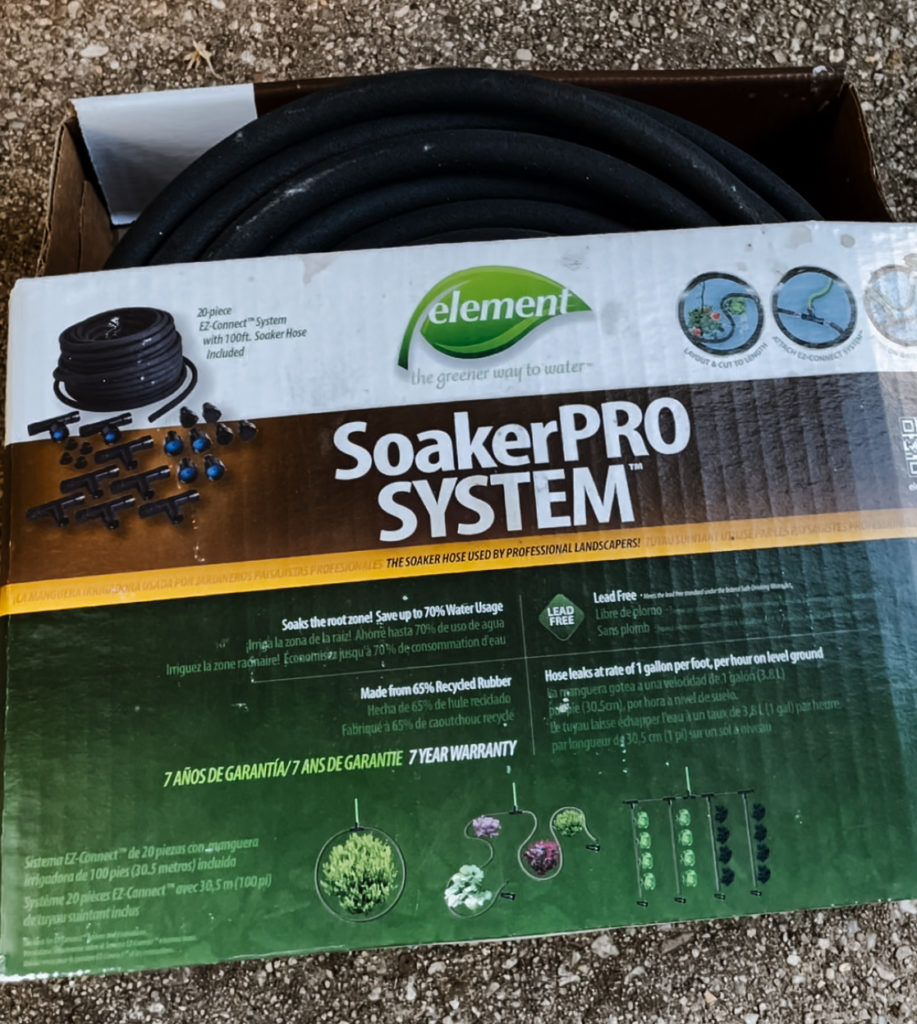
Last year Kristen’s mom Linda got us these great hydrangea bushes for the front yard. Kristen loves the look of hydrangeas and the upkeep is pretty easy so I was all for them.

Since we got them in the early fall of last year it didn’t really make sense to work on any permanent watering solutions until now. We opted for the Element Soaker Pro System, which we got at Home Depot. We’ve used it before and worked really well. The hose has tiny little holes all through it which allows water to slowly drip out of it into the yard. (Basically, it means we can turn it on and forget about it for 30-60 minutes without causing a flood).

How to install soaker hoses

To setup and install the hose, all you really need is the kit that it comes with, a pair of scissors or utility knife, and a shovel.

Since the hose has to cross in front of our front path to get to the bushes on the other side, we also used a piece of solid garden hose and a utility knife to create a connecter piece between the two sides.

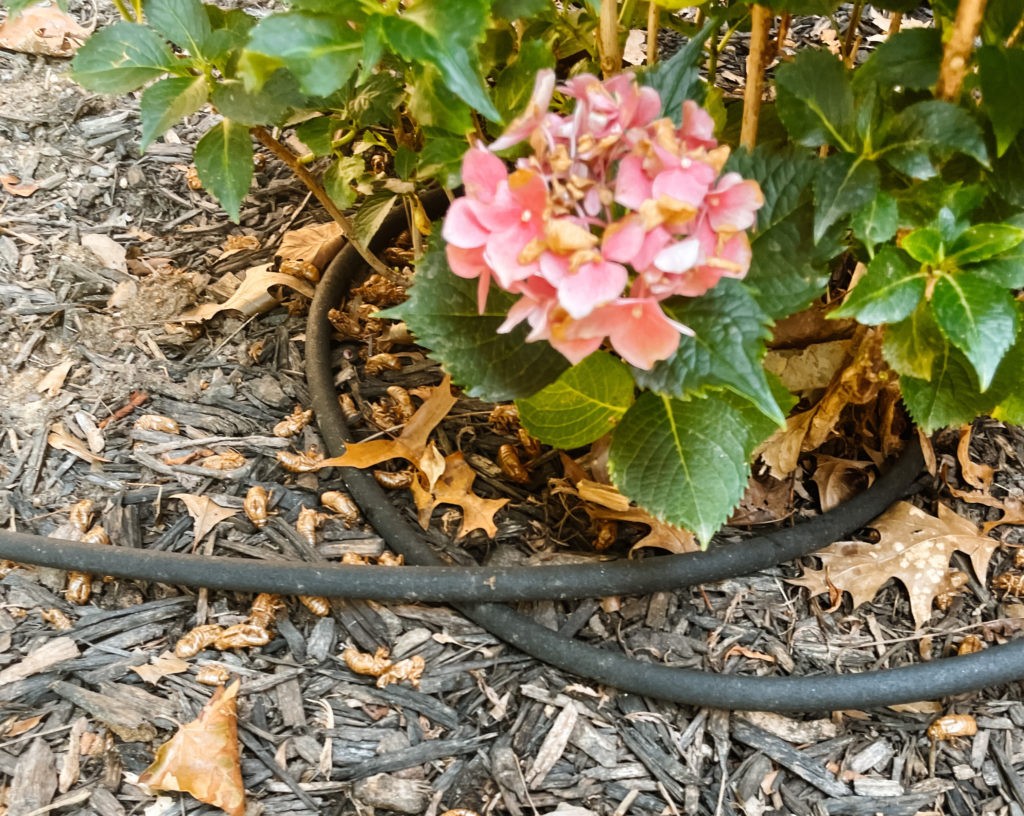
First, we stretched out the hose and looped it around each of the bushes on the right side. Just doing a straight line of the hose would also work well, we just want to make extra sure these plants weren’t going to get thirsty.

Prepping the garden hose

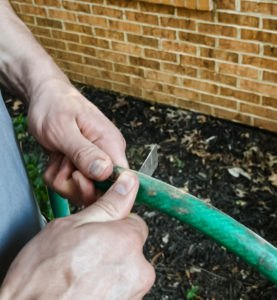
Since we have a pretty lengthy run by the front porch, we are using an old garden hose to cover that area so the walkway doesn’t get wet, too. We laid out the hose to determine how long the it needed to be and then we cut the old garden hose using a utility knife. We did this so it was the right length between the two garden areas – we didn’t want to have to bury more hose than we needed to.

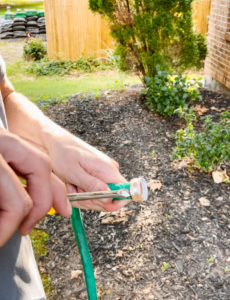
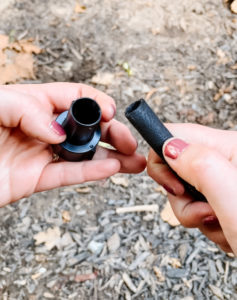
Once we had the garden hose cut down, we used two hose mender/repair kits (one of each – male version and female version), for each end, so that it could screw into the soaker hose. There are male and female versions – so depending on what connector type you plan to use for the soaker hose, use the opposite for the garden hose.

The mender kit has two components, either a male or female screw attachment and a screw clamp. First, you should slip the screw clamp over the hose, but don’t tighten it yet. Second, push the screw end attachment into the hose as far as it will go. Finally, slide up the screw clamp so it wraps closely to the screw head and tighten the screw on the clamp until pretty tight.


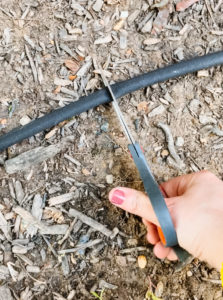
Prepping the soaker hose

While I was prepping the garden hose, Kristen was cutting down the soaker hose to size using a pair of scissors and adding the connector pieces to each end which will allow the pieces of hose to fit together. 

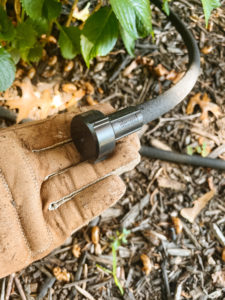
In the final steps we added an included end cap to the far end of the soaker hose (to stop the water from pouring out and forcing it through the soaker holes) and connected all of the hoses together.

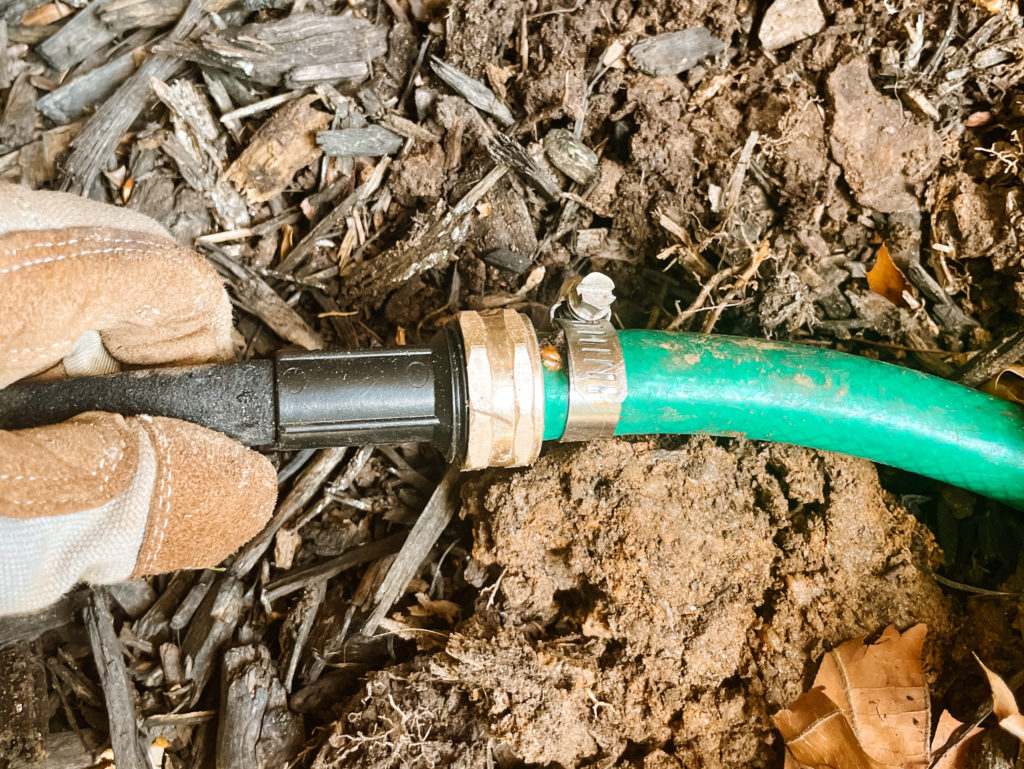
Then we turned on the hose to make sure all of the connections were secure and there were no leaks. Now we have an easy way to water the plants without have to stand outside with a hose or pull out a sprinkler system.

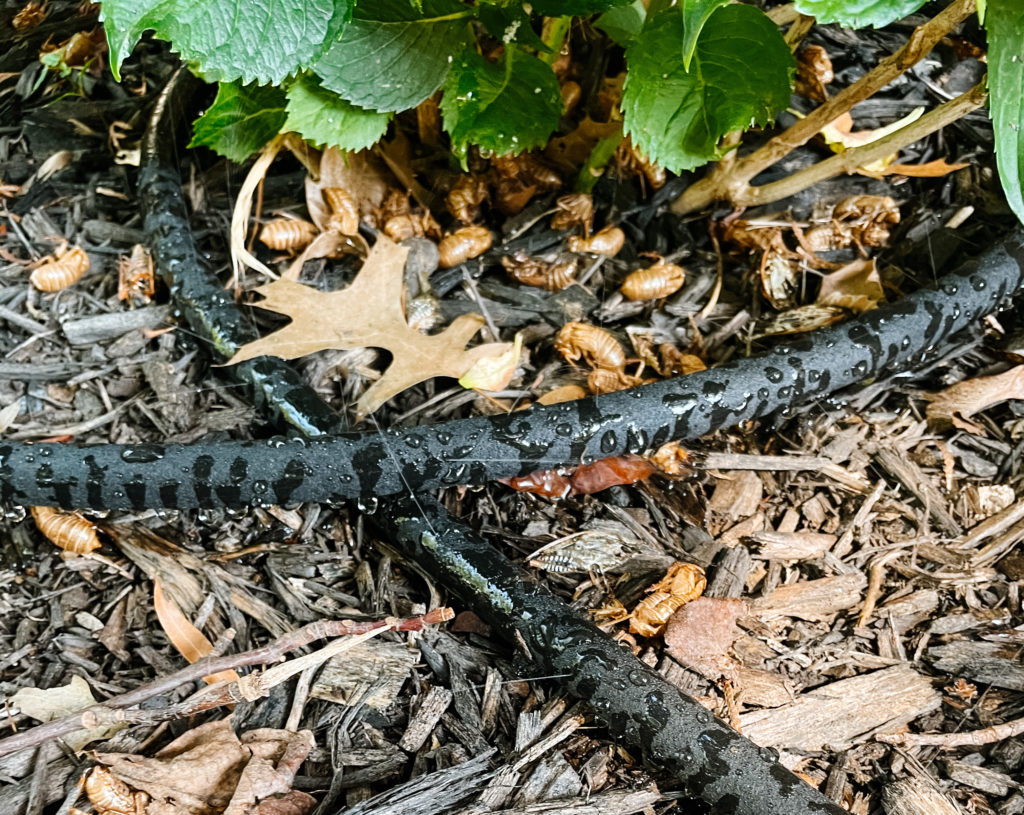
(Please ignore the cicada shells, this was the aftermath of Brood X. We’re calling it fertilizer…)

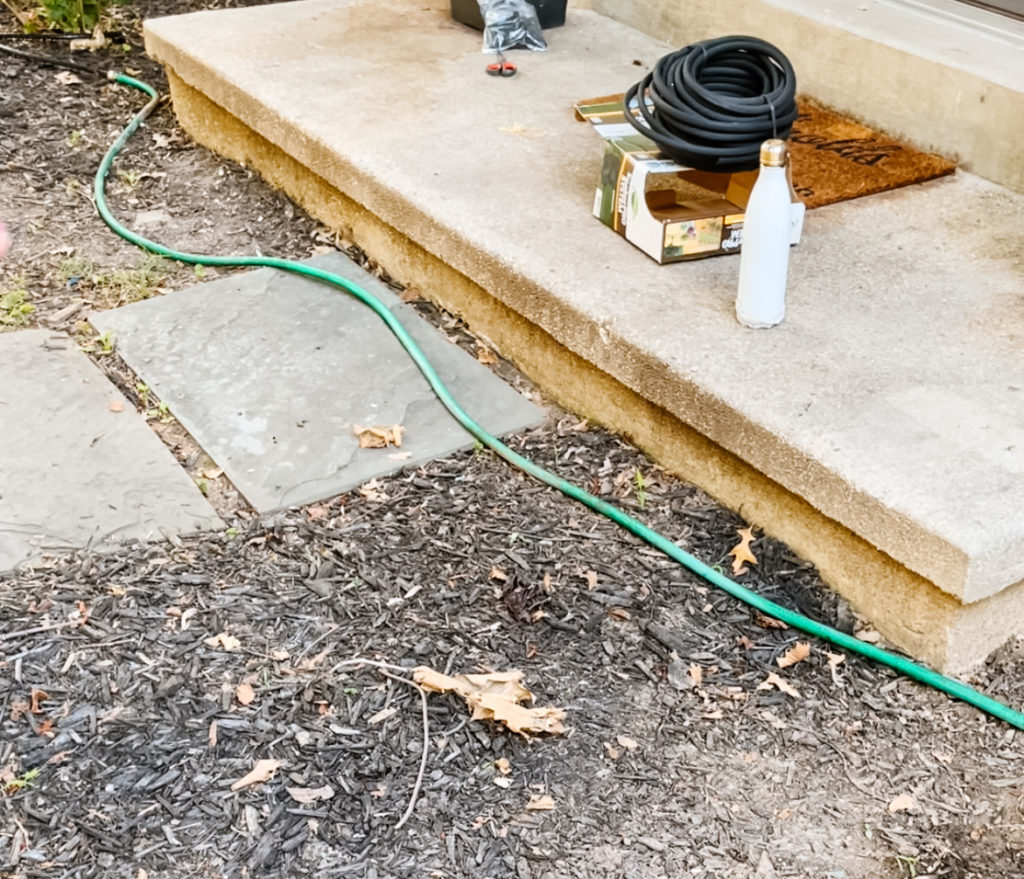
For the most part, the steps on how to install soaker hoses ends there. All that is left now is to bury the green garden hose. You can also opt to bury the soaker hose under some mulch, but it’s not necessary – these steps are more for aesthetics.

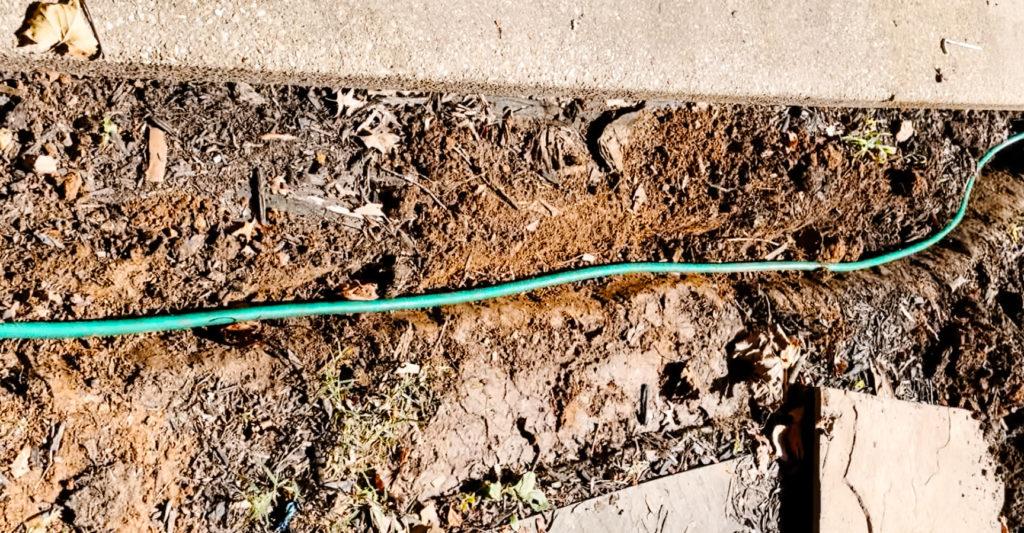
At the very least, we wanted the green hose buried so…

The next day, Kristen got up early and dug a trench to essentially burry the green and just keep the black above ground.

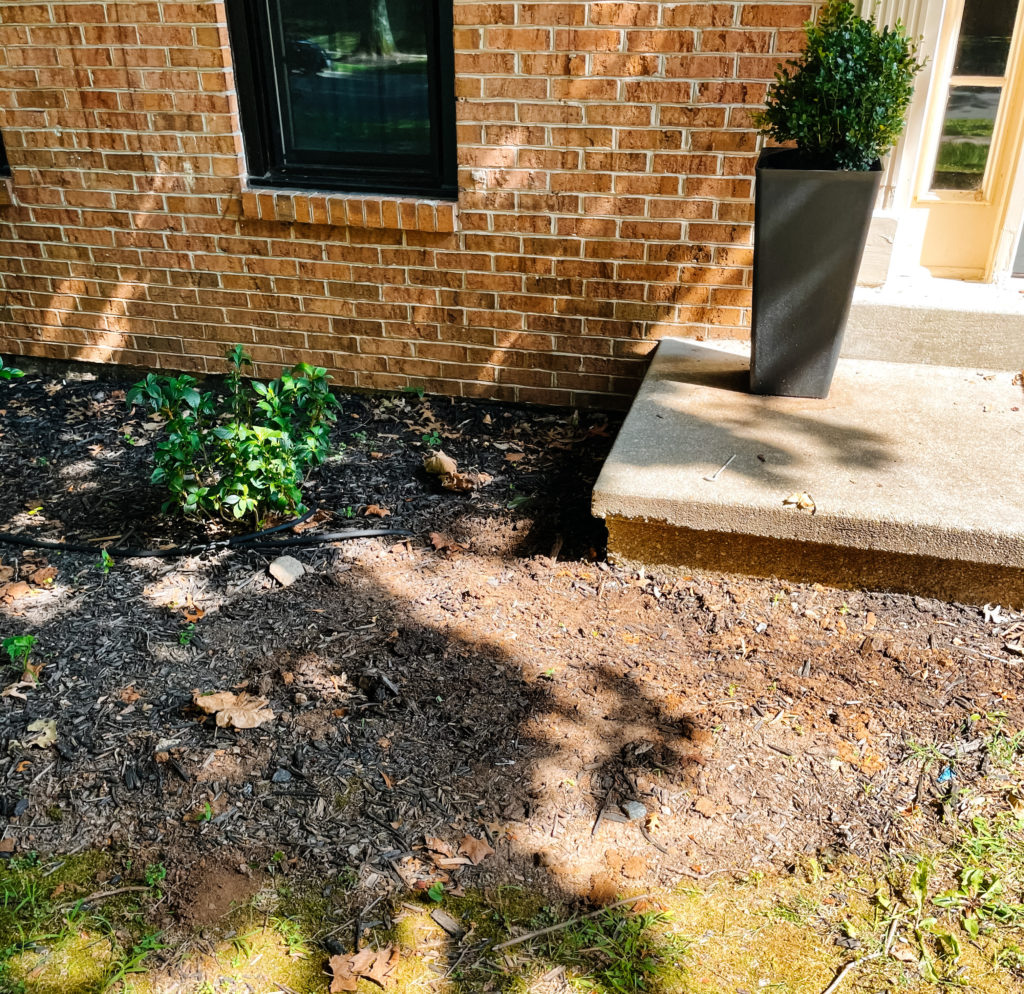
Then everything got covered back up and now you’d never even know that it was there!

Now, we can add mulch to the flower beds to hide the soaker hose as well and have a hidden water system all summer! Do you have any other ways you know how to install soaker hoses! Leave a comment below and tell us how you did it in your yard!

Posted By: Kevin · In: How-To, In the Garden

What To Look At When Buying A House – Important Questions To Ask Yourself
Trim Your Interior Windows for a Modern Look

You’ll Also Love

Our Master Bathroom is a Complete Gut Job – The Demo
Removing a Toilet – It’s Easier Than You Think!
Easy Landscape Lighting Makes Our House Look Glamorous

Leave a Reply Cancel reply

Your email address will not be published. Required fields are marked *

Recipe Rating


Trending

  • Want a Black Interior Front Door? How New Trim And Paint Change Everything
  • Our Beautiful Traditional Brick House With Black Windows Remodel
  • Mini Chicken and Waffles – The Ultimate Brunch Appetizer!
  • Glass Barn Doors Gave Our Office A Stunning Modern Look
  • Gray, black and gold powder bathroom
    Get the Room: Details & Links – The Powder Room

Categories

  • Blog
  • DIY
  • How-To
  • Lifestyle
    • Kristen’s Book Club

More You’ll Love

The Best Peppermint White Russians

The Best Peppermint White Russians

Make a Doorway in an Existing Wall

Make a Doorway in an Existing Wall

Kitchen Update: Before And Demo Pictures Of The Kitchen Chaos

Kitchen Update: Before And Demo Pictures Of The Kitchen Chaos

ourhowtohome

Scarlett Annette Mangold ♥️ You are so so lov Scarlett Annette Mangold ♥️ 
You are so so loved baby girl.
One view of this nursery just isn’t enough😍 One view of this nursery just isn’t enough😍

We’re days away from meeting our little girl and if she’s anything like her parents we’re in big trouble! 

At least the room is cute. 

#nursery #babygirl #nurserydecor #nurseryinspo #nurserydesign #safaribaby #safaritheme #littlegirlsroom #38weekspregnant #whitefurniture #refurbishedfurniture #refinishedfurniture #diyhomedecor #diyprojects #housetohome
We’re so ready for you baby girl! When we starte We’re so ready for you baby girl! When we started working in the nursery there was not a chance I thought it would be totally ready in time. Close? Sure. But finished? No way. 

We are so lucky to have so many people help us along the way (and for getting so many great deals on marketplace to bring this room together!) 

Now all we need is a little girl to use it!

#nursery #nurserydecor #nurseryinspo #babygirl #babygirlnursery #safari #animalnursery #facebookmarketplace #refurbished #38weekspregnant #nurseryideas #babygirlroom #homedesign #bedroomdesign #changingstation #safaribaby
Bookshelves for the nursery are FINISHED!! Can yo Bookshelves for the nursery are FINISHED!!

Can you believe this was all done with scrap wood that we had in the garage? 

For our baby shower we asked guests to bring a book in lieu of a card and im obsessed. We have the perfect amount of new stories to fill our shelves and a million memories to make in this cozy nook. 

#booknook #bookshelves #bookshelvesofinstagram #childrensbooks #nursery #nurserydecor #nurseryinspo #scrapwood #scrapwoodproject #reelsinstagram #memoriesforlife #snuggletime #cozynook #reelsvideo #nurseryroom #nurseryinspiration #childrensroom #reelsviral #childrensroominspo
What a year it’s been! I feel like we’ve don What a year it’s been! 

I feel like we’ve done so much work to the house this year but when it’s almost all in one room, I’m realizing it doesn’t always look like it. 

With the nursery almost ready to go and baby girl coming any day, we can only begin to imagine the great things 2023 is going to have in store for us! 

Happy New Year everyone!

Thanks for sticking around and being a part of our story 💜

#newyearseve #2022recap #2022wrapped #homeprojects #2023 #happynewyear #housetoahome #primarybathroom #livingroom #homedecor #renovation #newyear #recap2022 #reelsofinstagram😍 #reelsvideo #homesweethome #homedesign #nursery #boardandbatten
GAME CHANGER After years of making gingerbread h GAME CHANGER 

After years of making gingerbread houses and waiting the torturous overnight for the icing to dry we finally asked the question - why are we doing it this way?
 
Hot glue for the win! We saved the icing for decorating and the brownstones we’re ready for decorating immediately. 

Even Kevin who was a skeptical gingerbread traditionalist agrees… we’re never going back!

#nevergoingback #gamechanger #rowhomes #gingerbreadhouse #gingerbread #reelsinstagram #instagood #christmascrafts #christmasdecor #reelinstagram #christmasreels #holidayseason #christmasvibes
When I found this sleigh in the Target dollar sect When I found this sleigh in the Target dollar section, I knew it needed to be part of our holiday decor this year. Only problem? It needed a little something extra- queue for the stain! 

This updated sleigh is so cute and the perfect addition to our mantle. I found this pine cone filler and mini ornaments to complete the look! 

#christmasdecor #sleigh #pinecone #miniornaments #mantledecor #merrychristmas #holidaydecor #holidaycrafts #reelsvideo #merryandbright #stain #sleighride #christmastime #holidayseason #reelforyou #christmasmantel
Load More... Follow on Instagram
  • Privacy Policy

Copyright © 2023 Our How-To Home · Theme by 17th Avenue