Removing a vanity sink seems scary and I’ll be the first to admit that I was terrified by the whole plumbing aspect, but it’s actually a lot easier than you think. We’re gutting and completely renovating our master bathroom and that starts with getting rid of everything currently in the space. Now we’ve already removed the walls and toilet, so follow along and as we show you how to remove a bathroom vanity.
As a quick and easy review, check out the video below where we take you through the process step by step in real time.
\
How to Remove a Bathroom Vanity
Step 1: Empty the Pipes
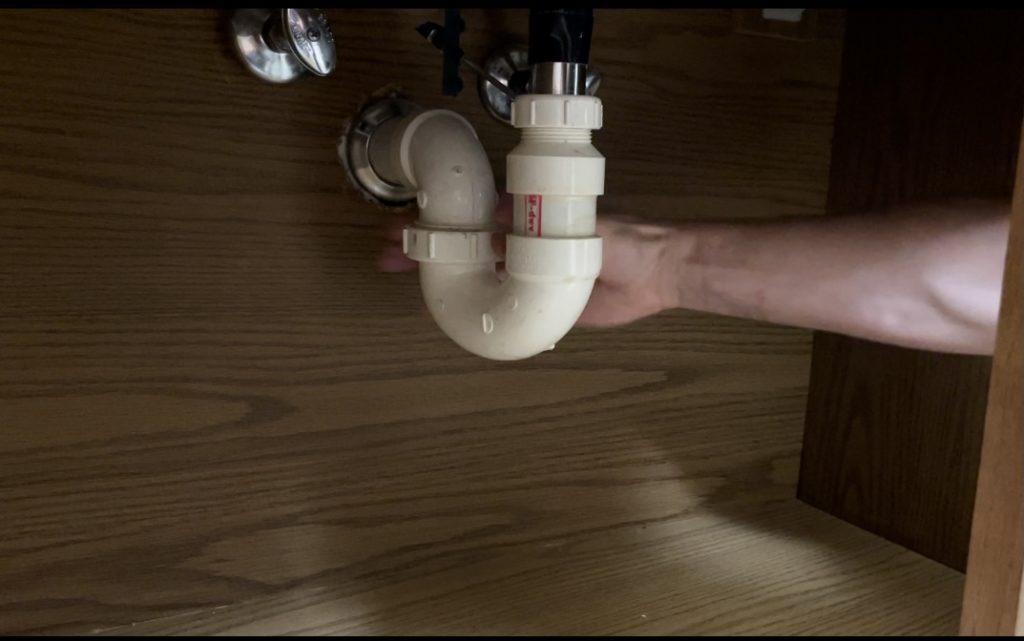
Start by removing the p-trap or the curved piece of pipe. This will be filled with water and other remnants that will probably smell really bad so if you can, it’s in your best interest to try removing it without dumping all the water out. The p-trap will start where my hand is located in the photo to the right and ends at the top of the curve where it meets the metal. It will be pretty tightly secured, but you should be able to unscrew it by hand.
Next, if the holes in the back of your vanity are large enough that you would be able to pull the vanity away from the wall without touching the plumbing, you can just go ahead and turn off the water at the shutoff valves. (They will be the knobs to the right and left of the p-trap). In our case, the vanity was fit tight around the piping, which means we needed to turn off the water for the whole house.
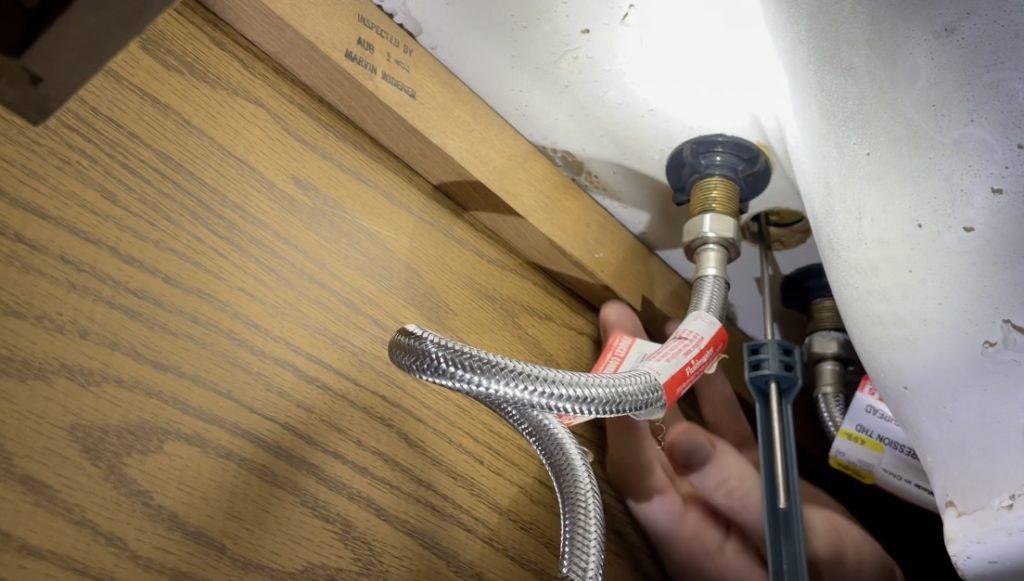 Once the water is off, you can unscrew the water supply tubes attached to the faucet. These screws can be found at the very top of the vanity near the vanity sink top. They are a little tricky to get to and you will likely need to get all the way in your cabinet to reach them. There will be two water supply tubes, one for hot water and another for cold.
Step 2: Remove your Vanity Top
That will be the final item attaching the vanity top to the cabinet. At this stage you’re able to take off the top and put it to the side, which will make the remaining steps much easier.
Step 3: Finish Removing the Piping
There are a few different options at this stage to finish out your project. Check out our three different scenarios and pick which one works the best for you.
- If you were able to shut off your water at the vanity, you can pull off the vanity and you’re done this phase of the project. Congrats!
 If you don’t want to mess with taking off the valves and your new vanity is going to be installed in the exact same place: There’s no need to make life more complicated for yourself than it has to be. Rather than taking apart the plumbing, demo your vanity instead. Using a multi-tool, cut into the vanity directly surrounding the piping until you can easily remove the cabinet.
- If your pipes were tight to the vanity and you plan to move your plumbing or update your valves.
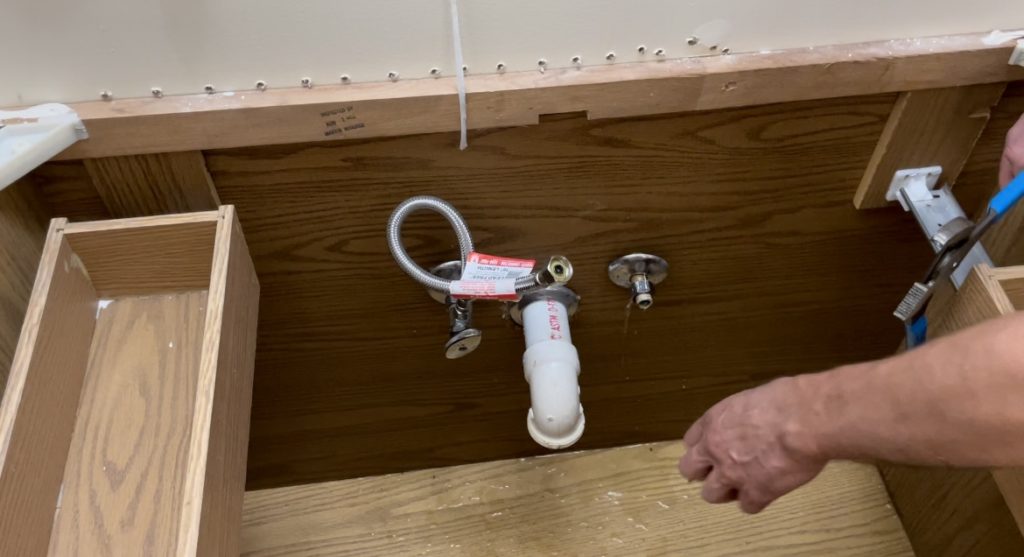
Once your vanity top is removed, you can take off the water supply tubes and shutoff valves. We also sawed-off the curved part of the white pipe to allow us to remove the vanity.(Reminder: To remove these pieces, we needed to turn off water to the whole house, not just the faucet). We will be completely moving the plumbing to a different part of the room so we have a little bit more wiggle room with our demo.
A VERY IMPORTANT THING TO REMEMBER. If you turned off what to the whole house, you are not finished until you put caps on the now exposed pipes. These are live pipes connected to the rest of the plumbing in your house. If you turned your water back on without the caps, you would quite literally flood your house.
You can get caps for your pipes at any local hardware store.
Step 4: Take out the Vanity
The very last step is to remove the screws keeping the vanity in place. In my experience, most floor mounted cabinets are only being held in place by a could of screws. These usually live in the corners of your cabinet and attach it to either a wall or a neighboring cabinet. The cabinets are almost never on the floor unless they’re on a platform and not directly on your floor (we do this a lot because we’re tall). Once the screws are removed begin to wiggle your vanity back and forth to loosen it from the wall and floor.
Finally, you can pull out the vanity and get it out of there. We’re all set to move on to the next step!


Leave a Reply