Our How-To Home

  • How-To
  • DIY
  • Lifestyle
    • Recipes
    • Kristen’s Book Club
  • Blog
    • Home Updates

Explore

  • How-To
  • DIY
  • Lifestyle
  • Blog
  • About Us
  • Ask Us Anything
  • Kristen’s Book Club

Connect

You are here: Home / DIY / Easy DIY Clay Vase – Using Paint & Baking Soda!

DIY · November 30, 2021

Easy DIY Clay Vase – Using Paint & Baking Soda!

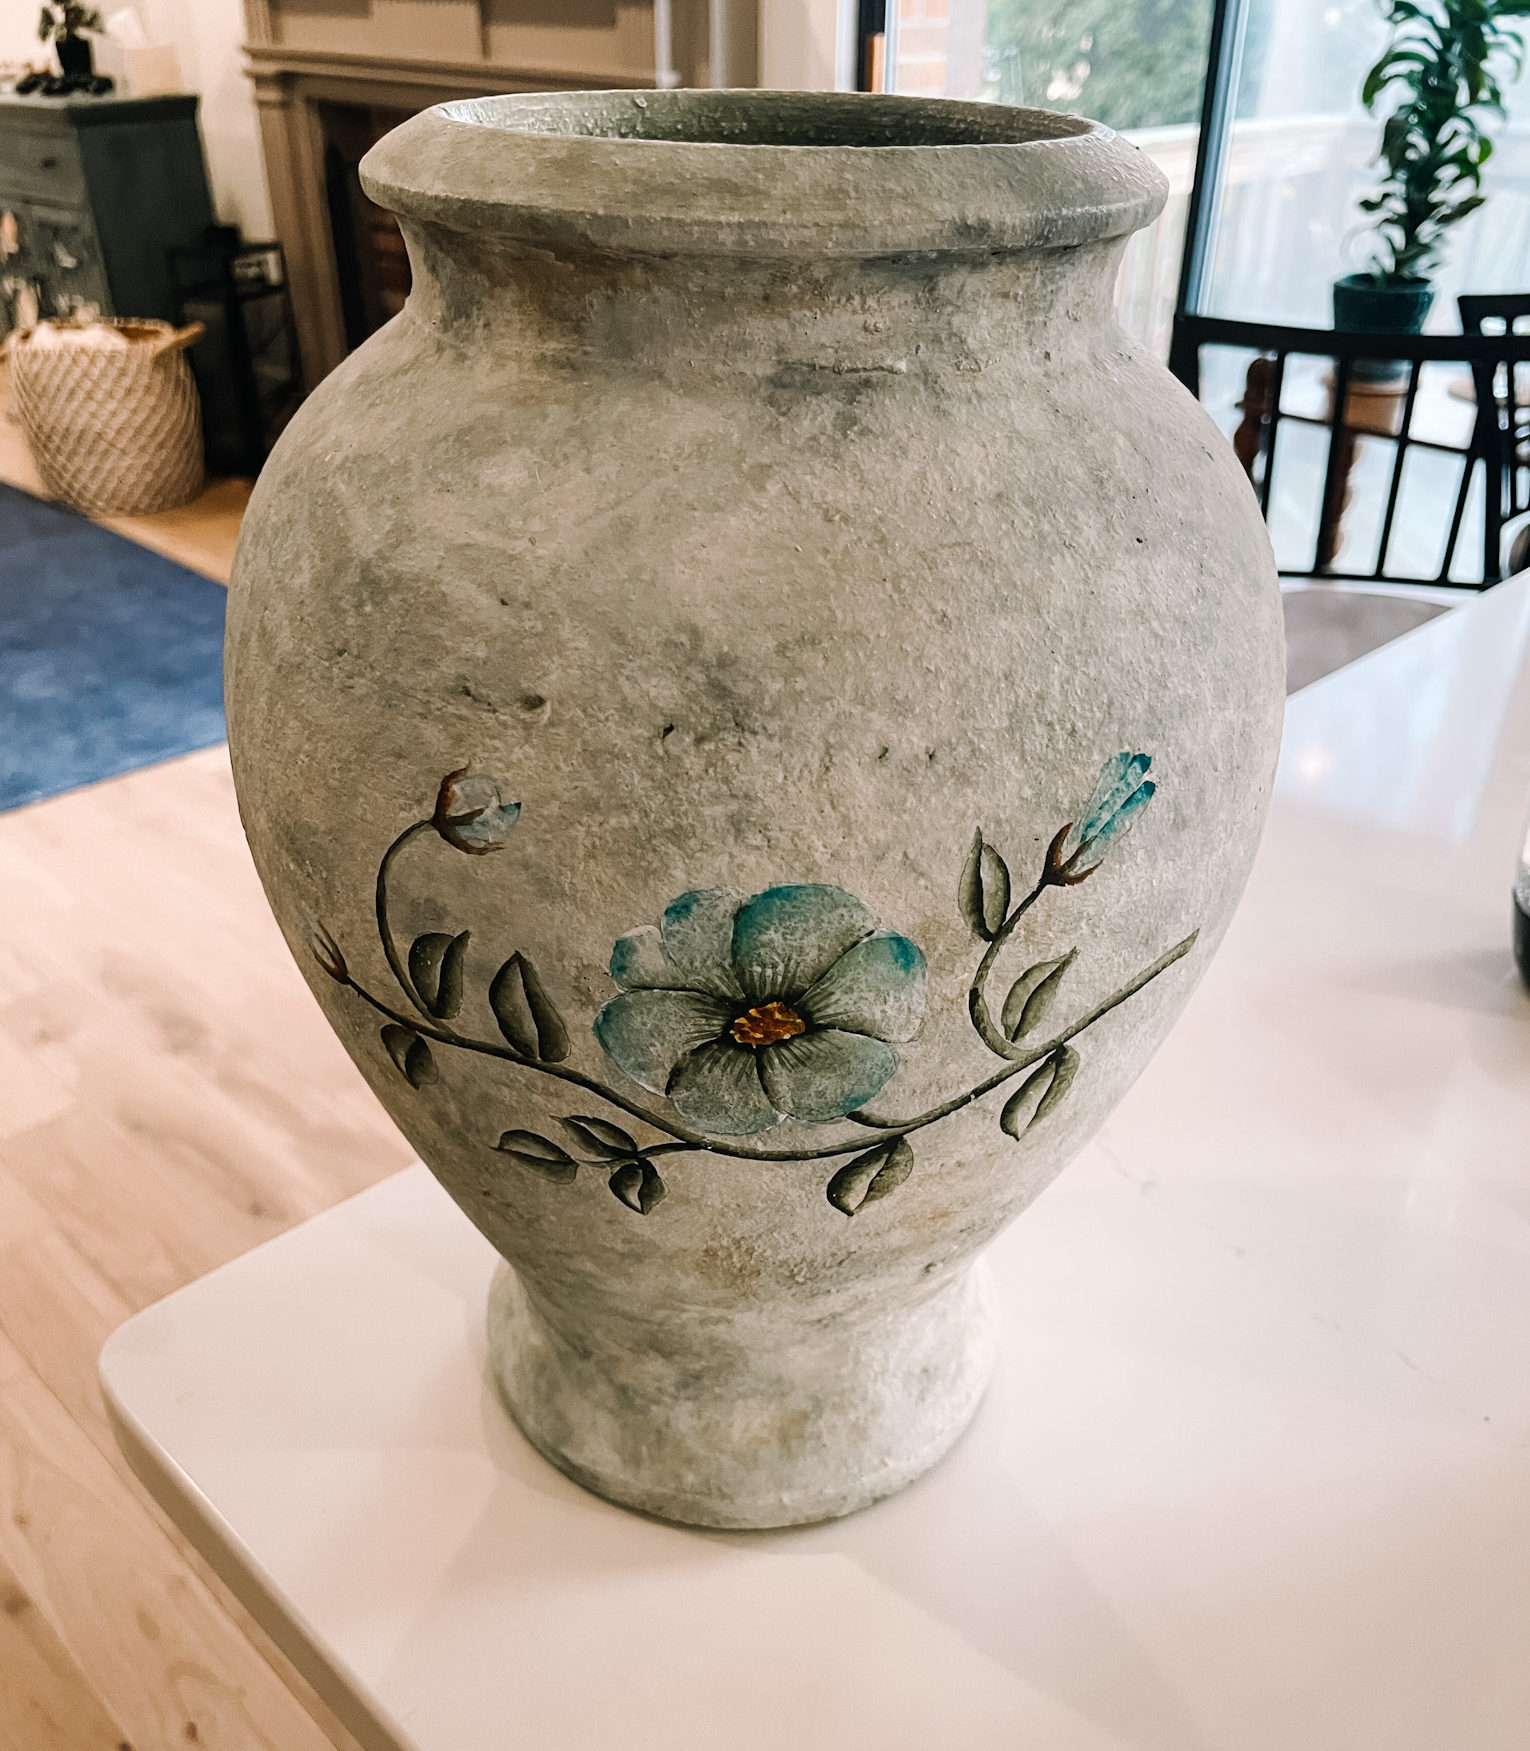
Have you heard of the DIY Clay Vase hack? I’ve been wanting to do it for a LONG time and when I found this hideous vase at the thrift store a few weeks back, I knew I had found my muse. The way to start out this project is simple: Go to your local thrift store and get digging. Look through the vases, urns, and bowls for any shape that catches your eye. The material is pretty versatile so don’t worry if it is ceramic, glass, plastic or plaster.

The key with this DIY is the shape. While these blue flowers against the sponge painted backdrop were awful, the shape was exactly what I’d hoped for. The urn has a classic shape that looks just like some of the more expense options available for sale online. These vases can cost from anywhere from $40-$150. Our little vase – a mere $11.

an old vase about to be painted with paint and baking soda

The plan was simply determine the color I want the vase to be, add baking soda and then paint until I’m satisfied. 

I accidentally ended up testing out two different types of paint for this project mainly because I ran out of my first choice… but we’ll get into that in a minute. 

DIY Clay Vase

This vase is so simple to make and requires almost no tools! Here’s how you do it. 

For this project you’ll need: 

  • Paint (I used Acrylic and regular wall paint in egg shell)
  • Baking soda 
  • Paint brush 
  • Vase of your choice (this could even be glass or plastic if you wanted)
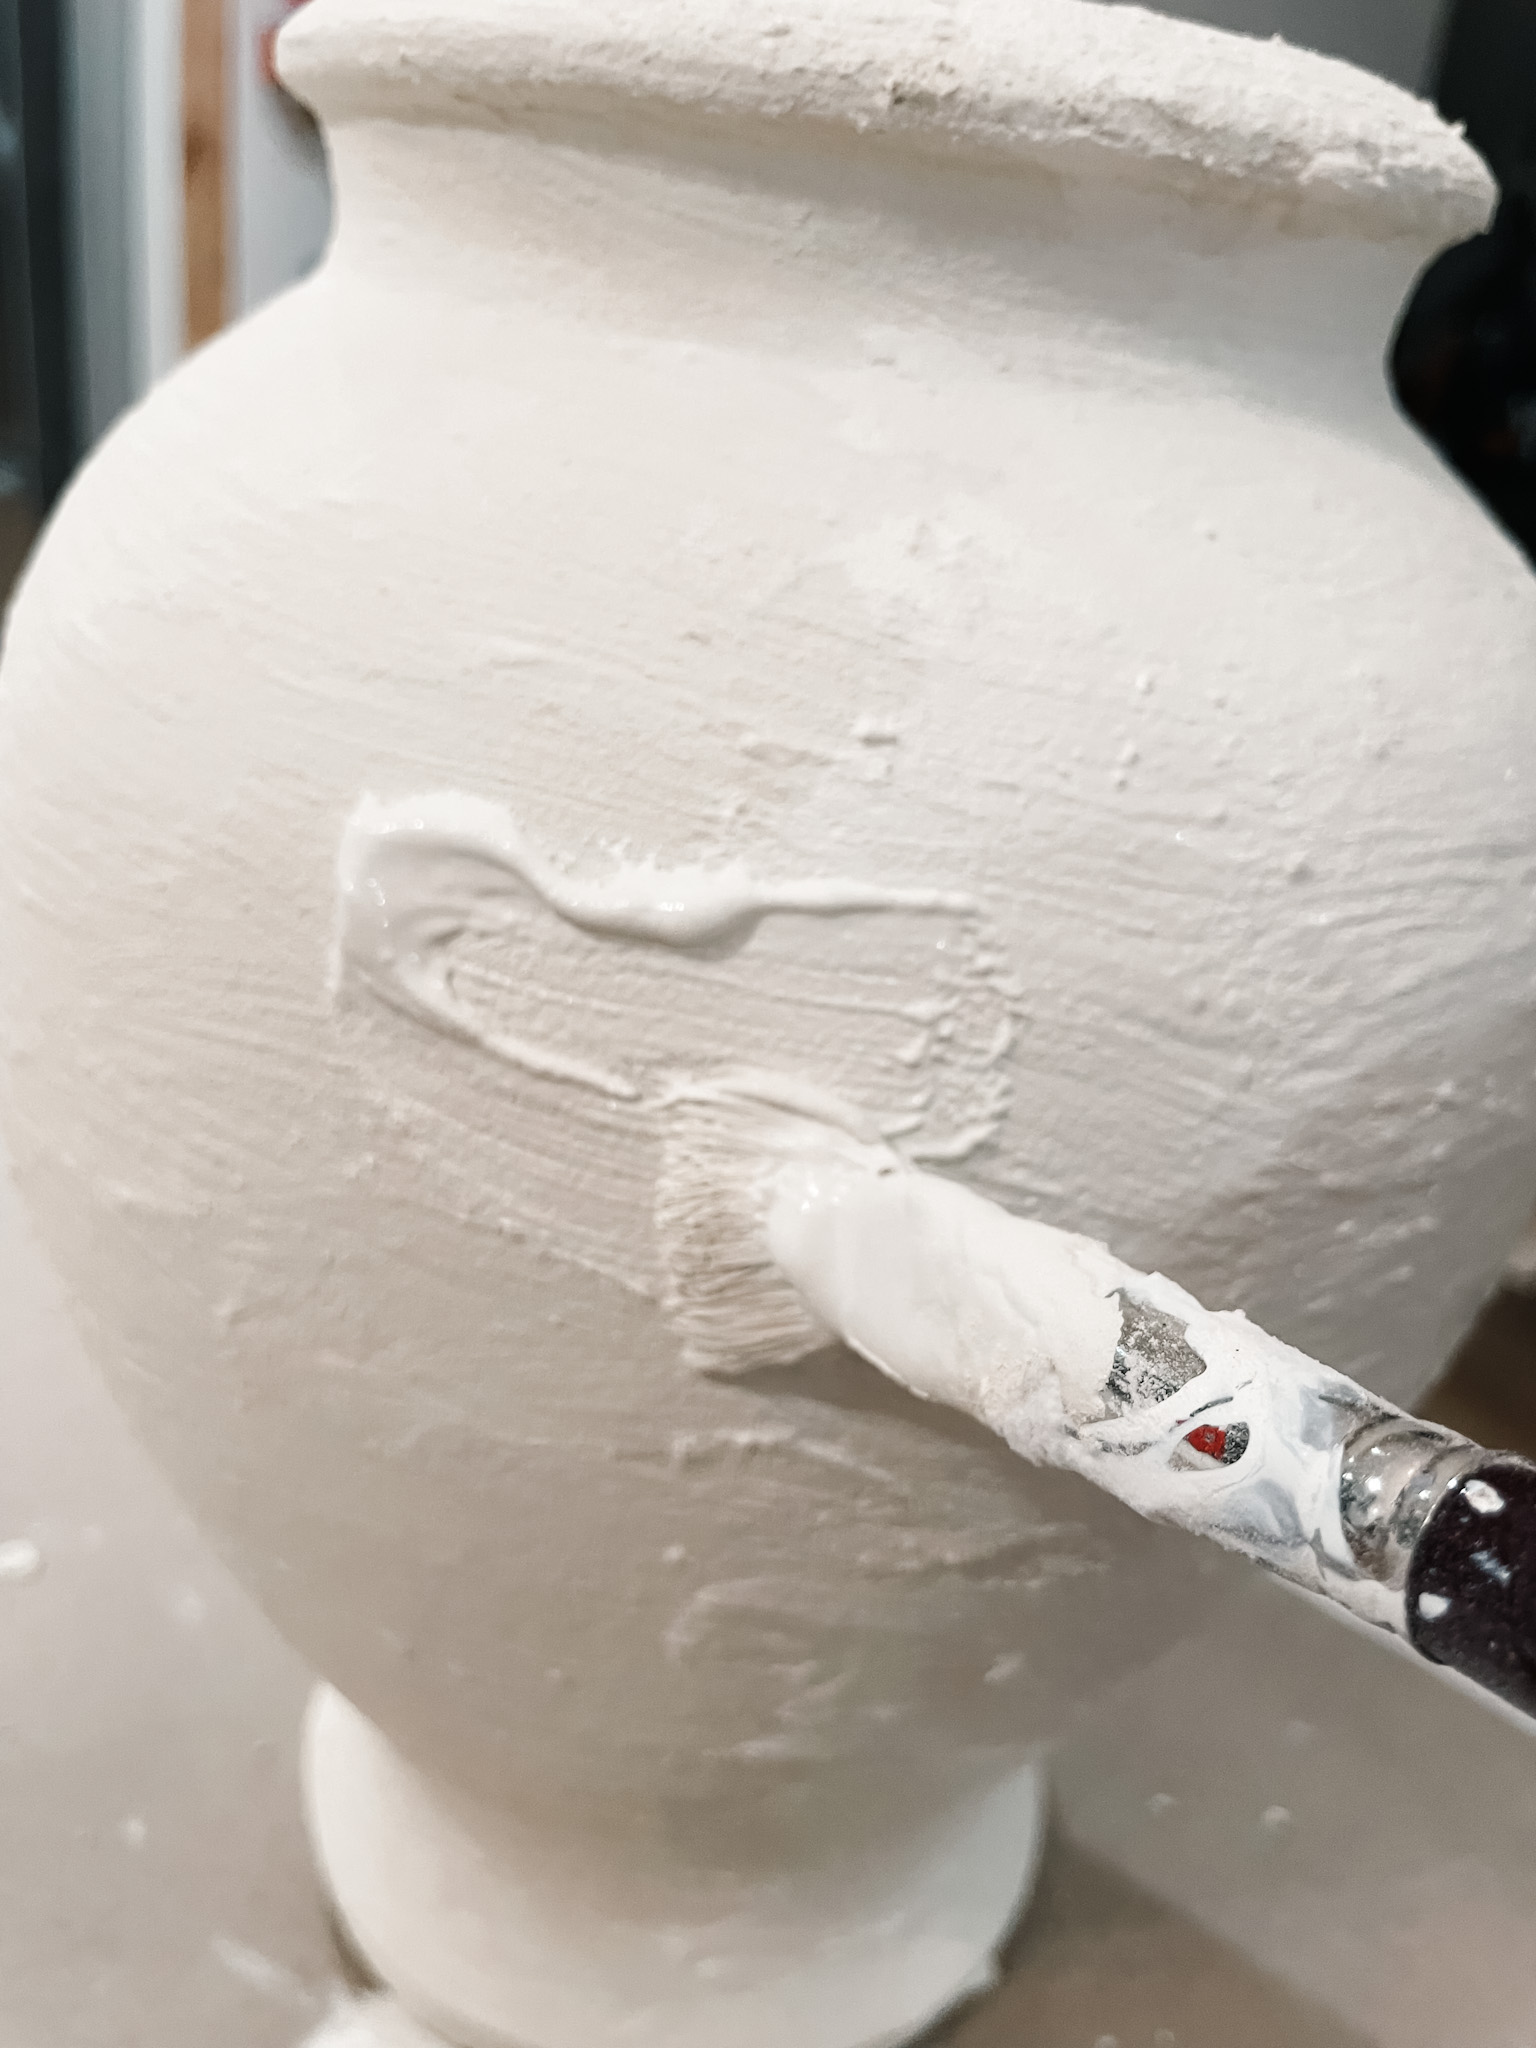
  1. Since it’s likely an old vase that you’re working with, I’d recommend wiping it down to get all the dirt and dust off. Painting over dust can create unevenness in your paint and may stop it from sticking. 
  2. From what I’ve experienced, the only real difference in the paint types is how wet the paint is which will directly correlate to how much baking soda you’ll need. I started with my acrylic paint, mixing white with brown and mustard to get a lovely cream color.
  3. Begin to mix in your baking soda. I wanted mine to look super textured like stone so I ended up opting for a 50/50 paint to baking soda ratio. Something else I noticed is the longer you let the mixture sit, the thicker it will be. For me it was great, but if you’re looking for a smoother consistency, you may want to hold off adding morea vase that's been painted with paint and baking soda for a clay effect until the paint has had time to rest. 
  4. Unfortunately, after the first layer I had run out of white acrylic paint and had to scavenge around my house looking for a new option. Cue white wall paint. Now the white wall paint was much thinner and required more color as as well as more baking soda to get it where I wanted it. In the end, both paint options are totally usable. 
  5. This vase took 3 coats of paint. The last was really just to add additional texture and smooth out brush strokes. 
  6. For certain types of vases such as plastic or glass, I would also use a clear sealer as a top coat to make sure the paint doesn’t chip. In my case, my vase was incredibly porous so I’m not worried about the paint coming off. 

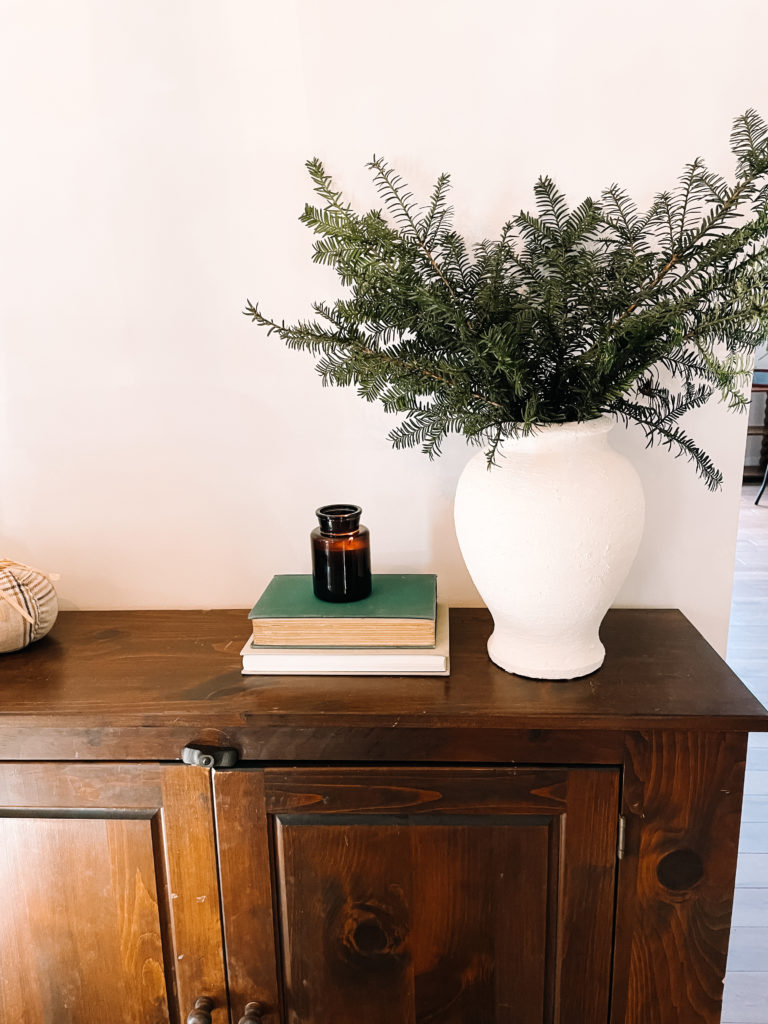
Finally once the DIY clay vase was dry, I filled it with evergreen branches to make it seasonal for the holidays and now it welcomes guest on our front table. I can easily change out the evergreen in the spring for beautiful florals and make this lovely season decor. 

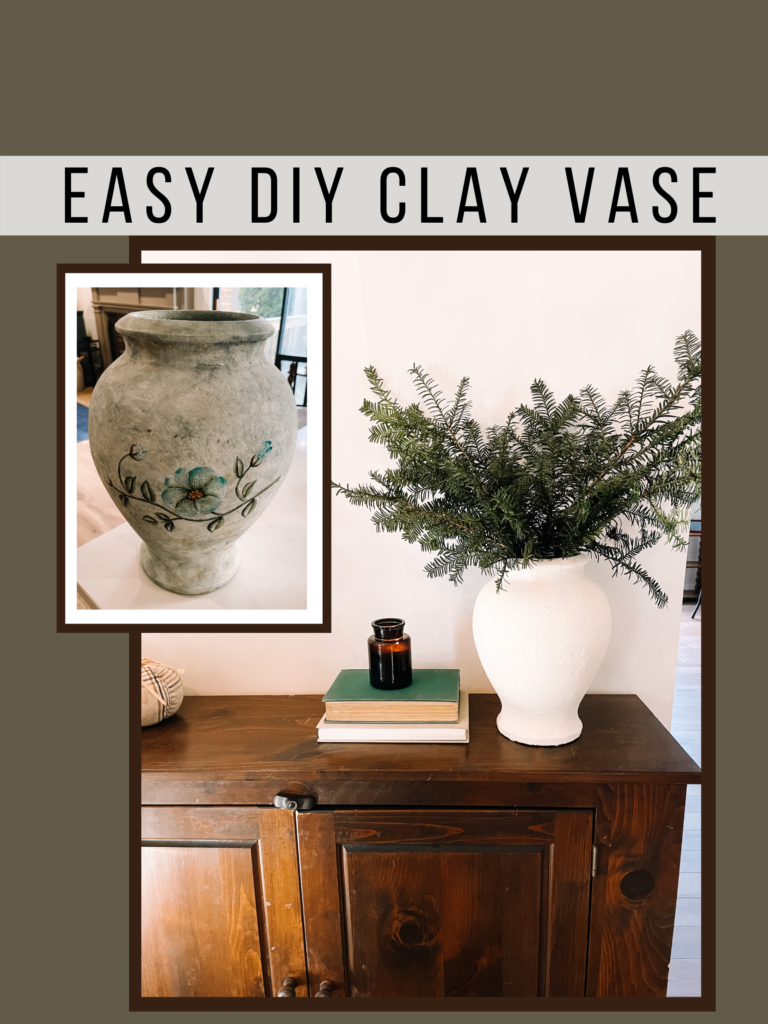
What a difference! Can you even believe that this was the same vase? This $11 thrift find looks like spent so much more on it. I know it took my a while to finally move forward with this project, but now I’m wondering why it took me so long to get started! I’m so happy with the way it turned out and can’t wait to try this again on more vases in the future!

a vase that's been painted with paint and baking soda for a clay effect

Posted By: Kristen · In: DIY

Sparkling Bourbon Cider – An Excellent Fall Cocktail
This is How to Make Christmas Garland Look Expensive

You’ll Also Love

green velvet ribbon wrapped around cones to create a modern christmas treeMake These Simple DIY Velvet Christmas Trees
Make Your Own Terracotta Pumpkins With This Dupe
black door with decorative trim and white craftsman moldingChange your Home’s Whole Look with Simple Custom Door Trim

Leave a Reply Cancel reply

Your email address will not be published. Required fields are marked *

Trending

  • Want a Black Interior Front Door? How New Trim And Paint Change Everything
  • Make Your Own Welcome Mat
  • Our Beautiful Traditional Brick House With Black Windows Remodel
  • This Simple Change Made Our Kitchen Island Look Super Custom
  • Christmas Garland with eucalyptus and pine cones
    This is How to Make Christmas Garland Look Expensive

Categories

  • Blog
  • DIY
  • How-To
  • Lifestyle
    • Kristen’s Book Club

More You’ll Love

Removing a Toilet – It’s Easier Than You Think!

Removing a Toilet – It’s Easier Than You Think!

Recipe for Homemade Croutons – The Best Hack for Leftover Bread

Recipe for Homemade Croutons – The Best Hack for Leftover Bread

Unique and Untraditional White Subway Tiles to Elevate Your Kitchen

Unique and Untraditional White Subway Tiles to Elevate Your Kitchen

ourhowtohome

Flip a dining set I thought … how hard could it Flip a dining set I thought … how hard could it be?! When you’re a type A perfectionist that needs to execute to your exact vision and have a 4 month old needing you all the time, apparently very hard. 

But man is she pretty. 

My margins on this are basically nonexistent with all of the mistakes (cough:: learning opportunities) I had a long the way but I’m proud of that it came out exactly as I envisioned. Now the big question: how much do you think I can sell it for?

#furnitureflip #tabledesign #upcycle #refurb #kitcheninspiration #dininginstyle #diningroom #reelit #furnituremakeover #reelsofinstagram #kitchentable #upcycledfurniture
We’re coming up to the end of the furniture flip We’re coming up to the end of the furniture flip that I thought was going to take 2 weeks and actually took 2 months. It was been quite a journey to get here but I’m so happy with how it’s looking! 

#furnitureflip #kitchentable #naturalwood #wecandohardthings #diningroomdecor #kitchendecor #diningtable #furnituremakeover #trusttheprocess #furnitureflipper #reelsinstagram #facebookmarketplace
Scarlett Annette Mangold ♥️ You are so so lov Scarlett Annette Mangold ♥️ 
You are so so loved baby girl.
One view of this nursery just isn’t enough😍 One view of this nursery just isn’t enough😍

We’re days away from meeting our little girl and if she’s anything like her parents we’re in big trouble! 

At least the room is cute. 

#nursery #babygirl #nurserydecor #nurseryinspo #nurserydesign #safaribaby #safaritheme #littlegirlsroom #38weekspregnant #whitefurniture #refurbishedfurniture #refinishedfurniture #diyhomedecor #diyprojects #housetohome
We’re so ready for you baby girl! When we starte We’re so ready for you baby girl! When we started working in the nursery there was not a chance I thought it would be totally ready in time. Close? Sure. But finished? No way. 

We are so lucky to have so many people help us along the way (and for getting so many great deals on marketplace to bring this room together!) 

Now all we need is a little girl to use it!

#nursery #nurserydecor #nurseryinspo #babygirl #babygirlnursery #safari #animalnursery #facebookmarketplace #refurbished #38weekspregnant #nurseryideas #babygirlroom #homedesign #bedroomdesign #changingstation #safaribaby
Bookshelves for the nursery are FINISHED!! Can yo Bookshelves for the nursery are FINISHED!!

Can you believe this was all done with scrap wood that we had in the garage? 

For our baby shower we asked guests to bring a book in lieu of a card and im obsessed. We have the perfect amount of new stories to fill our shelves and a million memories to make in this cozy nook. 

#booknook #bookshelves #bookshelvesofinstagram #childrensbooks #nursery #nurserydecor #nurseryinspo #scrapwood #scrapwoodproject #reelsinstagram #memoriesforlife #snuggletime #cozynook #reelsvideo #nurseryroom #nurseryinspiration #childrensroom #reelsviral #childrensroominspo
What a year it’s been! I feel like we’ve don What a year it’s been! 

I feel like we’ve done so much work to the house this year but when it’s almost all in one room, I’m realizing it doesn’t always look like it. 

With the nursery almost ready to go and baby girl coming any day, we can only begin to imagine the great things 2023 is going to have in store for us! 

Happy New Year everyone!

Thanks for sticking around and being a part of our story 💜

#newyearseve #2022recap #2022wrapped #homeprojects #2023 #happynewyear #housetoahome #primarybathroom #livingroom #homedecor #renovation #newyear #recap2022 #reelsofinstagram😍 #reelsvideo #homesweethome #homedesign #nursery #boardandbatten
Follow on Instagram
  • Privacy Policy

Copyright © 2025 Our How-To Home · Theme by 17th Avenue